Cost Management
Cost management helps you to control your spending on multi-cloud services while optimizing the cost, and various features are provided to dive deeper into your cost to identify trends and detect anomalies.
Quick Start Guide
This guide describes the basic instructions needed to use Cost Management.
Register your cloud account and configure required settings in Service Portal and then you are all set.
It is useful to get visibility into the full spectrum of costs in order to understand where costs originated within your organization. Cost Management allows you to view accrued costs and usage data at a glance with charts and graphs. To learn more about accrued costs by cloud vendors, costs and cost trends, see Dashboard.
Use Billing Analytics to review accumulated costs and estimate monthly, quarterly, and yearly cost trends against a budget. For deeper analysis, you can choose any combination of Account, Product, Region, and Service Group as search conditions. To learn more about cost analysis, see Billing Analytics.
View total costs of your cloud service, and costs by account, invoice, and additional service. To learn more about billing details, see Billing.
Dashboard
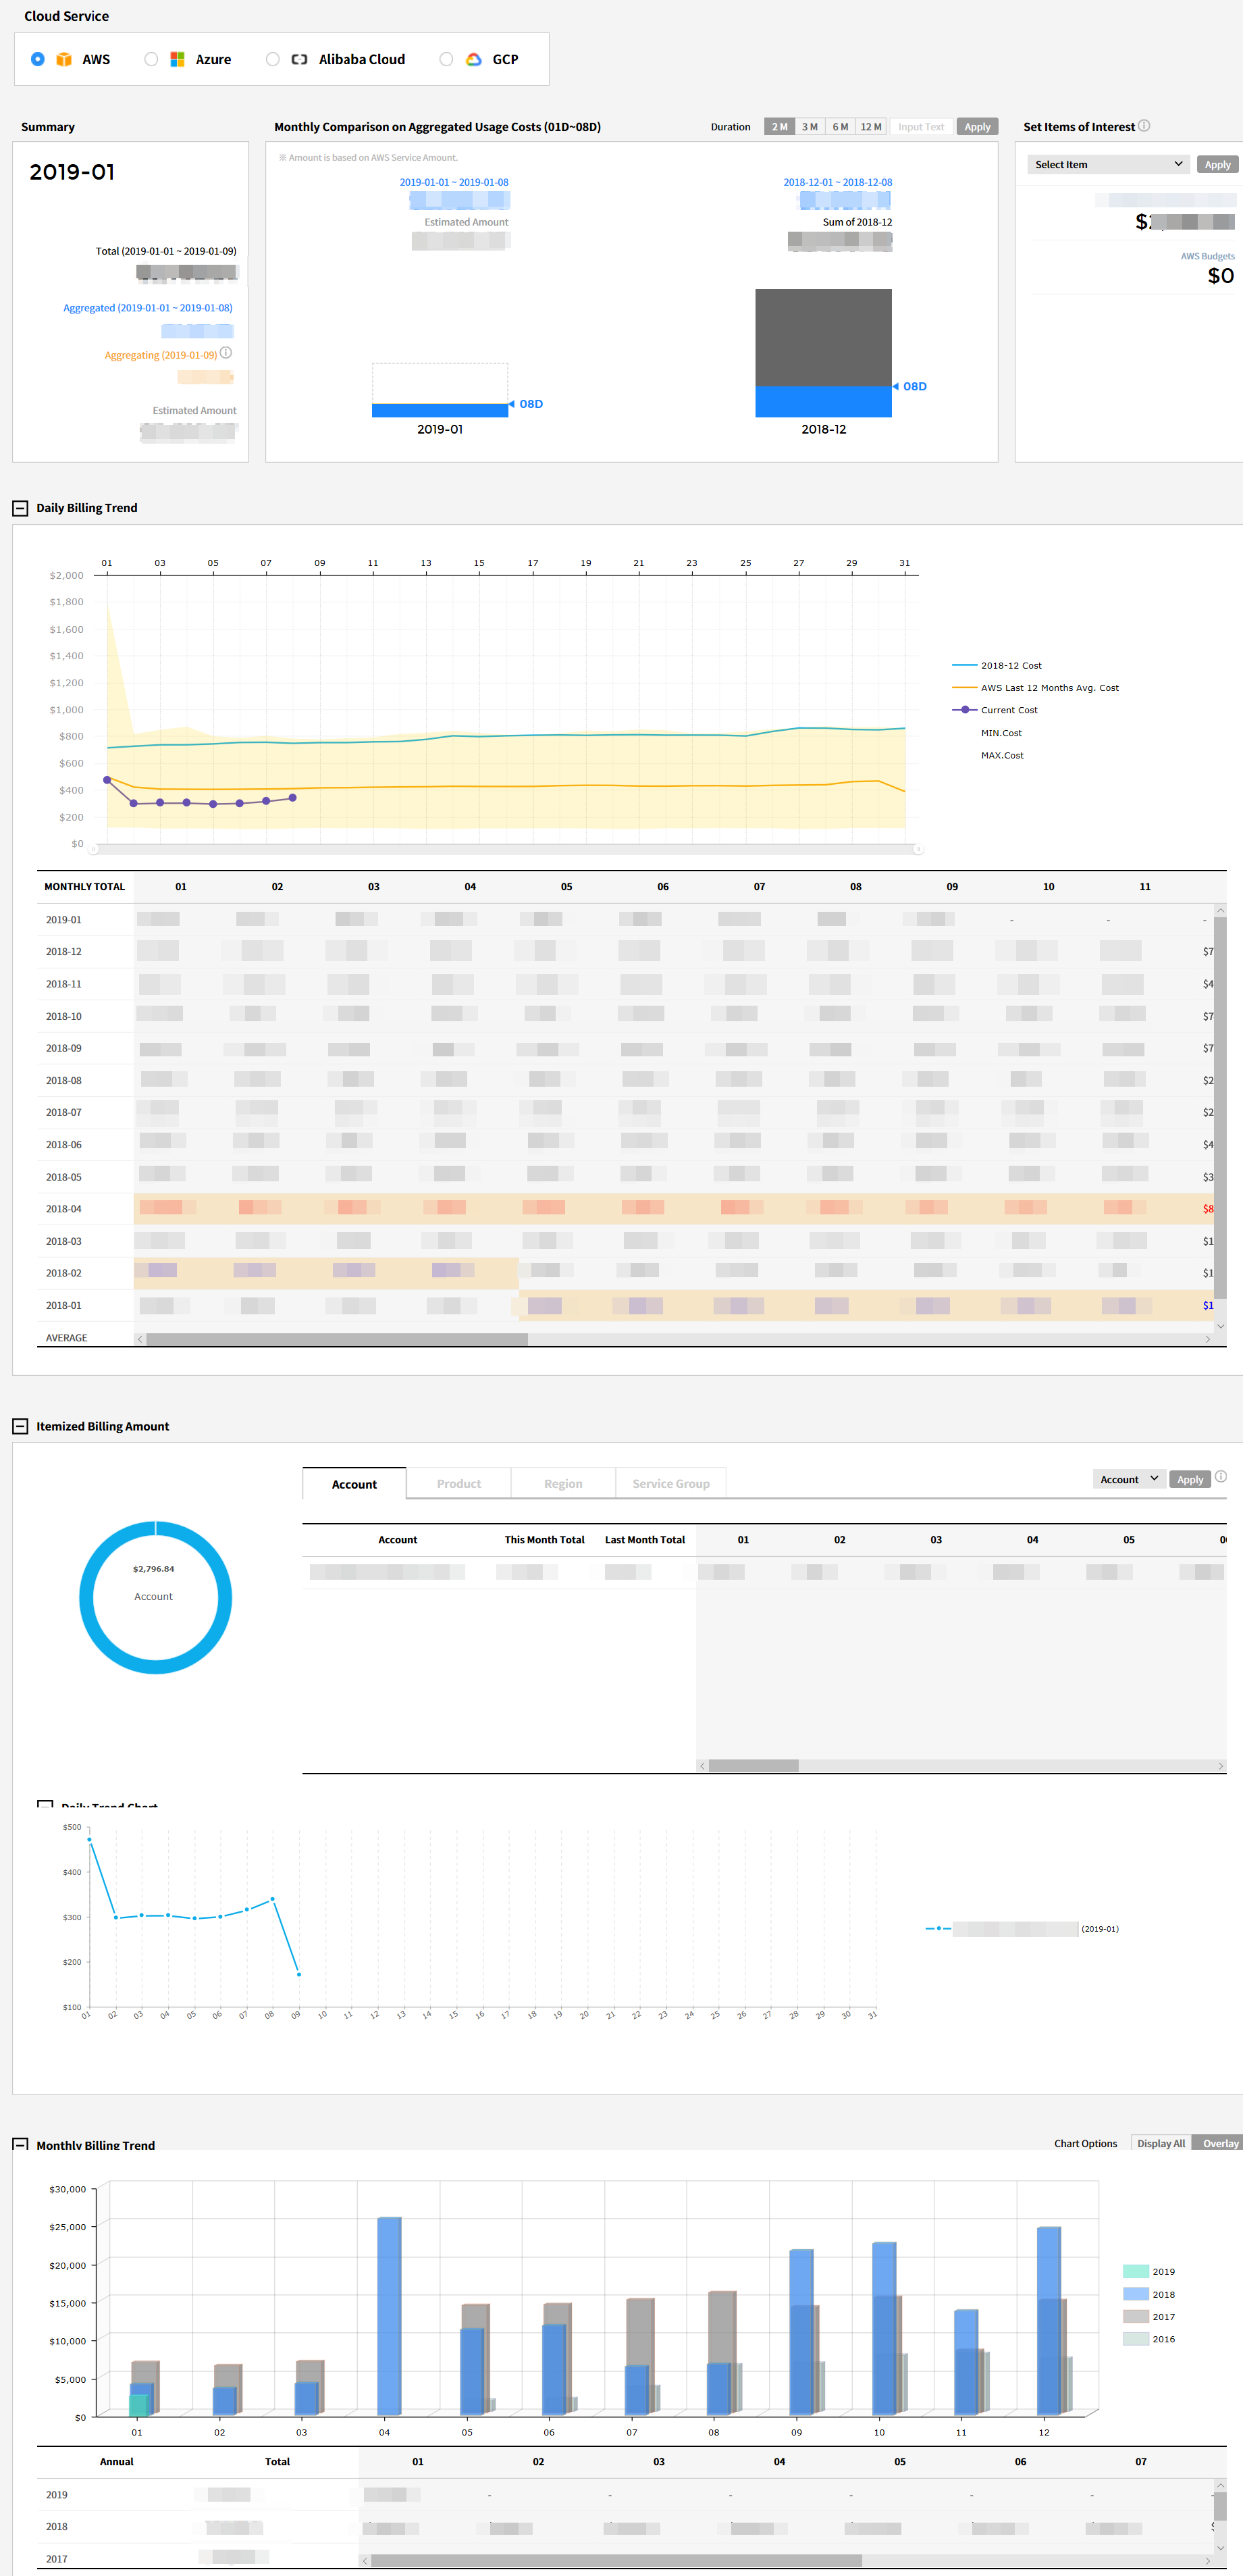
You can check various graphs and charts that show different breakdowns of the usage from the dashboard.
Cost Management > Dashboard
Cloud Service
It displays your cloud services and accounts. As you select a cloud service and account, detailed cost information of the selected items will be displayed in various formats on the dashboard.

Summary
You can check the cost summary for this month. In the summary box, three different costs are displayed as shown below.
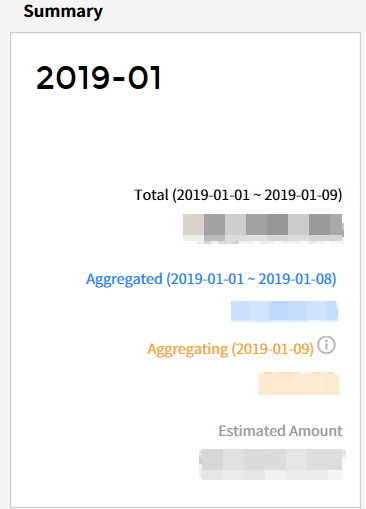
- Aggregating: It shows costs which have been incurred, but not finalized into the total cost.
- Aggregated: It shows aggregated costs for the month-to-date (MTD).
- Estimated cost: It shows the approximation of the cost for this month by analyzing usage patterns.
Monthly Comparison on Aggregated Usage Costs
This section allows users to set a search period, and compare and analyze costs. The period can be set up to 12 months. You can select a period from 2, 4, 6, or 12 months, or you can directly set a period by entering a number in the input field, and then click the [Apply] button.
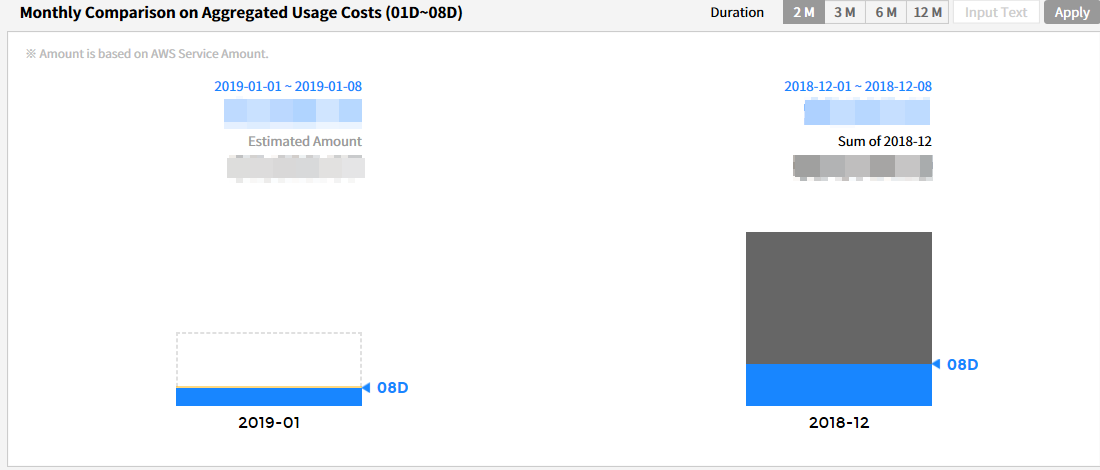
Bar charts displayed in the box above are broken down by colors, and each color has different meanings. Refer below for detailed information.
- Blue: The color indicates the MTD costs.
- Orange: It indicates costs incurred this month, but not finalized yet.
- Gray: The gray color represents total costs for the last month.
- Dash-line: It indicates estimated costs for this month.
Set Items of Interest
You can select items you want to display on the dashboard. If you click the [Select Item] button, available items are shown in the drop-down menu. The selected costs will be displayed on the dashboard until you make some changes.
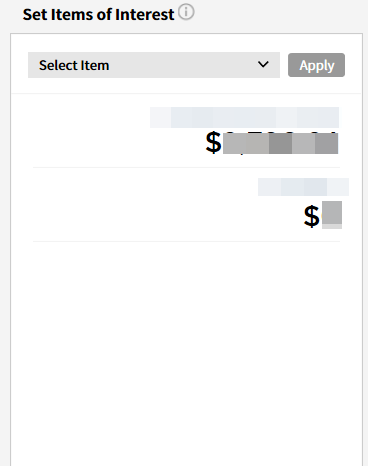
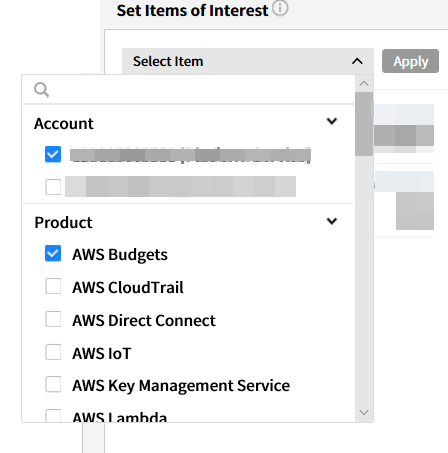
You can select items from categories listed below to view costs on the dashboard.
- Account
- Product
- Region
- Data Transfer
- Service Group
Daily Cost Trend
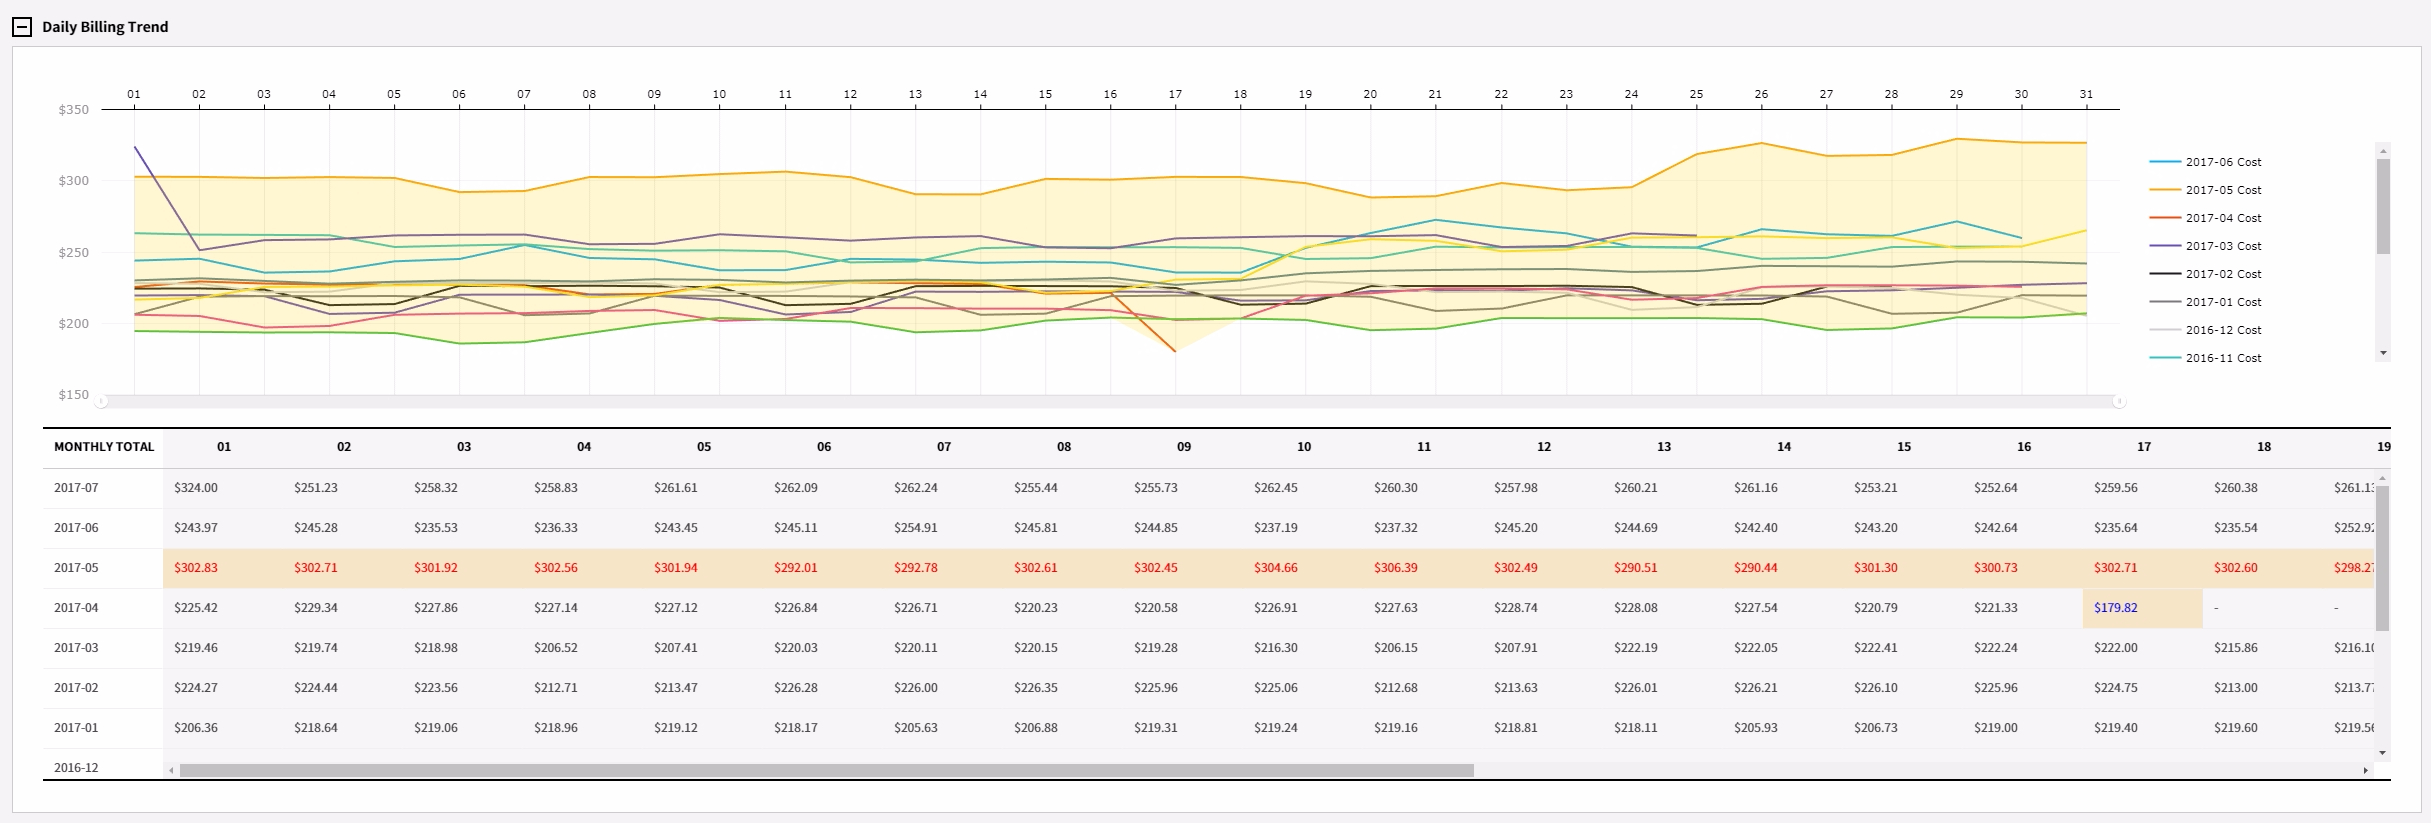
Daily Cost Trend provides you the cost chart and detailed data for a selected period on a daily basis. With the chart, you can check daily usage patterns and a point where unexpected costs incurred.
Itemized Cost
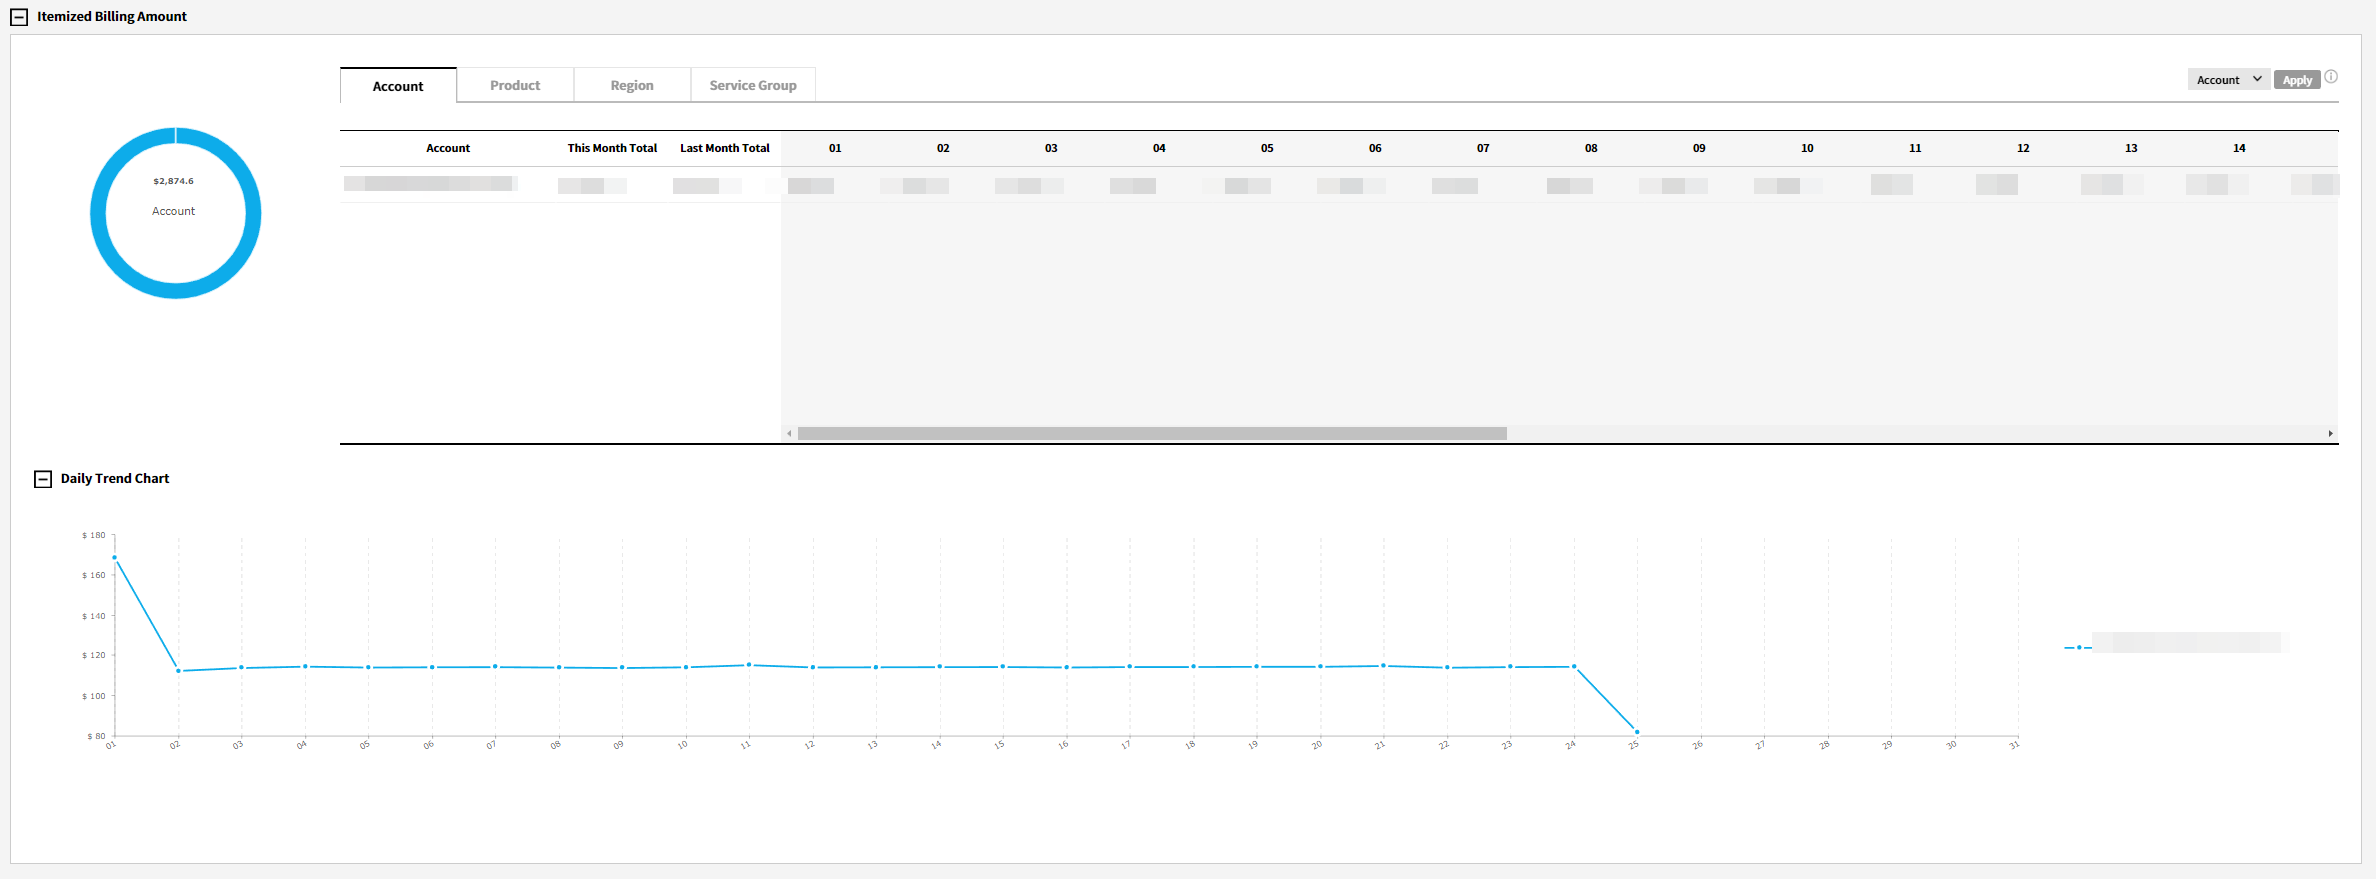
You can check costs based on Account, Product, Region and Service Group, and also view daily trend charts for itemized costs.
Monthly Cost Trend
You can check cost trends on a monthly basis for up to 3 years. It allows you to visualize trend charts by clicking [Display All] or [Overlay] button, which is located at the top-right corner of the grid.

User Dashboard
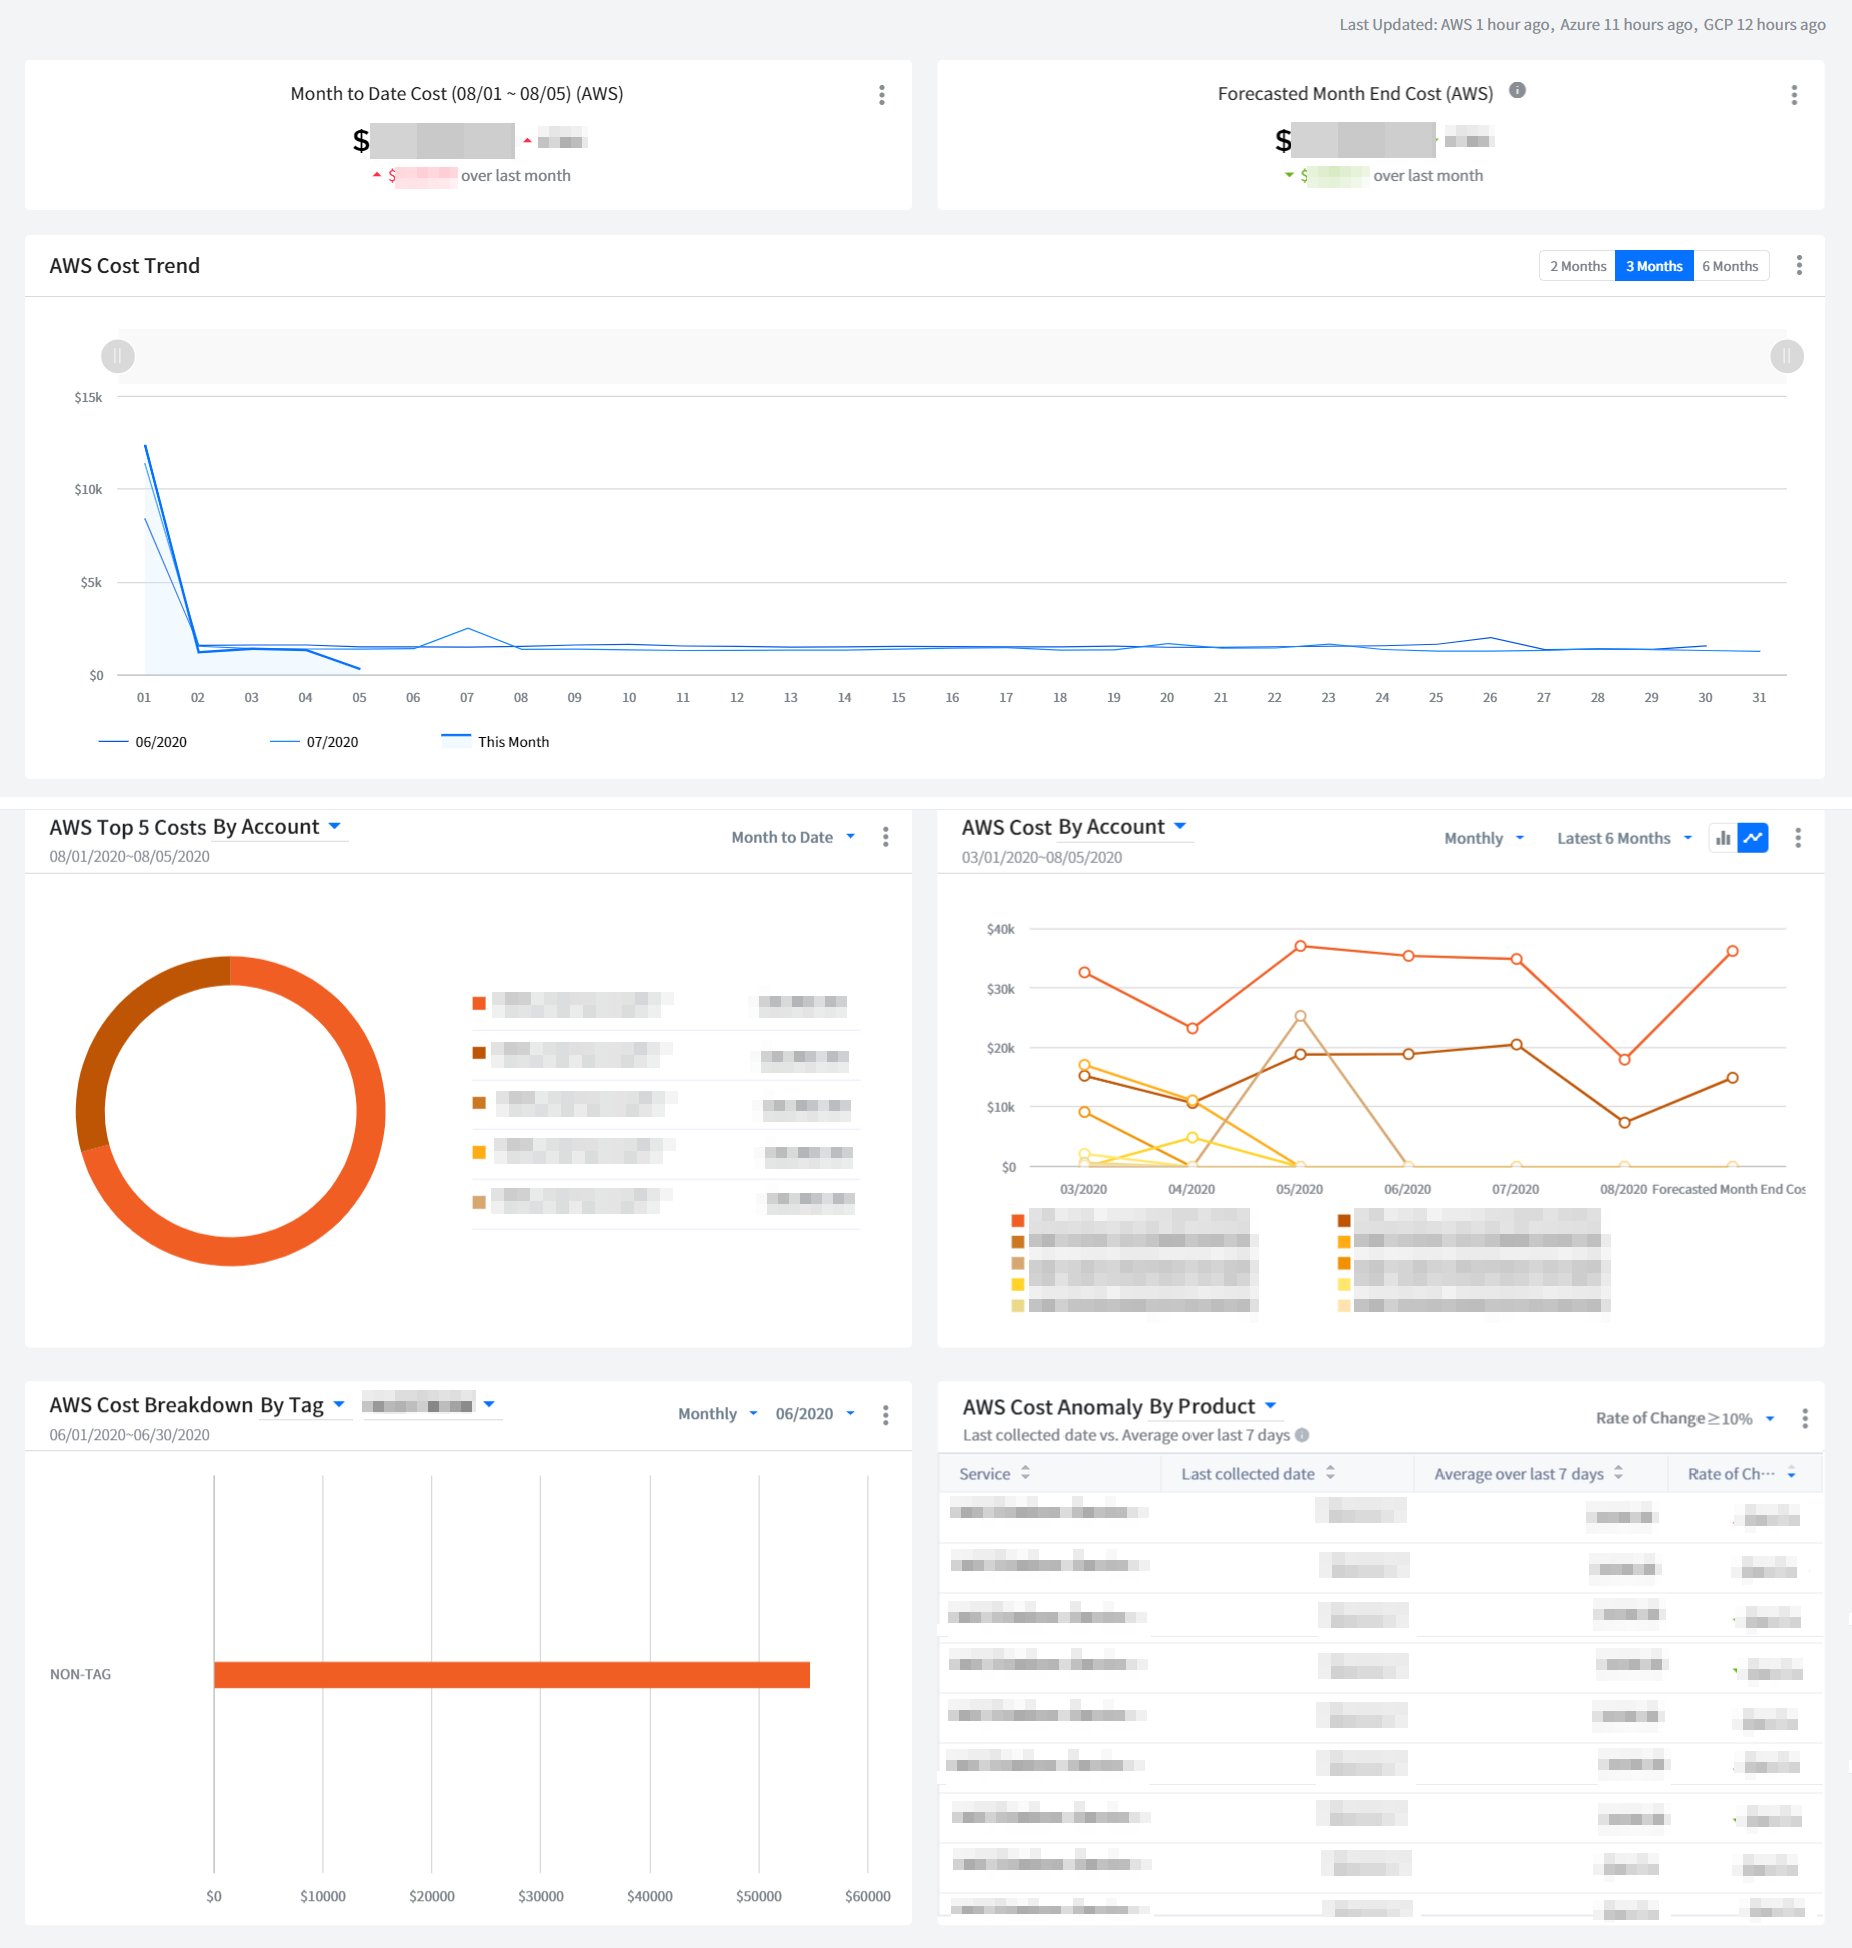
User dashboard is a customizable interface that lets you visualize and understand your cloud costs over time. It offers the optimized dashboard feature that allows you to create and customize multiple dashboards for your convenience. You can create up to 10 dashboards based on the default template. In addition, various widgets are provided so that users can see only the information they need. With just a few clicks, you can easily edit the widget, move its position, and configure the screen as needed.
Cost Management > User Dashboard
Multiple Dashboards
This feature lets you add several dashboards for different purposes and easily edit them. You can customize your own dashboard by duplicating the default template, and then adding and editing widgets.
Create Dashboard
You can create a new dashboard based on a template and customize your dashboard.
① Click the [Duplicate] icon to switch the screen where you can add a new dashboard.
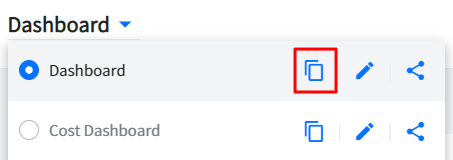
② Edit the dashboard name and then click the [Save As New Dashboard] button to create a new one.

③ Once a new dashboard has been created, you can customize it.
Delete Dashboard
When you click the [Edit] icon next to the dashboard name you want to delete, the [More] button will be displayed.
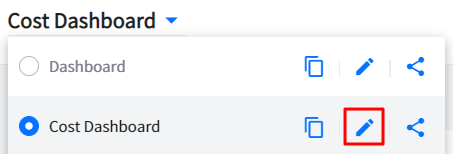
Click this button and then click the [Delete] button to delete the dashboard.

Share Dashboard
It allows you to share your dashboards with others. You can share your dashboard by copying the URL link of dashboard and sending it to the other user by instant messaging or email, for example.
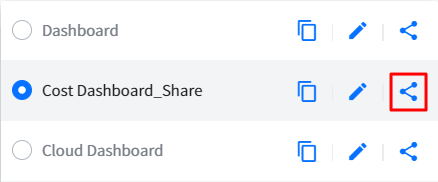
Click the [Share] icon next to the dashboard name to share.
![]()
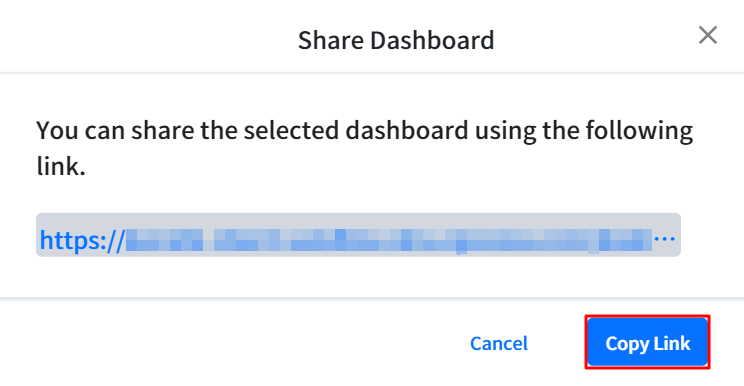
Click the [Copy Link] button in the Share Dashboard popup window to copy the URL link of the dashboard.
![]()
Send the copied link to the user you want to share with by instant messaging or email, for example.
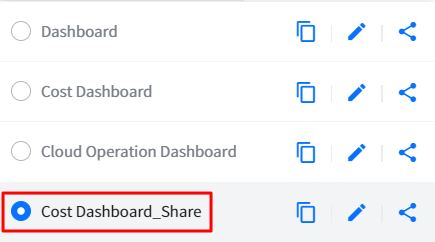
The user can view the shared dashboard by clicking the link you sent. Shared dashboard will be displayed in dashboard list of the user.
![]()
- If the shared dashboard is deleted or the user you shared with has insufficient permission on the shared dashboard, the dashboard cannot be shared.
Widget Types
We are providing multiple widgets such as Cost Trend, Cost Breakdown, and Top 5 Costs. It describes the types and features for each widget.
Month to Date Cost
This widget shows how much you’re estimated to have incurred in charges so far this month and compares it to this time last month. You can see month to date cost for each cloud service by changing the cloud service option.
Forecasted Month End Cost
This widget shows how much you will owe at the end of the month and compares your estimated costs to your actual costs of the previous month. You can see the forecasted month end cost for each cloud service by changing the cloud service option.
Cost Trend
It displays the trend of cloud cost. You can set a period to 2 months, 3 months, or 6 months to see the trend. If you move your mouse over the graph, a pop-up window will appear to show monthly cost information for the selected time period.
Cost
It provides graphical displays of cloud cost. It also allows you to check cloud cost by account, product and region. You can set a period and graphs type. If you move your mouse over the graph, a pop-up window will appear to show cost information by cloud account, product and region and total cost for the selected time period.
Product Cost Breakdown
It displays product cost breakdown for the selected account. It also allows you to check costs grouped by product category, a popup will appear to show a list of product costs and total cost in that product category when you move your mouse over any of the bars in the chart. You can set a period and account to see the product cost breakdown.
Cost Breakdown
It provides graphical displays of cost breakdown by account, tag, product and region. You can set a period to see the cost breakdown.
Custom Cost Anomaly Detection
It analyzes cloud usage and costs based on custom rules, detects anomalies when the rules are not met, and sends alerts. When detecting anomalies, you can filter costs by account, product, or region as analysis criteria, and set a date range to compare, for example, if you select 3 days, you can compare it with the 3 days prior to the selected 3 days. When sending anomaly alerts, you can categorize alerts as critical, major, or minor by allocating a certain amount of money to the alert band. You can set delivery options to send alerts, and set recipients for receiving alerts via AlertNow or email.
AI-based Cost Anomaly Detection
It trains and analyzes your cloud usage and cost data with machine learning algorithms in real time. The feature detects unusual usage patterns everyday, and sends alerts based on AI detection sensitivity set by the user. When sending anomaly alerts, you can categorize alerts as critical, major, or minor by allocating a certain amount of money to the alert band. You can set delivery options to send alerts, and set recipients for receiving alerts via AlertNow or email.
📜 Note: When AI prediction cost drifts out of sensitivity range, it detects anomalies and send alerts. Low sensitivity will result in less notifications while high sensitivity will result in more.
Top 5 Costs
It provides graphical displays of top 5 costs by account, product, region, and period, and it is easy to find top 5 items without changing any filters from the widget.
Integrated Cost Breakdown by Category
If you are using more than one Cloud Service, select multiple Cloud Services in this single widget to view the integrated cost breakdown by product category in the bar chart.
Integrated Cost Breakdown by Service Group
If you are using more than one Cloud Service, select multiple Cloud Services in this single widget to view the integrated cost breakdown by service groups in the bar chart.
Integrated Cost
If you are using more than one Cloud Service, select multiple Cloud Services in this single widget to view the integrated cost breakdown in the bar chart.
1-Year Ahead Cost Forecast
Using past cloud cost data as training data, this widget is based on the AWS SageMaker DeepAR algorithm, which is a time series forecasting algorithm, to forecast 1-year ahead cloud costs.
This widget is currently available for AWS users only.
Manage Widget
Edit Widget
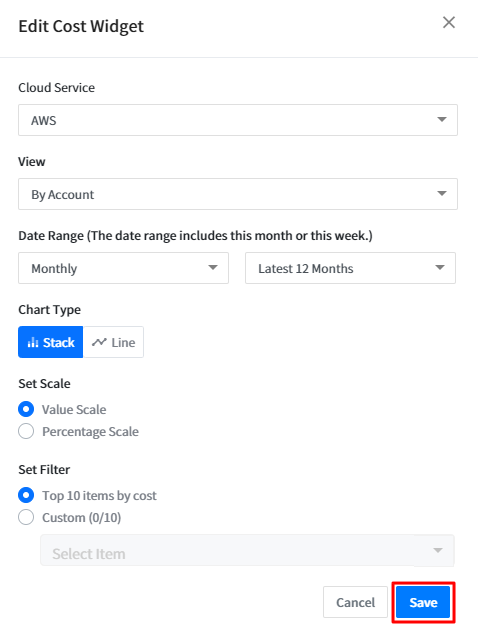
① Click the [More] button located on the top-right of the widget and then click the [Edit Widget] button to edit widget.

② Change the required information and then click the [Save] button to finish editing the widget.
Add Widget
① You can add widgets for your needs.
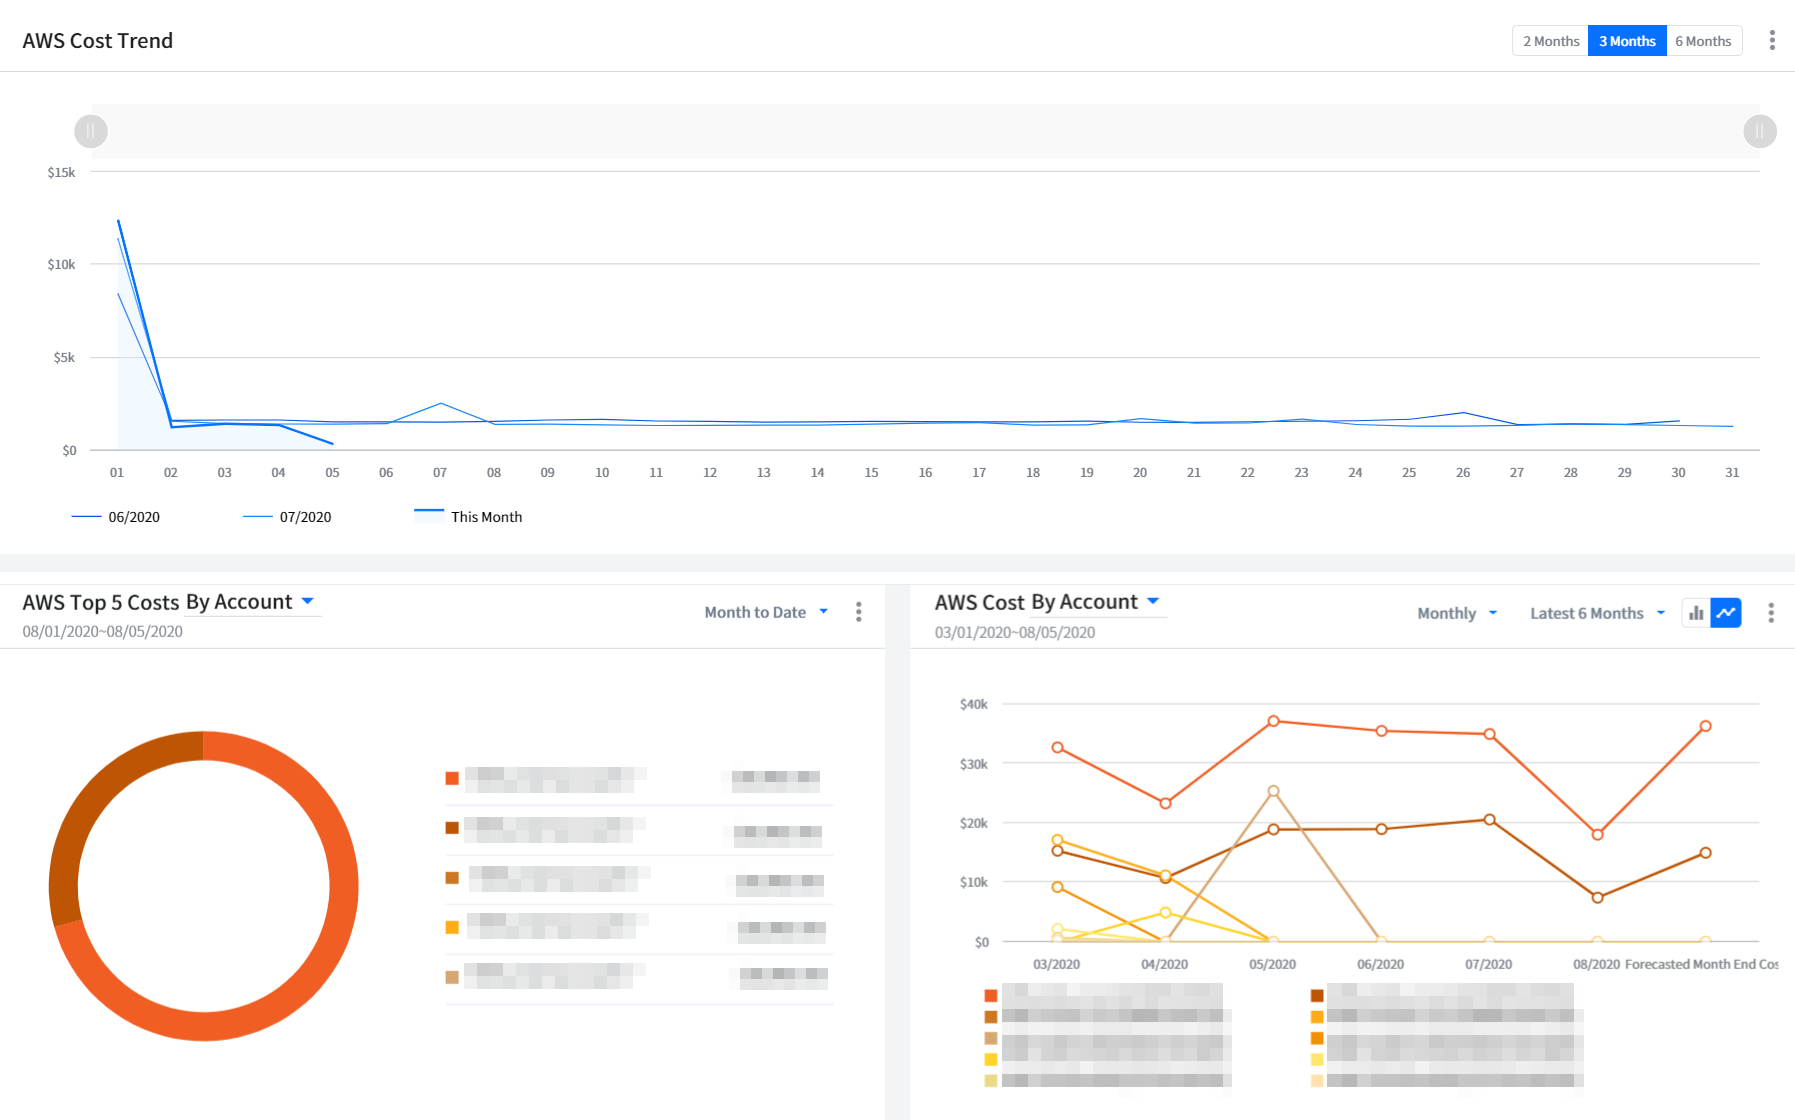
② When you click the [Edit] icon next to the dashboard name, [Add Widget] button will be displayed.

③ Click [Add Widget] and then click [Add] to add widgets.
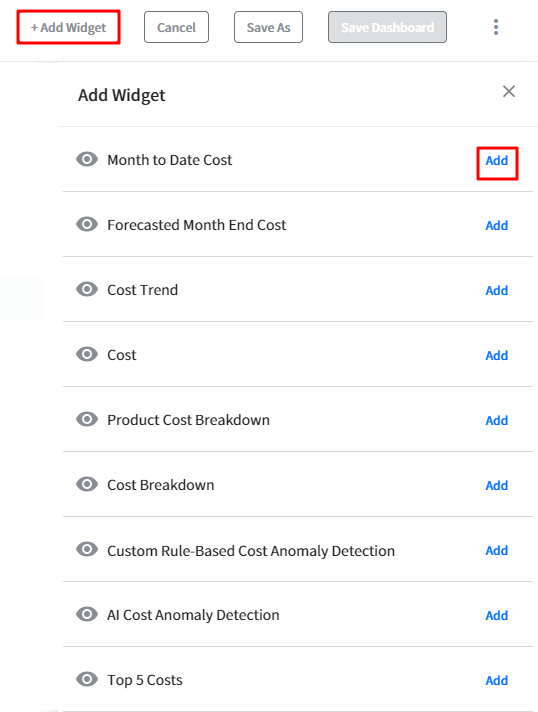
Duplicate and Delete Widget
① Click the [Edit] icon next to the dashboard name to switch to the edit mode which allows you to duplicate and delete widgets.

② Click the [More] button located on the top-right of the widget and then click the [Duplicate] button to duplicate the widget. Also, you can click [Delete] to delete it.

Move and Resize Widget
① Click the [Edit] icon next to the dashboard name to switch to the edit mode which allows you to move and resize widgets.

② To increase or decrease the widget size, hover over the widget and drag the lower right corner of the widget. Stop dragging the corner when you have the size that you want.
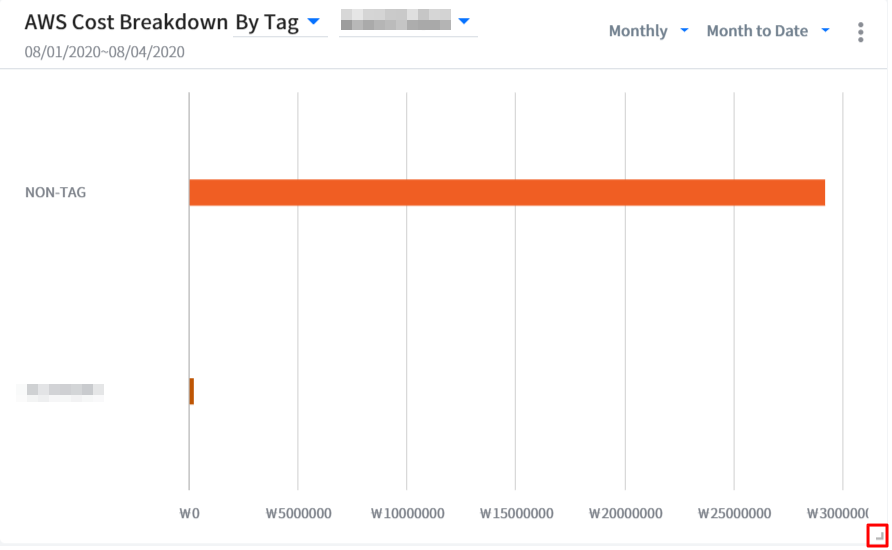
③ To move a widget on a dashboard, select and drag the widget to a new location on the dashboard.
Select Cloud Service
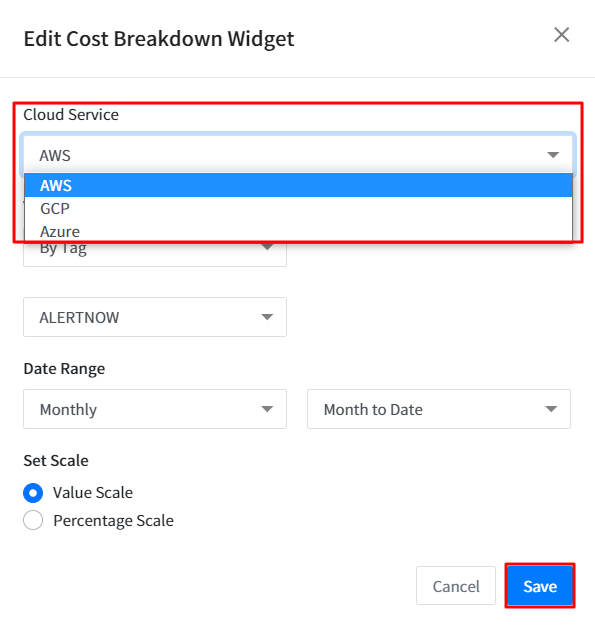
You can select a cloud service for each widget. Click the [More] button located on the top-right of the widget and then click [Edit Widget] to edit the widget. In the Cloud Service field, select one from AWS, GCP or Azure, and then click the [Save] button.
Cost Anomaly Detection
Cost Management > Cost Anomaly Detection
Cost Anomaly Detection analyzes your cloud-related costs in real-time through user-set rules or AI algorithms to help you check cost anomalies that arose at a specific point in the past. You can look for causes of cost anomaly and easily find a solution.
- You can customize user-set rules and AI detection sensitivity in Cost Management > User Dashboard. You can either use the default setting below or customize it based on your needs.
| Item | Default Setting | Rule Category |
|---|---|---|
| Cloud Service | AWS | User |
| Analyze by | Account | User |
| Period | Month to date vs. Same period last month | User |
| Rate of Change | 10% | User |
| Alert Band | $100.00~$1,000.00 | User, AI |
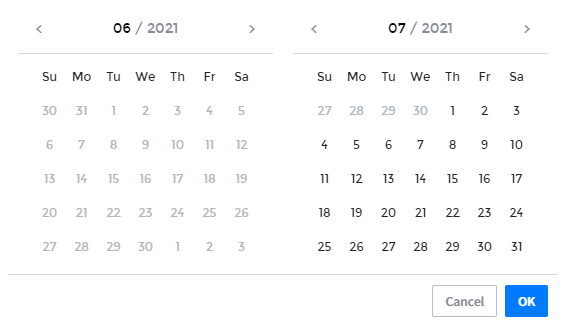
First off, set a period for cost anomaly monitoring on the calendar widget on top left.

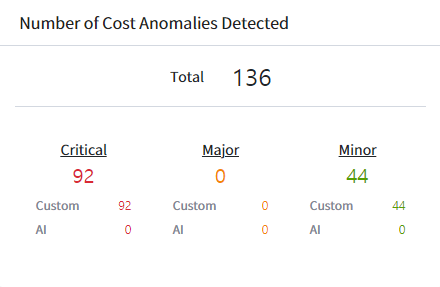
Number of Cost Anomalies Detected
This blade displays the total number of cost anomaly detection based on the rules you set and AI algorithm. You can also check how many cases have been detected by user-set rules and AI algorithms respectively. Detection Types are categorized into 3 groups - Critical, Major and Minor. Click on each group to check details on each case by detection type on the Cost Anomaly Detection List below.
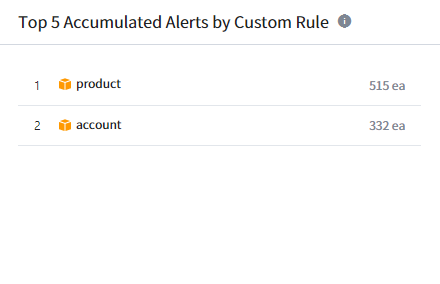
Top 5 Accumulated Alerts by Custom Rule
This blade shows you 5 areas that had the most alerts by the rules you set. Alerts are analyzed by account, product and region.
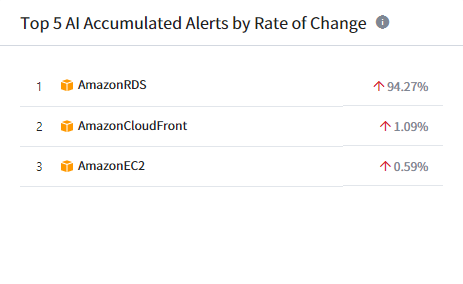
Top 5 AI Accumulated Alerts by Rate of Change
This blade shows you the accumulated change rate of cost anomaly detected by AI. It shows you 5 services with the biggest changes in the cost as well as cost increase or decrease in percentage.
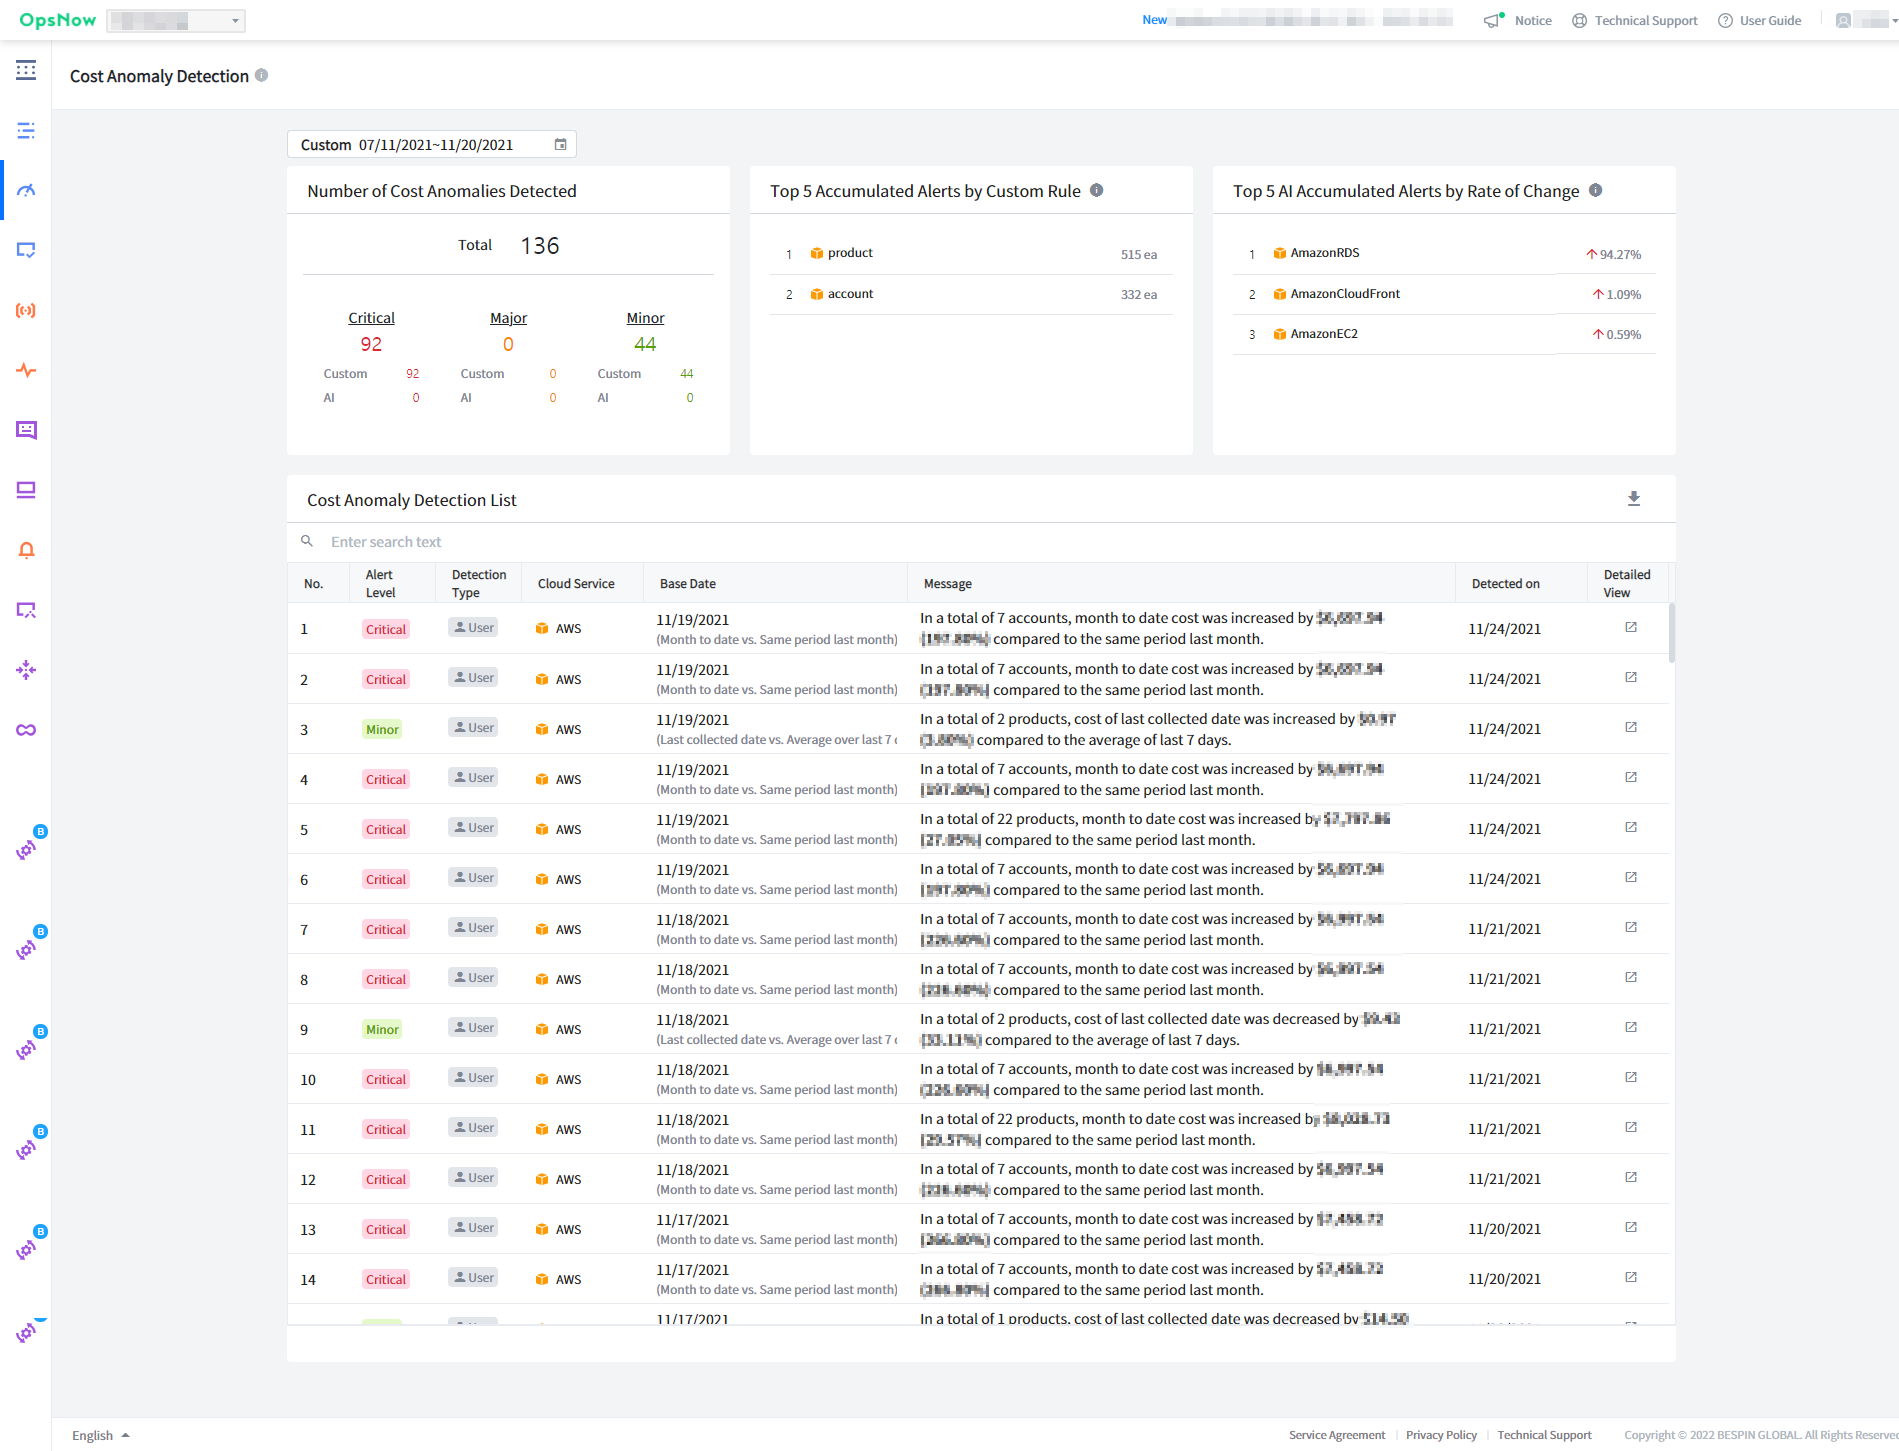
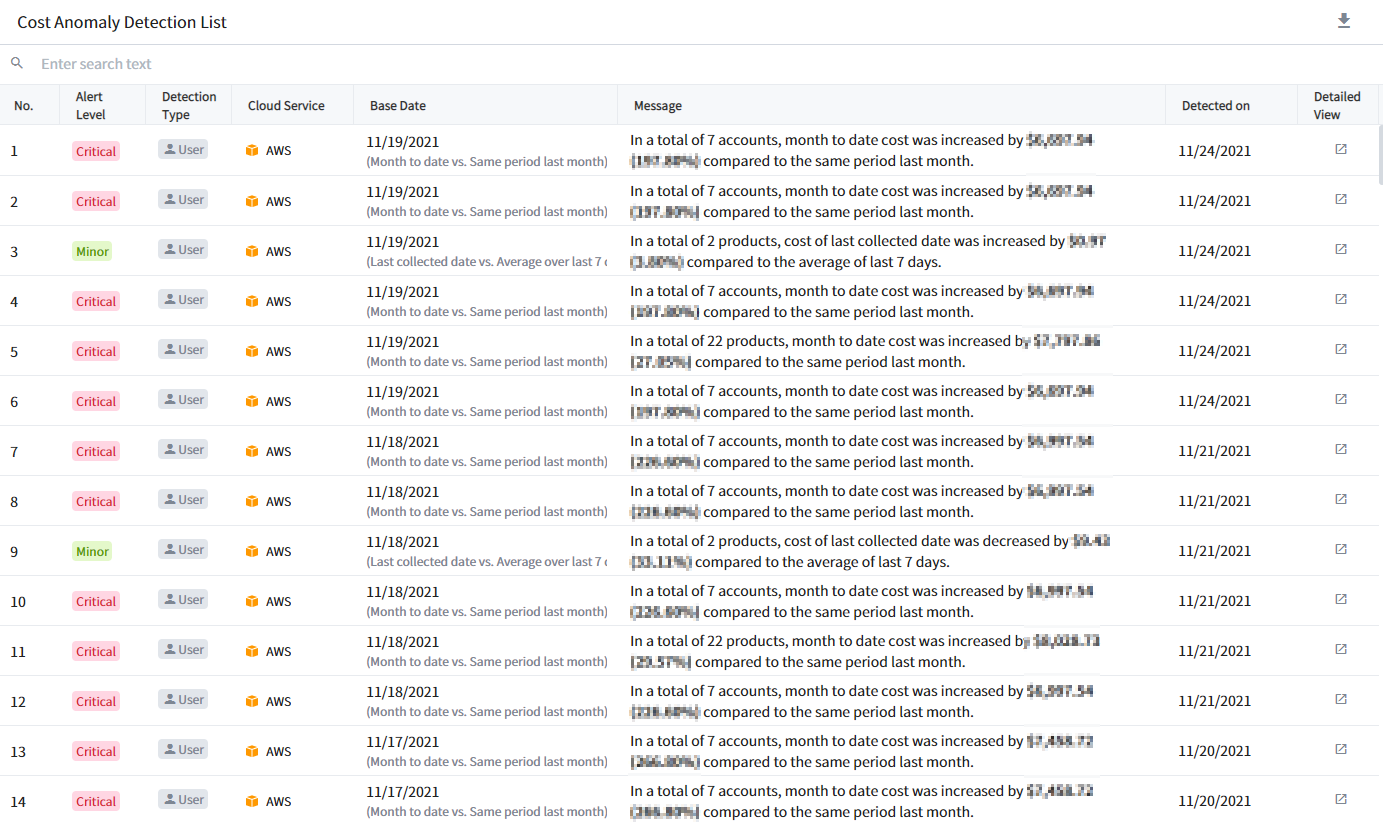
Cost Anomaly Detection List
This list displays detected cost anomalies with more details.
1. Alert Level: Alert levels are categorized into Critical, Major and Minor.
2. Detection Type:
• User: Cost anomaly detection based on customized rules
• AI : Cost anomaly detection based on AI analysis
3. Cloud Service: Cloud service where cost anomaly originates.
4. Base Date:
• Month to date vs. Same period last month: Compares month-to-date cost with the same period of previous month
• Last collected date vs. Same period last month: Compares cost on the last collected date with average of the previous 7 days
5. Message: This column displays an amount and percentage of decrease or increase in the cost compared to the same period of previous month.
6. Detected on: This column displays a date when cost anomaly is detected.
7. Detailed View: Click ![]() to go to Cost Analytics and see more details on the case.
to go to Cost Analytics and see more details on the case.
Click the
on top right of the list to download it in an excel file.
Cost Analytics
Cost Management > Cost Analytics
Cost Analytics is a feature that facilitates intuitive and easy cost management and analysis of an organization. It focuses on the necessary cost information and provides filtering options to minimize processing time by removing unnecessary cost data. It allows you to view aggregated cost information and cost trends by category, such as accounts, products, regions, and service groups, and supports detailed cost analysis by providing a total of 16 filter options. Users can click on widgets set in the user dashboard to navigate to the Cost Analytics screen, where they can view detailed screens based on the conditions set in the user dashboard widgets.
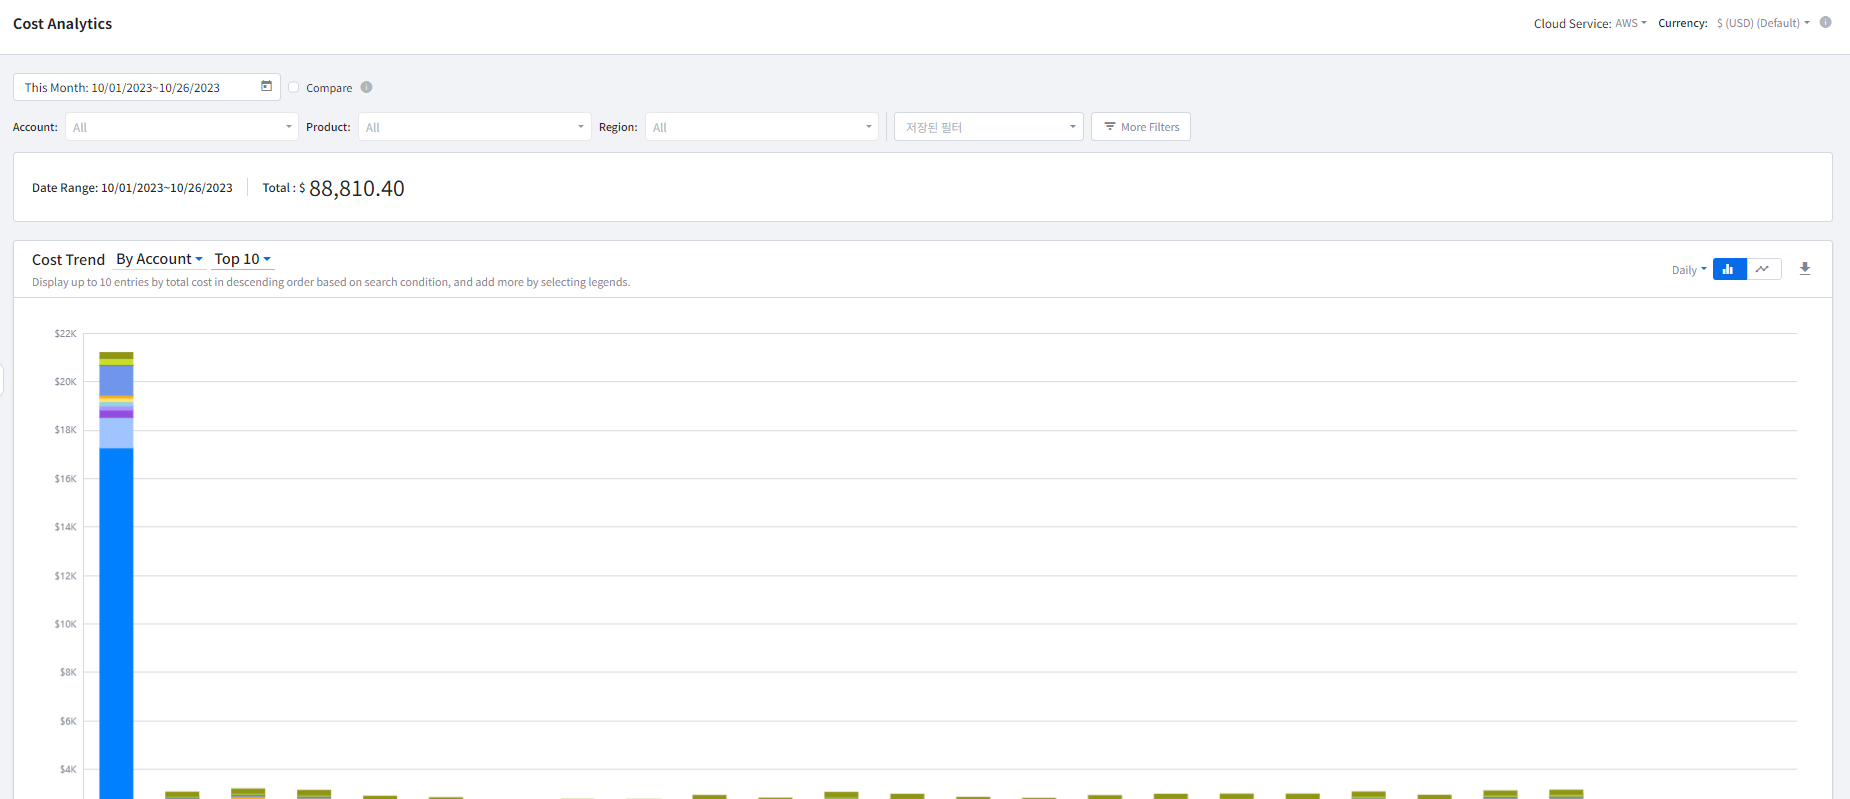
Cost Trend
It visualizes cost trends for the accounts, products, and regions set by the user in graphs. When you hover over the graph, tooltips are displayed, showing cost information and total cost for each account, product, region, and service group. By selecting “Top 10” in the upper left corner filter, you can view the top 10 items based on cost, and by choosing “All,” you can see all cost information.
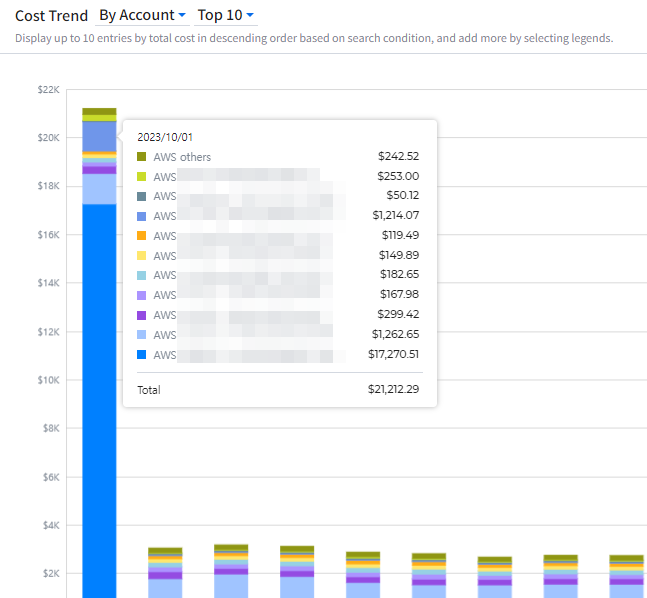
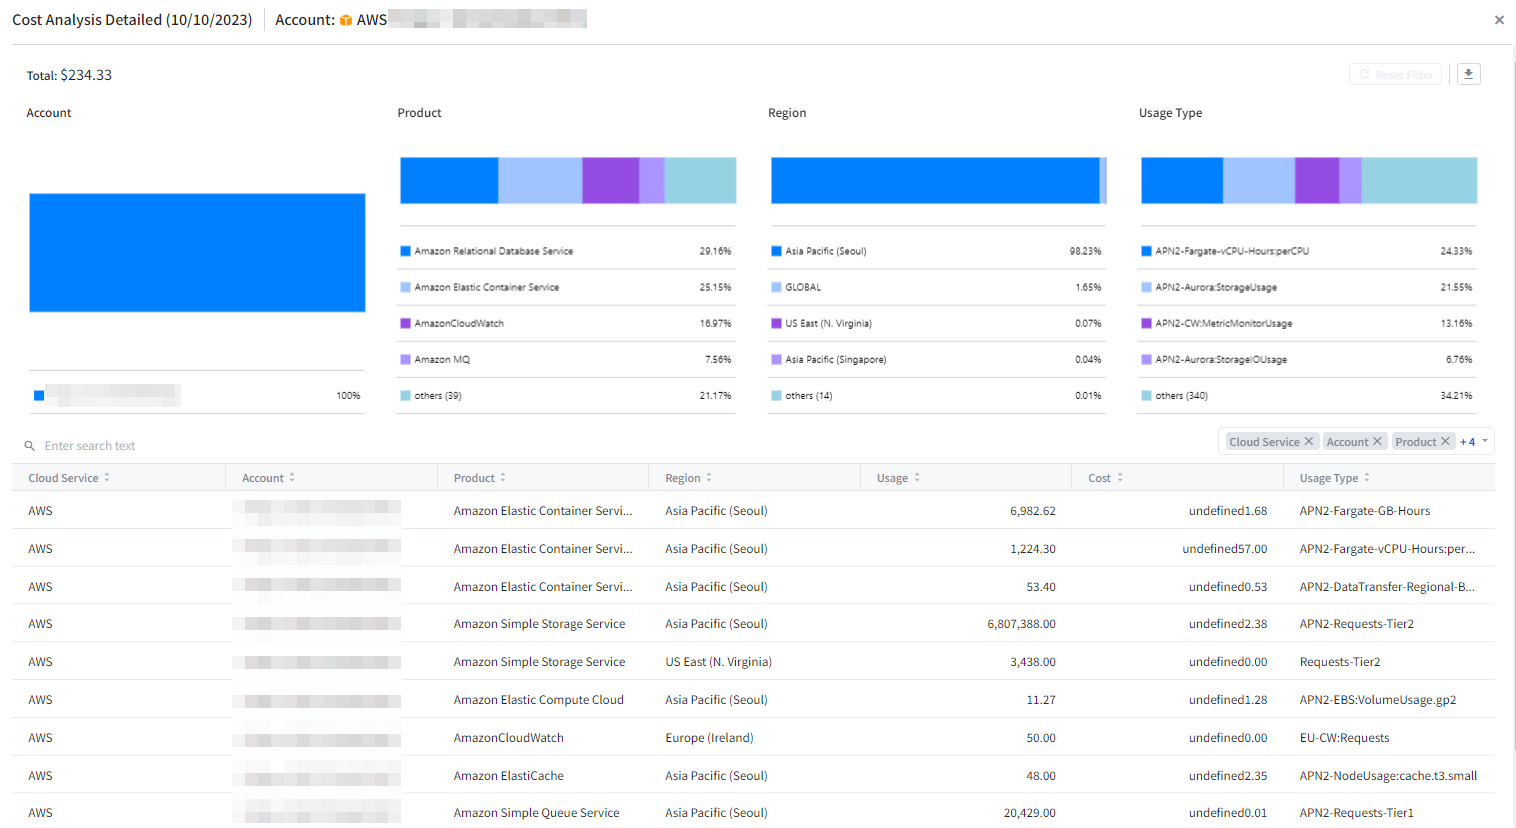
The table located below the cost trend chart provides a brief overview of daily costs. If you need detailed cost information for a specific date, you can click on the amount for that date to access detailed information on the screen. In the detailed screen, you can view cost information by key items such as accounts, products, regions, usage type, and more.
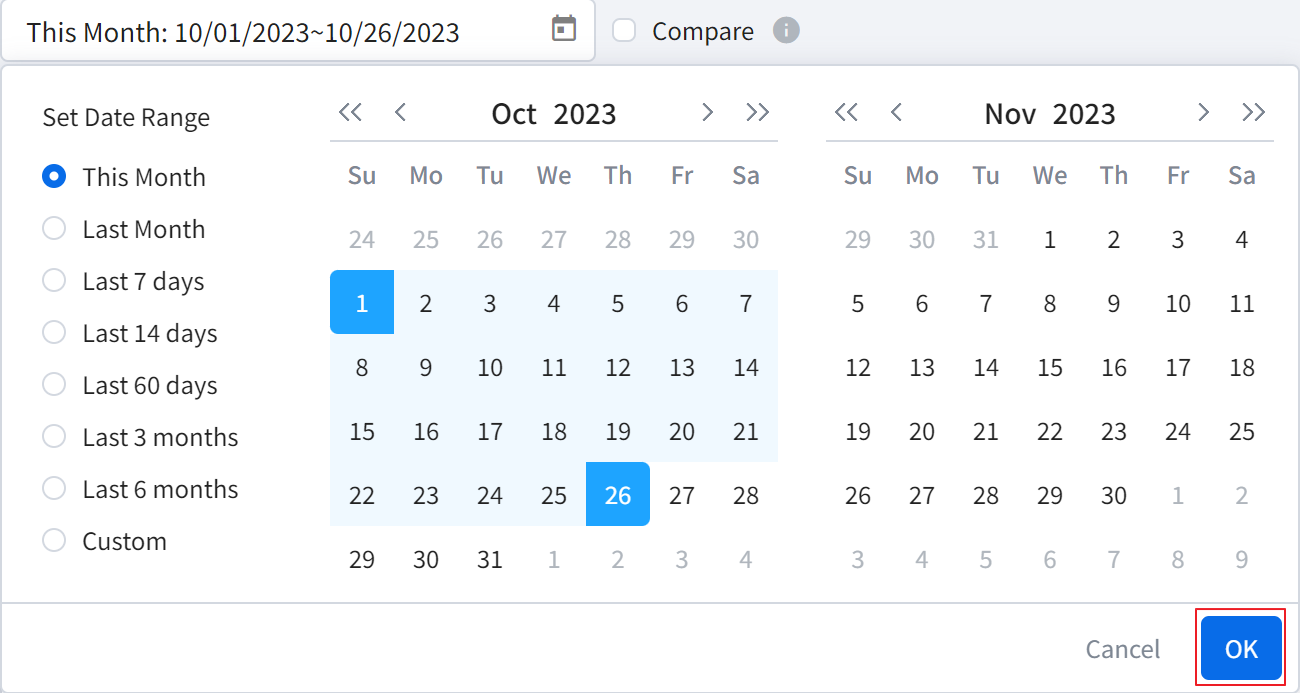
Set Date Range
After clicking on the calendar in the upper left corner of the screen, you can select the start date and end date.
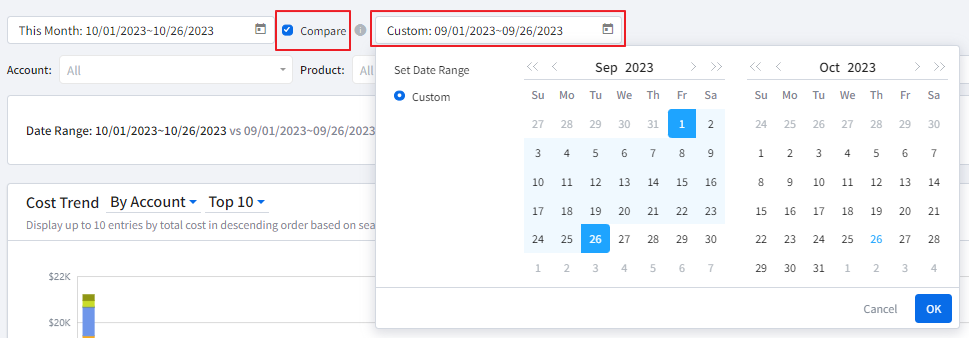
By clicking the Compare checkbox, you can compare the cost data for the currently selected period with the corresponding data from a previous period.
Filters
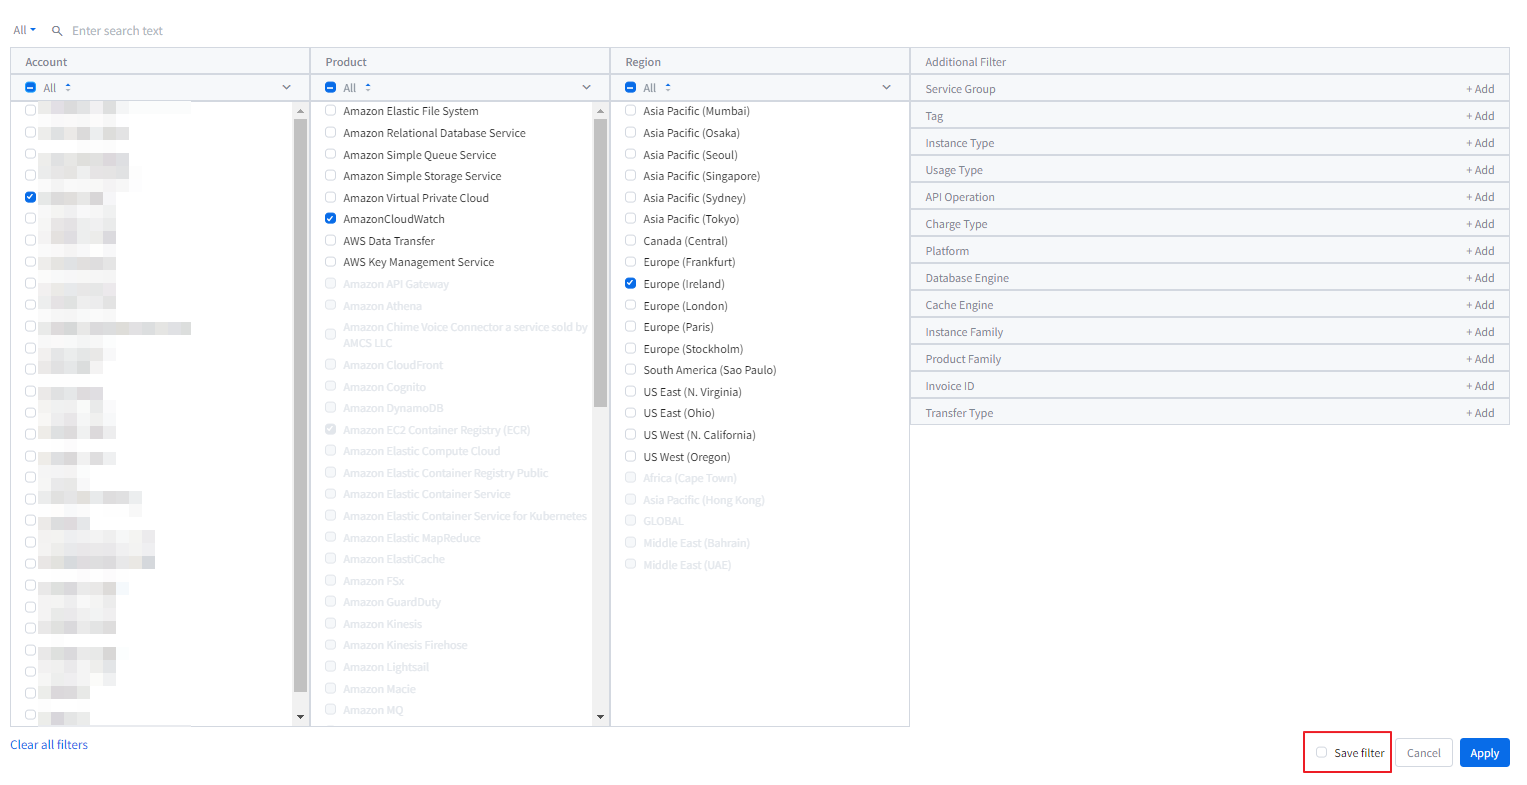
Additional filter options allow for more detailed cost analysis, helping you see who is spending on what, whether there is excessive and unnecessary spending, and if the expenditures are reasonable. By clicking [More Filters], you can obtain results with only the necessary cost data. Filter options include not only accounts, products, and regions but also tags, instance types, usage types, API operations, charge types, platforms, database engines, cache engines, instance families, product families, invoice IDs, and transfer types. When you navigate from user dashboard widgets to Cost Analytics, the information configured in those widgets is automatically retained and displayed, eliminating the need for additional settings.

Save Filter
If you are frequently using a specific filter option, you can save it and use it later. Select [More Filters] and set required filter options. Click the [Save filter] button and enter a name for that filter as well. After saving the filter, select it from the drop down menu from [Saved Filters].
It provides the feature to save frequently used filters for future use. After clicking [More Filters], you can configure the necessary filter options, then click the [Save filter] button, enter a name for the saved filter, and click [Save & Apply]. When you select the saved filter from the dropdown menu at the top of the screen, the saved filter will be applied to the screen.
Billing Invoice
Cost Management > Billing Invoice
Billing Invoice provide a clear understanding of the monthly charges for the selected month and the previous month, by showing a detailed breakdown of cloud costs and a monthly cost trend. You can analyze billing costs by account, cloud billing, and cloud invoice, and use the Invoice Insights feature to identify the most significant changes in cost patterns and their expected causes.
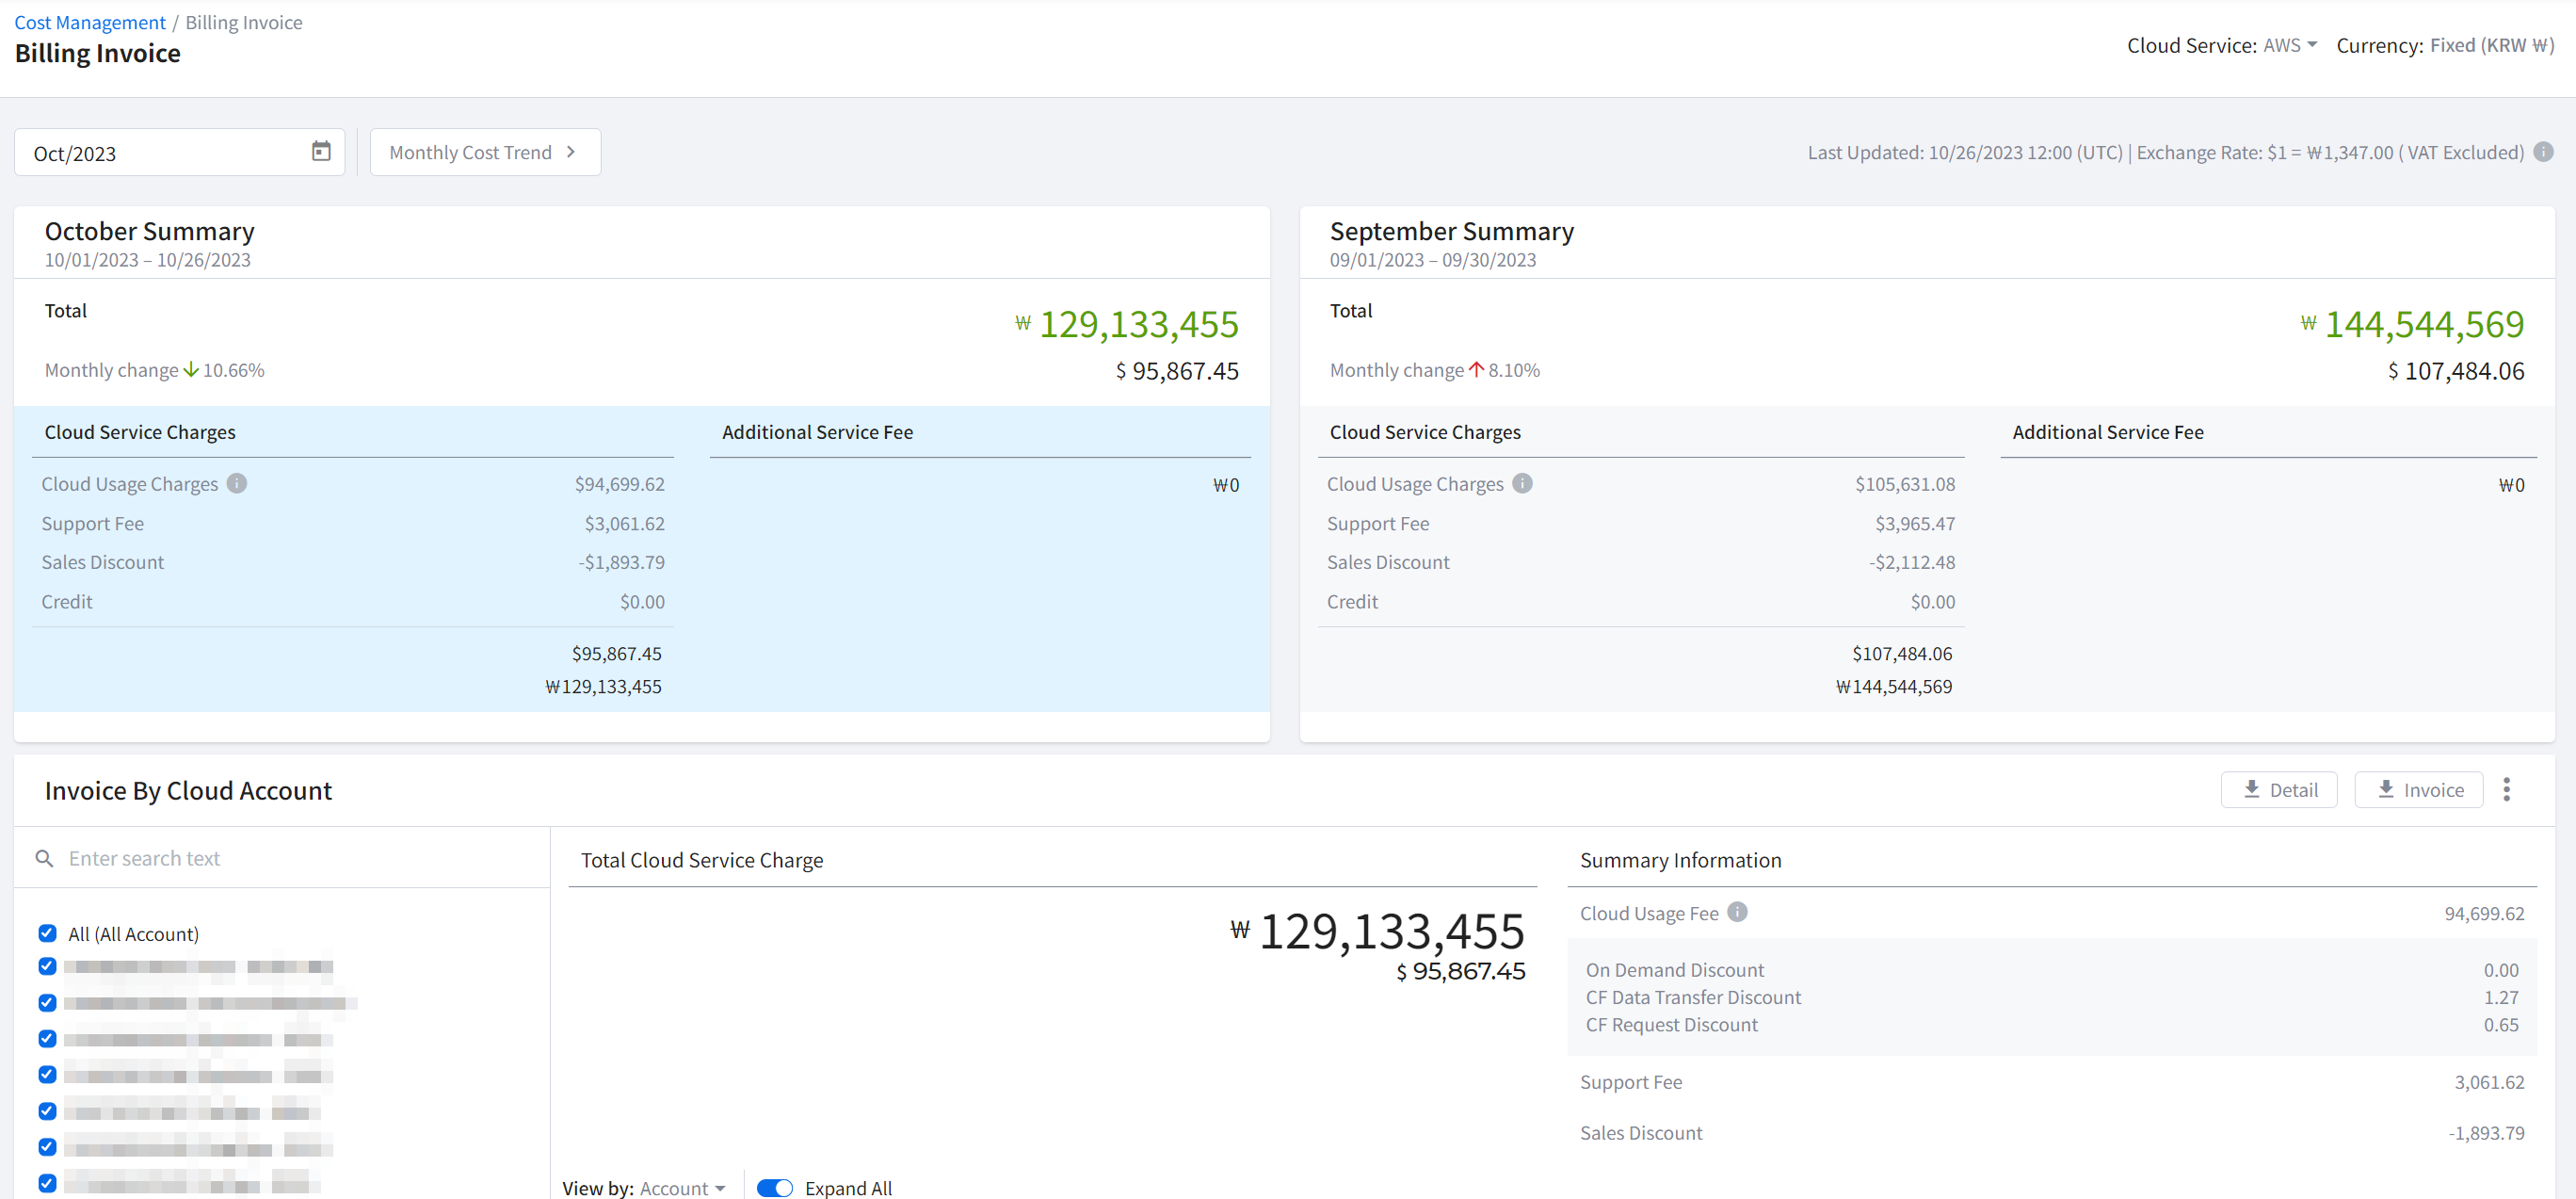
Summary
Summary shows the cloud service fees and additional service charges for the selected month and the previous month. It provides a summary of the cloud service fees, which include cloud usage fees, support fees, discount fees, and credits that make up the total cost.
① Select a cloud service in the top-right corner of the page.
② Click a month to view the information you want.


- Cloud Usage Charges: Charges of cloud computing usage = Cloud cost - On-Demand Discounts - CloudFront Discounts - Savings Plans Promotion Savings
- Support Fee: Fees determined by the service contract under the AWS Support Plan
- Sales Discount: Discounted amount on cloud usage charges under the service contract
- Credit: Credits applicable to your invoice
- Additional Service Fee: Additional fee or discounts such as Savings Plans Promotion Compensation
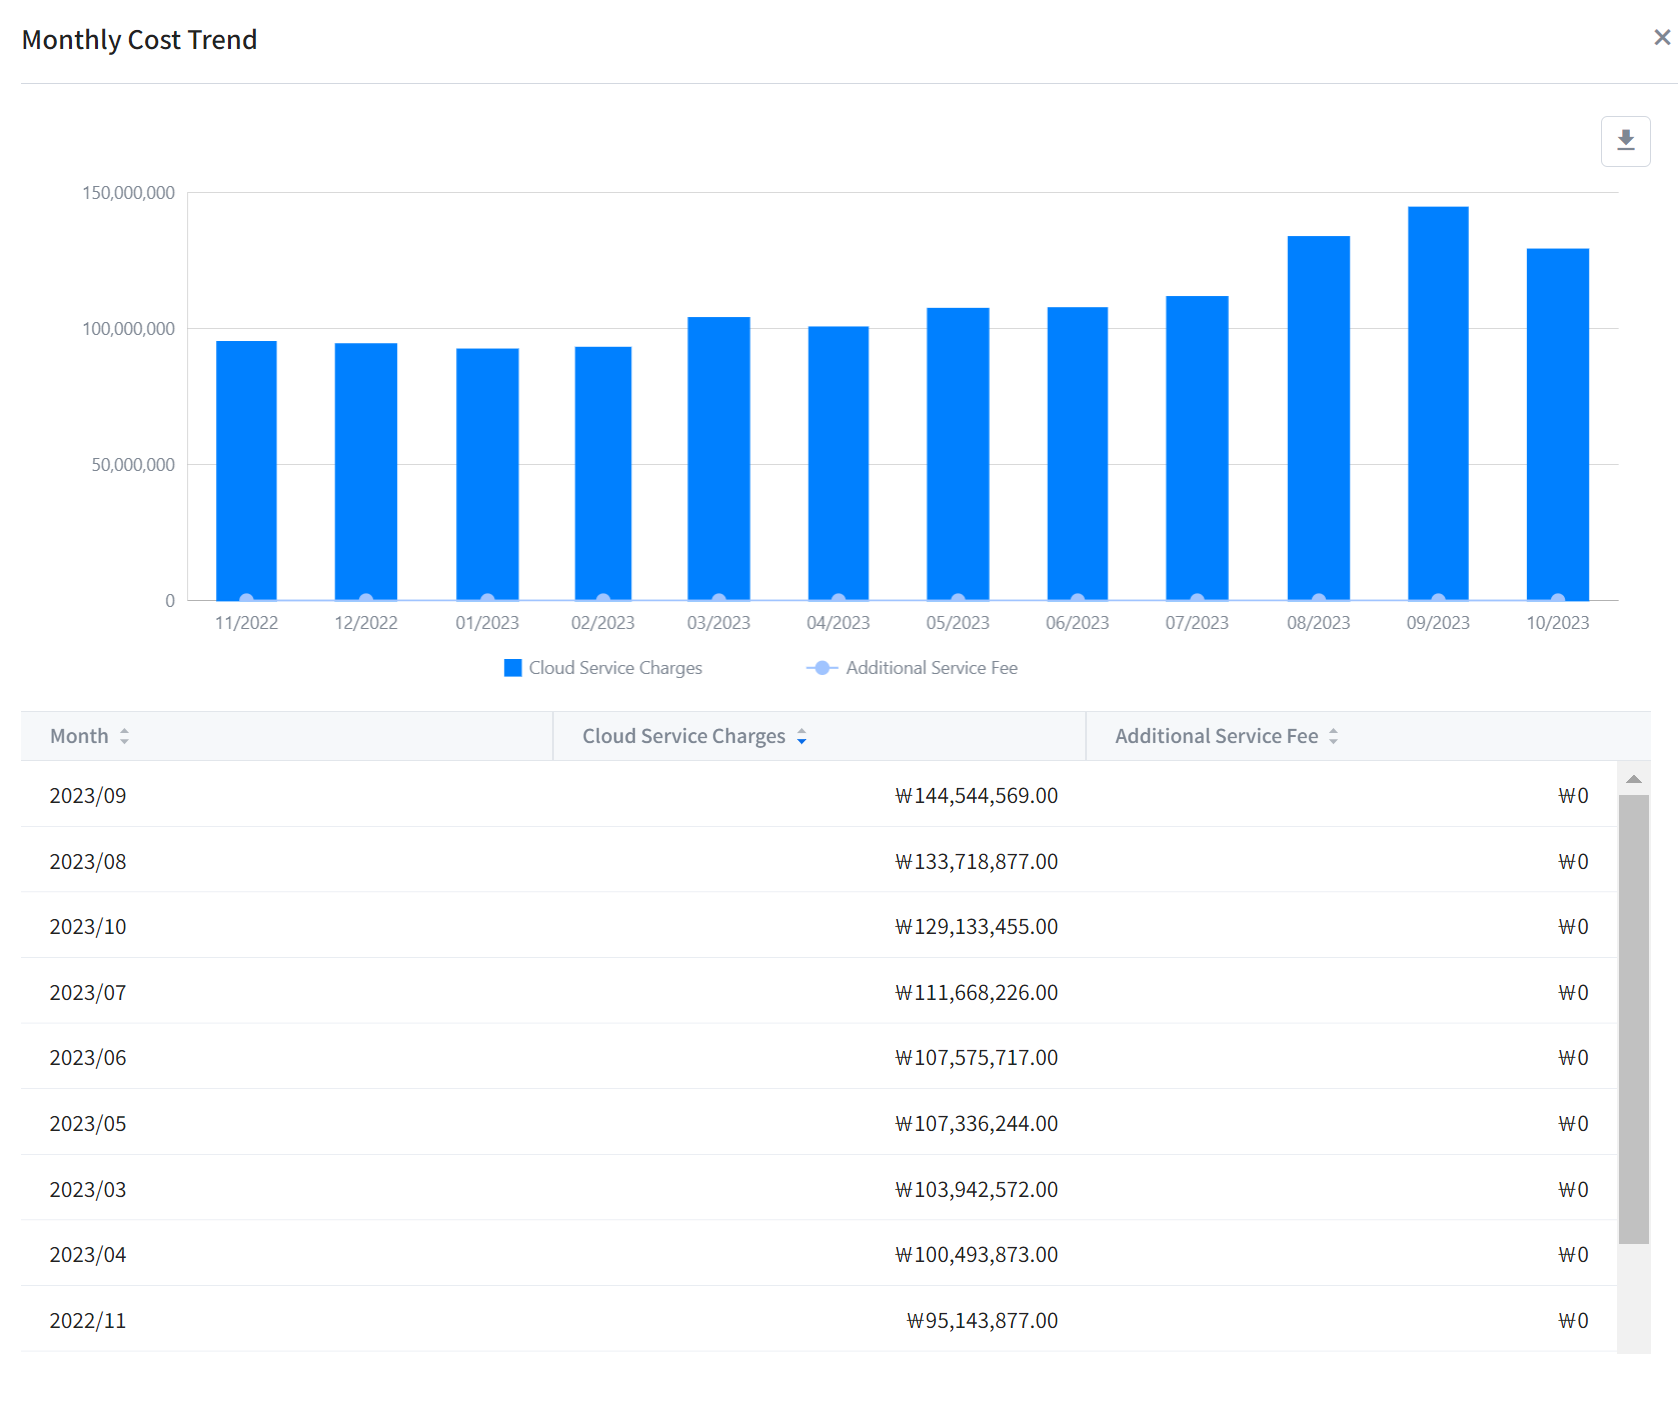
Monthly Cost Trend
This is a chart that allows you to check the annual trend of cloud service fees. When you hover over the chart, tooltips will display cloud service fees and additional service charges. By clicking the download button in the upper right corner, you can download the data within the chart as an Excel file.
Invoice by Cloud Account
You can review summary and detailed information about registered account charges, as well as download detailed records and invoices as files. By clicking the kebab button in the upper right corner of the card and selecting the Send Invoice button, you can choose between sending it once or sending it repeatedly at intervals. If you choose to send it repeatedly, you can receive invoices periodically every month. Additionally, you can check the list of invoices you have sent so far through the Send Invoice History.
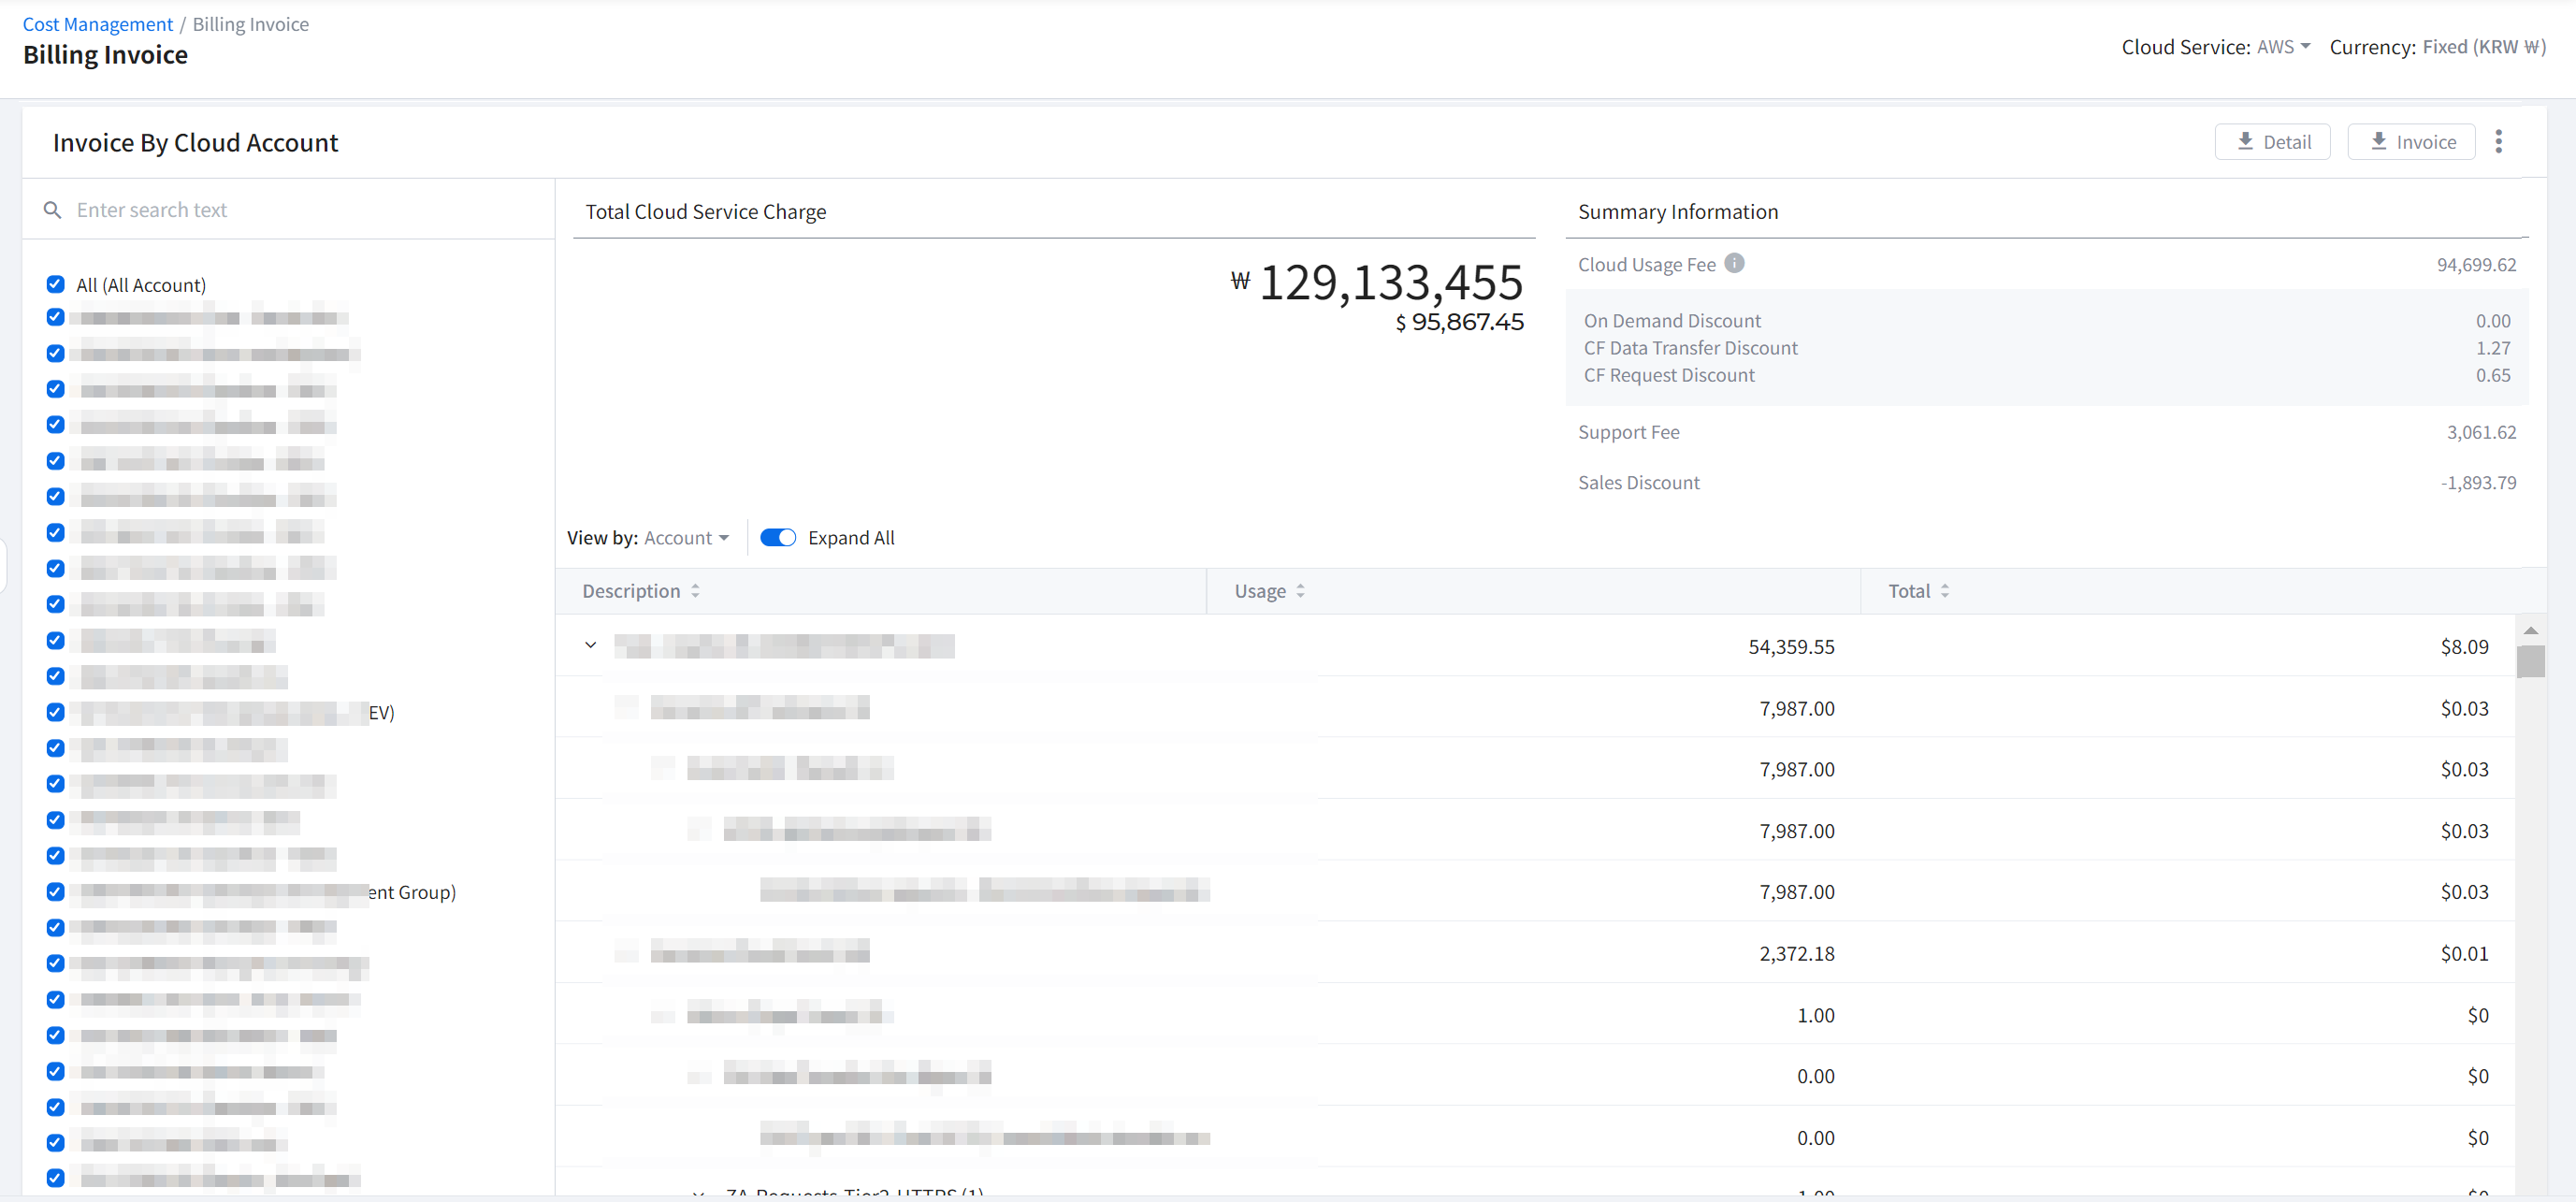
• Account Selection: You can select an account from the left account list. The summary and detailed information of the selected account will be displayed on the right.
• Summary Information: Summary information, such as usage fees and discount amounts, is displayed.
• Detailed Information: You can view detailed billing details, including usage and charges, by account, invoice, region, tag, and service group. Click on the “View by” in the top left to check information based on criteria. By enabling or disabling the “Expand All” radio button, you can expand or collapse item-specific detailed information for your review.
Details Table - AWS
The details table contains Charges by Account, Cloud Invoice List, Invoice Insight, and Charges by Service Group tabs.
Charges by Account
You can see cloud usage charges, support charges, discount rates, and credits by account, and the total amount calculated for these items.

Cloud Invoice List
By matching Billing IDs and Cloud Accounts, you can check billing dates and charges by billing ID or cloud account. When the billing is confirmed, Billing ID will be displayed and if not, Estimated will be shown.
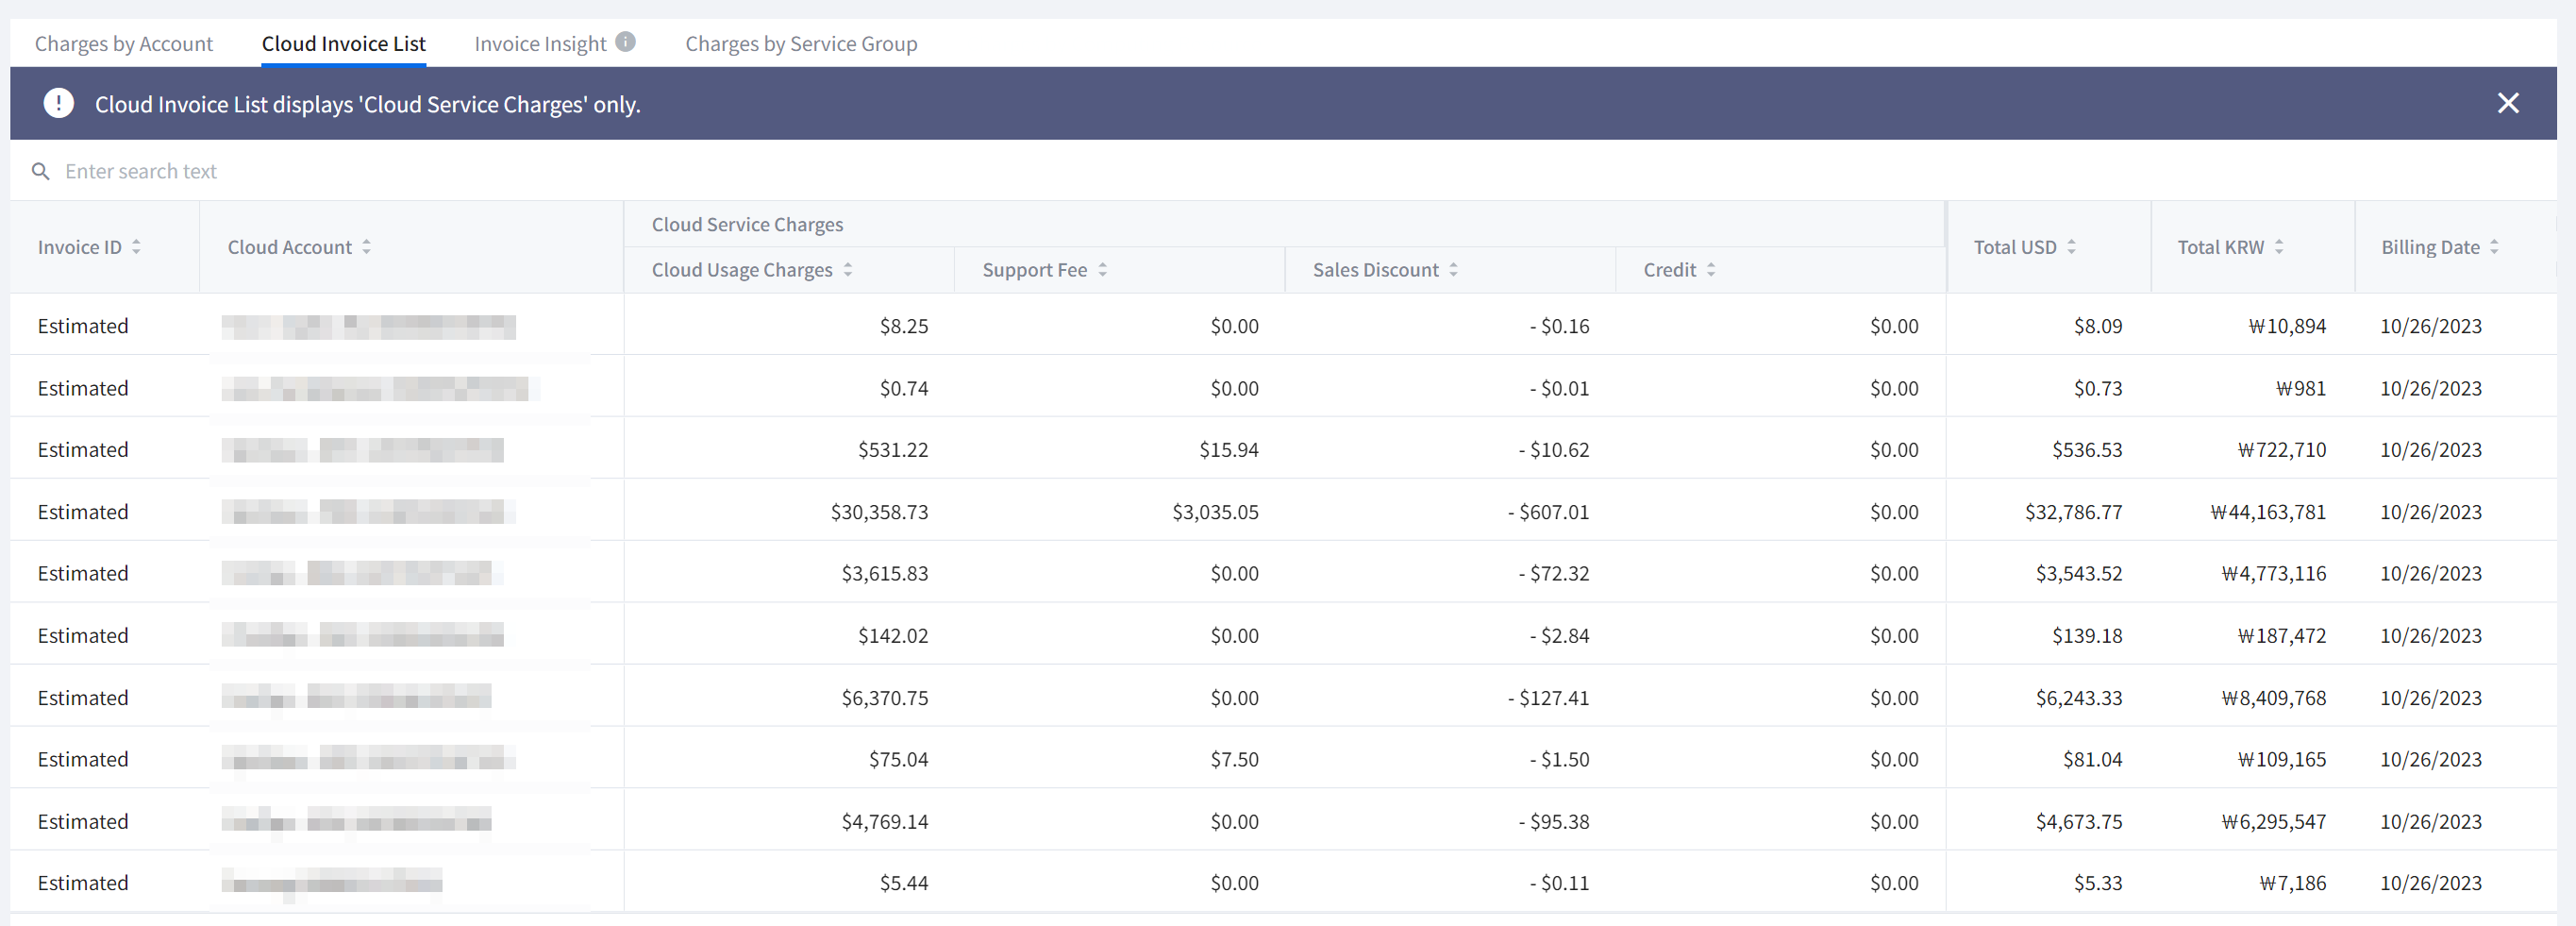
📜 Note: Cloud Invoice List displays cloud service charges only, and you can find additional service fees in Charges by Account tab.
Invoice Insight
Invoice Insight compares and analyzes past and newly issued invoices to identify products with large changes in cost patterns and possible causes. When cost changes are detected in the invoice, it shows the difference between this month versus the last month and average costs, and provides the link to go to [Cost Analytics] to identify what caused the change.
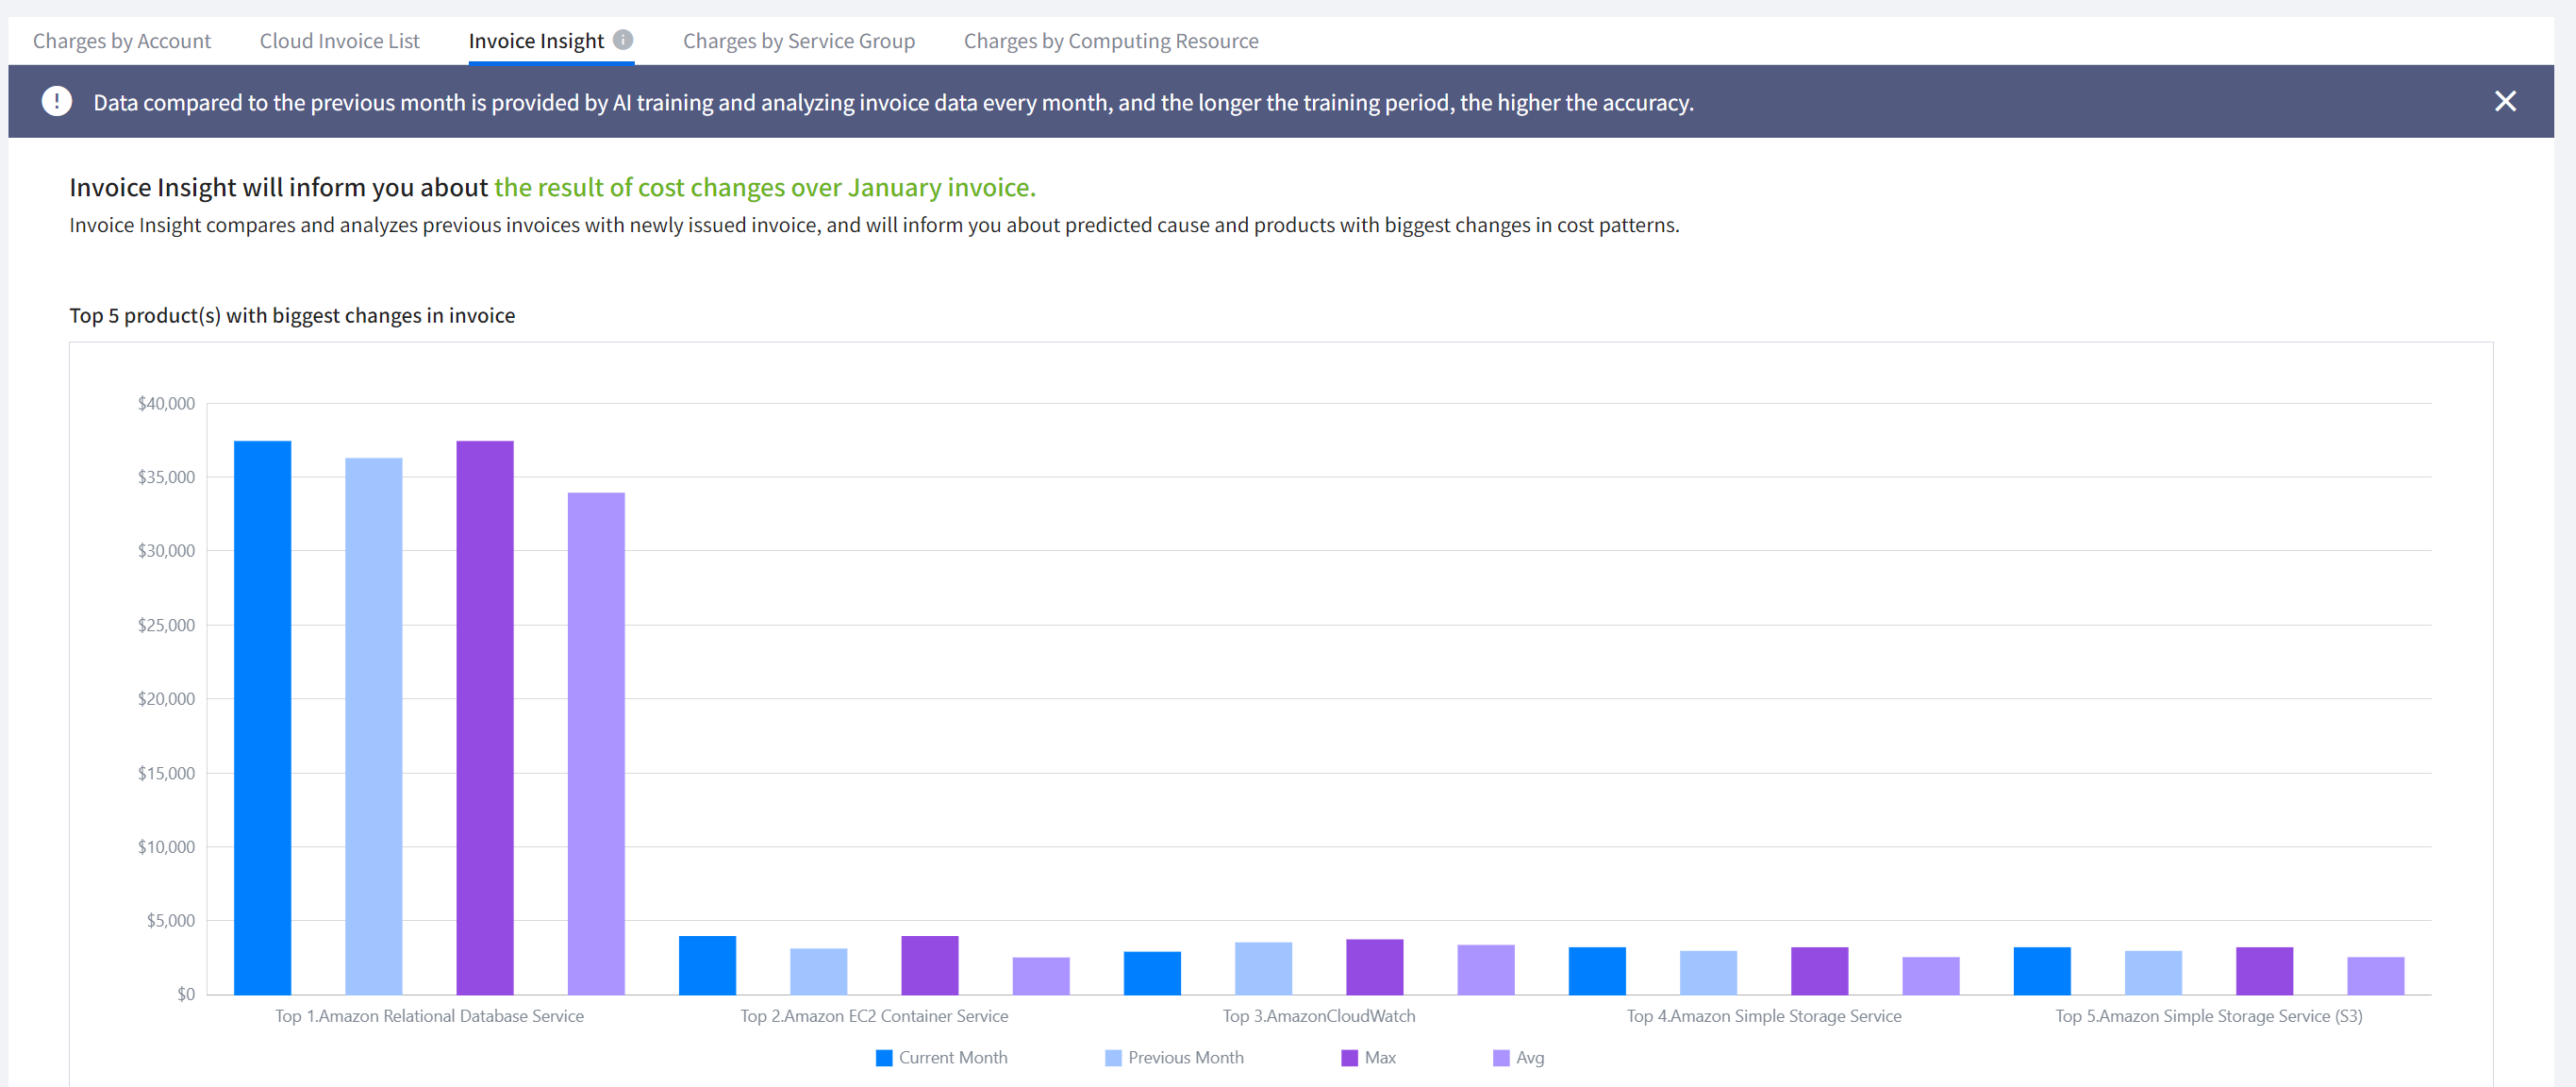
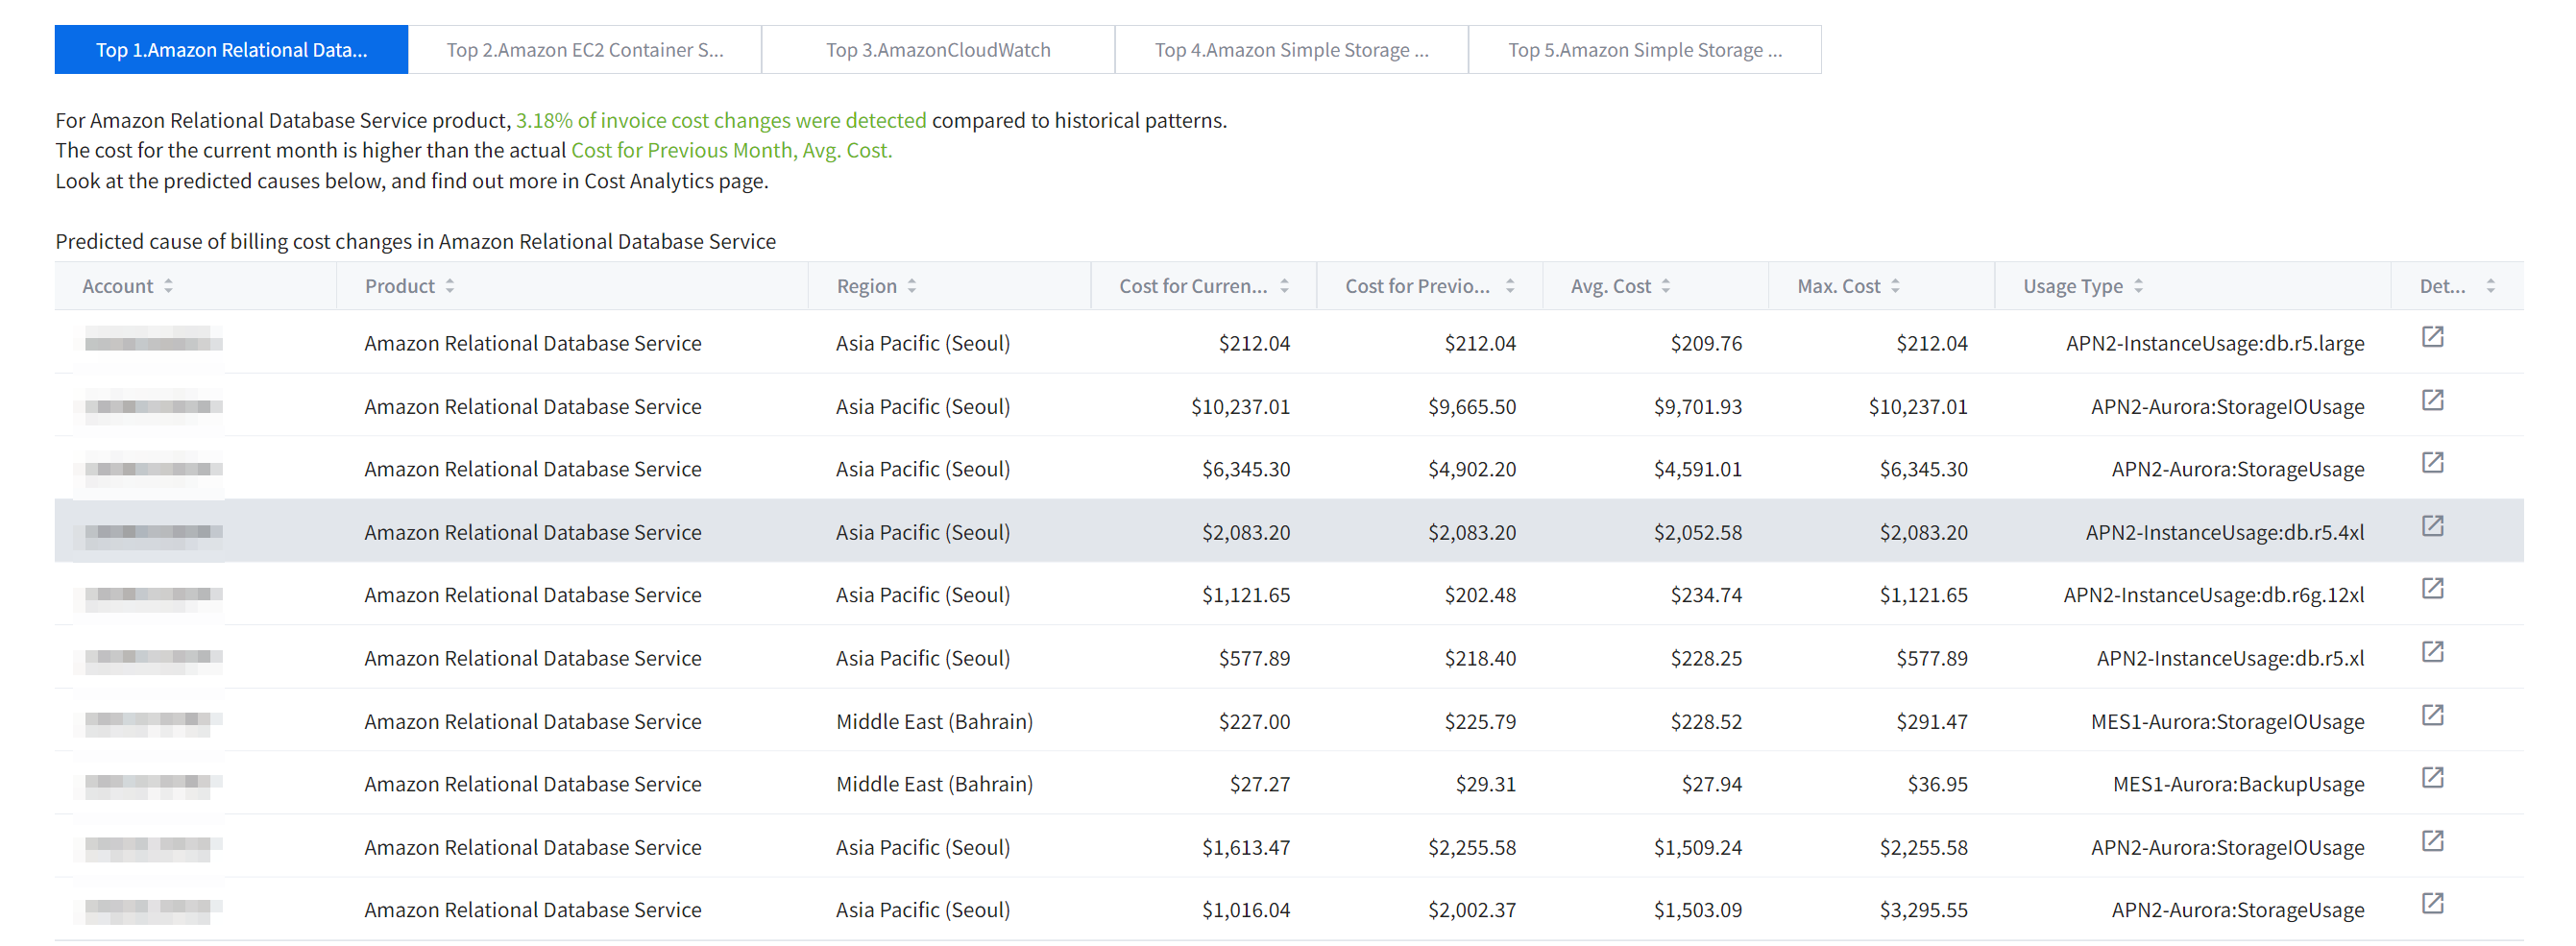
- Invoice Insight is only available in the global version.
- Cost changes in the invoice or cost anomaly occurs, you can set alarms in the [Cost Anomaly Detection] to track them immediately.
Charges by Service Group
You can check cloud service fees, cloud usage fees, CF standard fees, CF discount fees, CF fees, sales discount fees, support fees, credits, and total charges by service group.

Details Table - Azure
The details table contains Charges by Subscription and Cloud Invoice List tabs.
Charges by Subscription
You can see cloud usage charges by subscription. Select a cloud subscription to go to the detail page to view its cost information.

Cloud Invoice List
By matching Billing IDs and Cloud Subscriptions, you can check billing dates and charges by billing ID or cloud subscription.

- Cloud Invoice List displays cloud service charges only, and you can find additional service fees in Charges by Subscription tab.
Details Table - GCP
The detailed table includes a charges by project tab.
Charges by Project
In the charges by project, you can see cloud usage fees, discount fees, credits, and totals by project ID.

Details Table - OCI
The detailed table includes charges by compartment.
Charges by Compartment
In the charges by compartment, you can see cloud usage fees, discount fees, and totals by cloud compartment.

Details Table - Ncloud
The detailed table includes Charges by Account and Cloud Invoice List tabs.
Charges by Account
You can see cloud usage charges, sales discounts, credits, and VAT by account, and the total amount calculated for these items. Select a cloud account to go to the detail page to view its cost information.

Cloud Invoice List
By matching Billing IDs and Cloud Accounts, you can check billing dates and charges by billing ID or cloud account. When the billing is confirmed, Billing ID will be displayed, and if not confirmed, Estimated will be shown.

- Cloud Invoice List displays cloud service charges only, and you can find additional service fees in Charges by Account tab.
CDN Dashboard
Cost Management > CDN Dashboard
You can find the summary of Cost, Data Transfer, and Requests, and also can compare this information for this month with the previous month.
Amazon CloudFront Summary
You can check fees, amount of data transferred, and number of requests, and compare them with the previous month.

• Cost: It shows aggregating, monthly total, and estimated costs for this month and previous month.
- Aggregating: It shows costs incurred in less than 24 hours so it has not yet been fully settled.
- Total Aggregated Cost: It shows total costs which have been fully settled for the period, from the first day of this month to now.
- Estimated cost: It shows estimated costs for this month by analyzing usage patterns.
• Data Transfer: It shows aggregating, monthly total, and estimated amount of data for this month and previous month.
- Aggregating: It shows the amount of data transferred that has been incurred in less than 24 hours so it has not yet been fully settled.
- Total Aggregated Cost: It shows the total amount of data transferred which has been fully settled for the period, from the first day of this month to now.
- Estimated cost: It shows the estimated amount of data transferred for this month by analyzing usage patterns.
• Request: It shows aggregating, monthly total, and estimated number of requests for this month and previous month.
- Aggregating: It shows the number of requests incurred in less than 24 hours so it has not yet been fully settled.
- Total Aggregated Cost: It shows the number of total requests that has been fully settled for the period, from the first day of this month to now.
- Estimated cost: It shows estimated number of requests for this month by analyzing usage patterns.
- K: 1,000, M: 1,000,000, B: 1,000,000,000
Amazon CloudFront Usage
You can check costs, data transferred amount and request number for each account, region and web distribution.
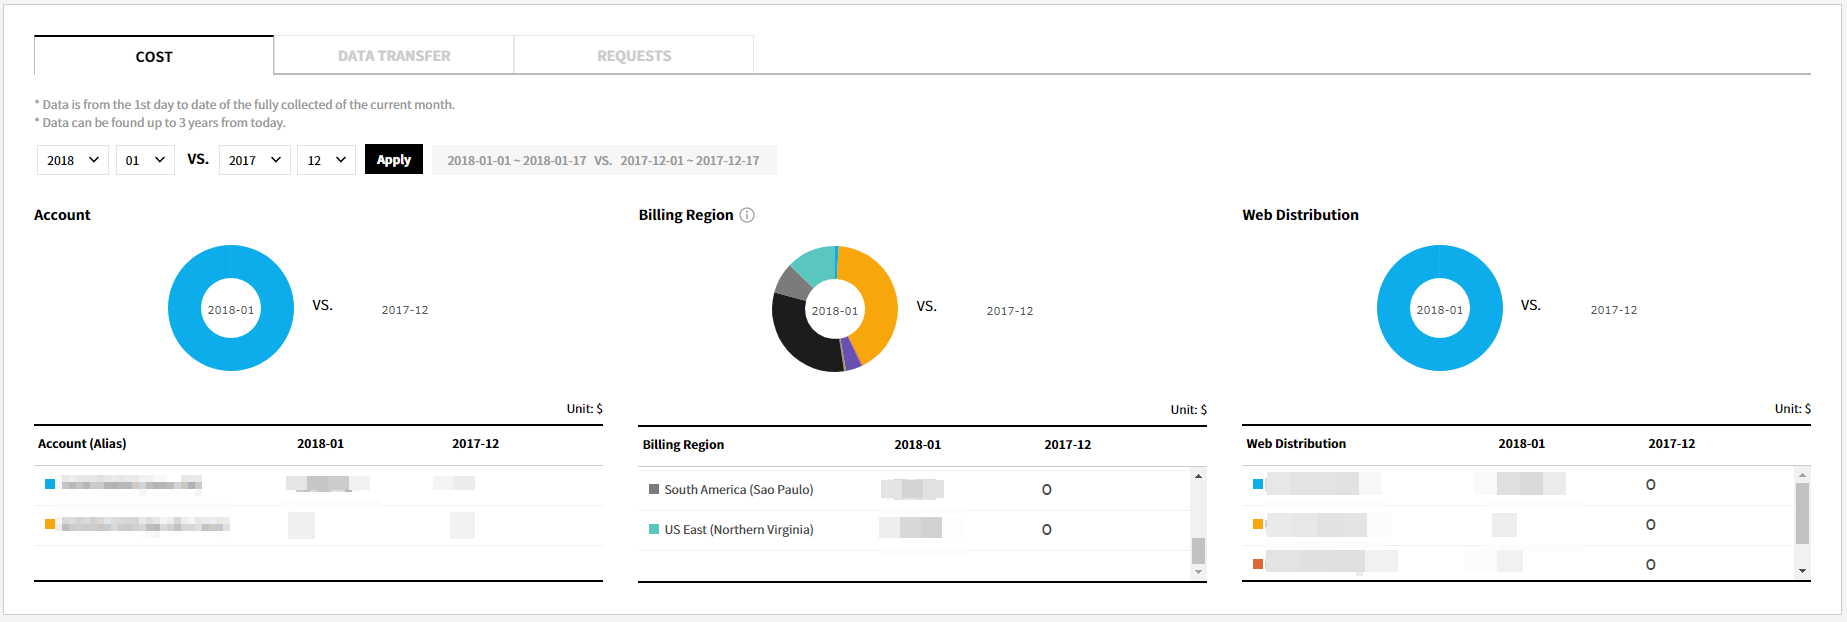
• Cost: You can check and compare the costs by each account, region and web distribution for the selected month.
• Data Transfer: You can check and compare the amount of data transferred by each account, region and web distribution for the selected month.
• Requests: You can check and compare the number of requests by each account, region and web distribution for the selected month.
Amazon CloudFront Usage Trend
You can check the daily, hourly or weekly costs, amount of data transferred, and number of requests.
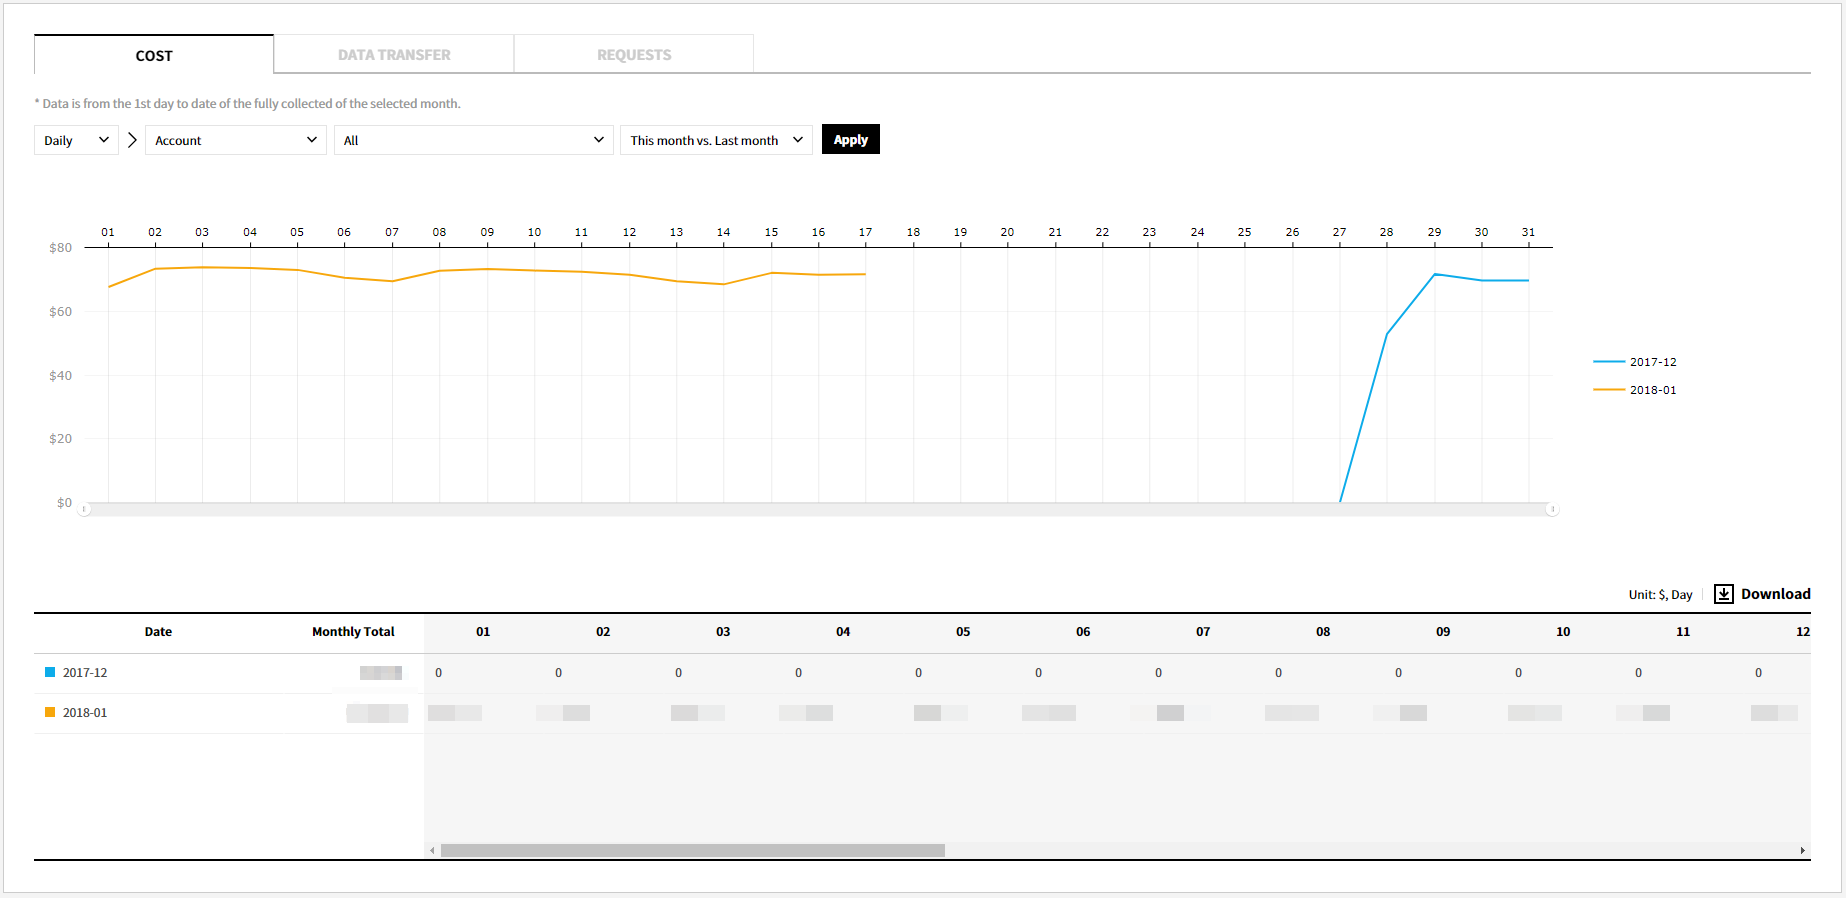
• Cost: You can check the billing trend according to the selected method.
- Daily: You can check the daily fees for this month and previous month.
- Hourly: You can check the hourly fees for up to 8 days from the selected date.
• Data Transfer: You can check the trend of the amount of data transferred according to the selected method.
- Daily: You can check the amount of daily data transferred for this month and previous month.
- Hourly: You can check the amount of hourly data transferred for up to 8 days from the selected date.
• Requests: You can check the trend of the number of requests according to the selected method.
- Daily: You can check the number of daily requests for this month and previous month.
- Hourly: You can check the number of hourly requests for up to 8 days from the selected date.
• Drop-down list by conditions: You can view the data that will be displayed on the chart based on the condition listed below. Click the drop-down list located on the top of the graph to set conditions.
- Daily: Account, Region, Web distribution, Time gap
- Hourly: Account, Region, Web distribution, Select date
Budgeting
Cost Management > Budgeting
You can enter a monthly budget per cloud service, and check and analyze actual costs compared to your budget. By setting the alarm, you can receive a notification via SMS or e-mail when cost exceeds a certain ratio or amount within the budget you set in advance.
Budget Overview
You can compare actual monthly costs against your budget in charts.
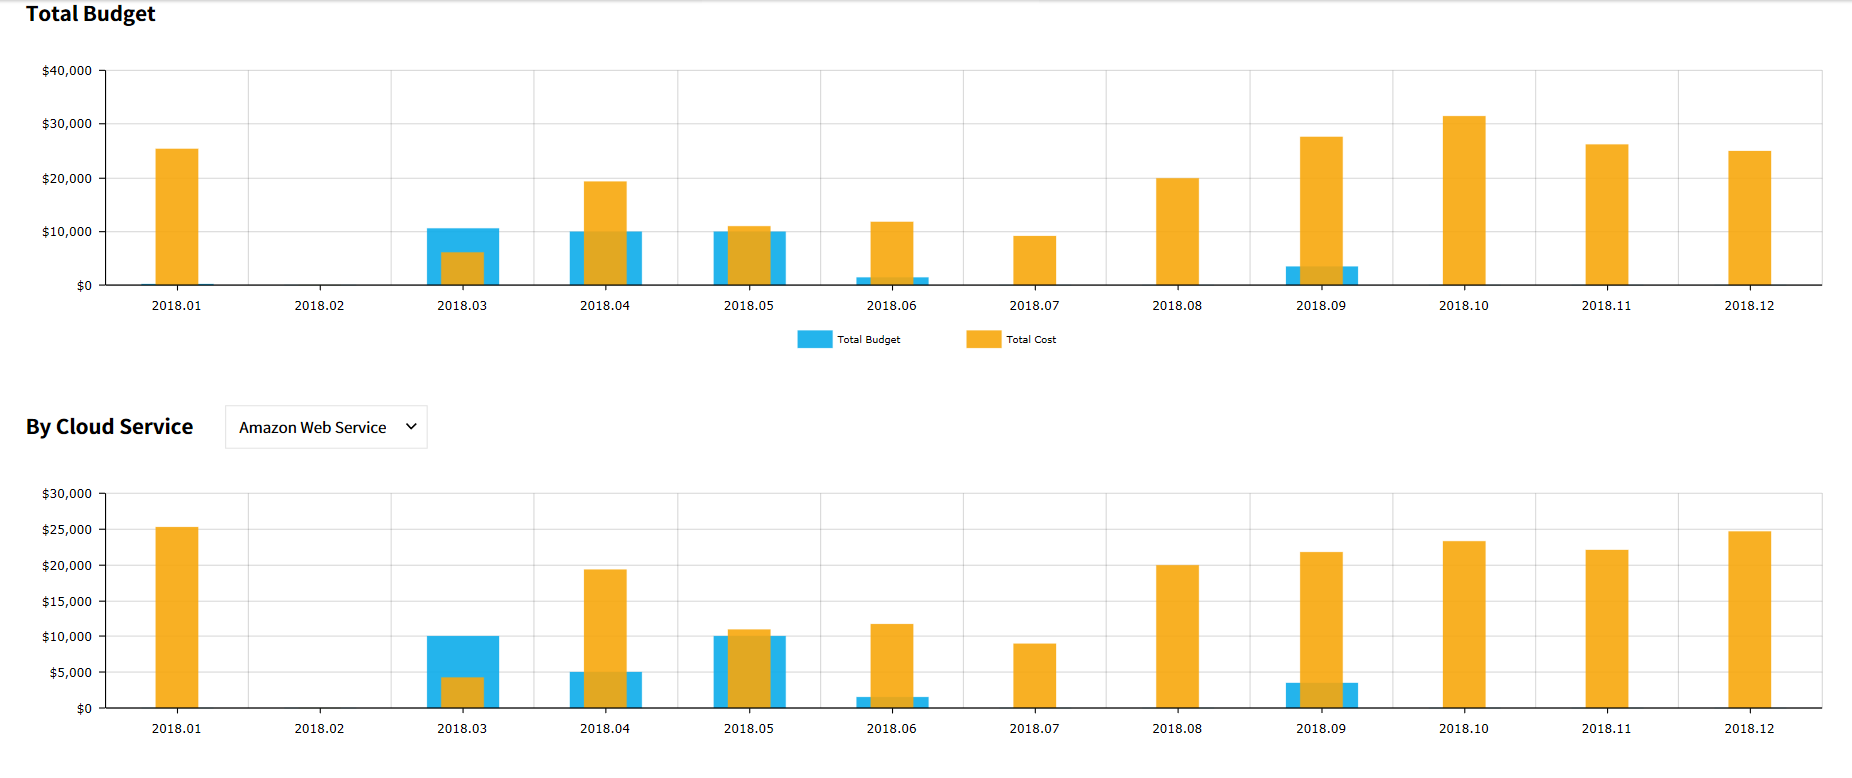
• Select Year: Click the drop-down menu on the top-left corner to set a year checking total budget for the selected year and charges by cloud service.
• Total Budget: You can check and analyze total budgets and actual costs of all cloud services in charts.
• By Cloud Service: You can compare the budget and actual cost of each cloud service with the graph. You can compare budgets by cloud services against actual costs.
Budget Setting
You can enter a monthly budget for each cloud service.
• Select Year: You can select a year you want to set a budget. Budgets can be set for up to 3 years.
• Budget Table: You can enter a monthly budget for each cloud service. Double-click a cell to enter the budget. Then, click the [Save] button on the top-right to save changes.
Alarm List
With Alarm List, you can set criteria to receive alarms regarding budget usage.

• Add New Alarm: You can set a new budget alarm. By clicking the button, you can enter details for a new alarm.
• Alarm Name: It indicates the name of a new alarm.
• Warning: It indicates whether an alarm is On/Off, and allows to categorizing a level of alarms as well.
• Alarm Mode: You can select how you receive an alarm via SMS or email.
• Delete button: Bring your mouse over the alarm name, the button will be displayed as active. By clicking the button, you can delete the alarm.
• Edit button: Bring your mouse over the alarm name, the button will be displayed as active. By clicking the button, you can edit the alarm.
Alarm Recipient
You can manage who receives alarms and takes actions.
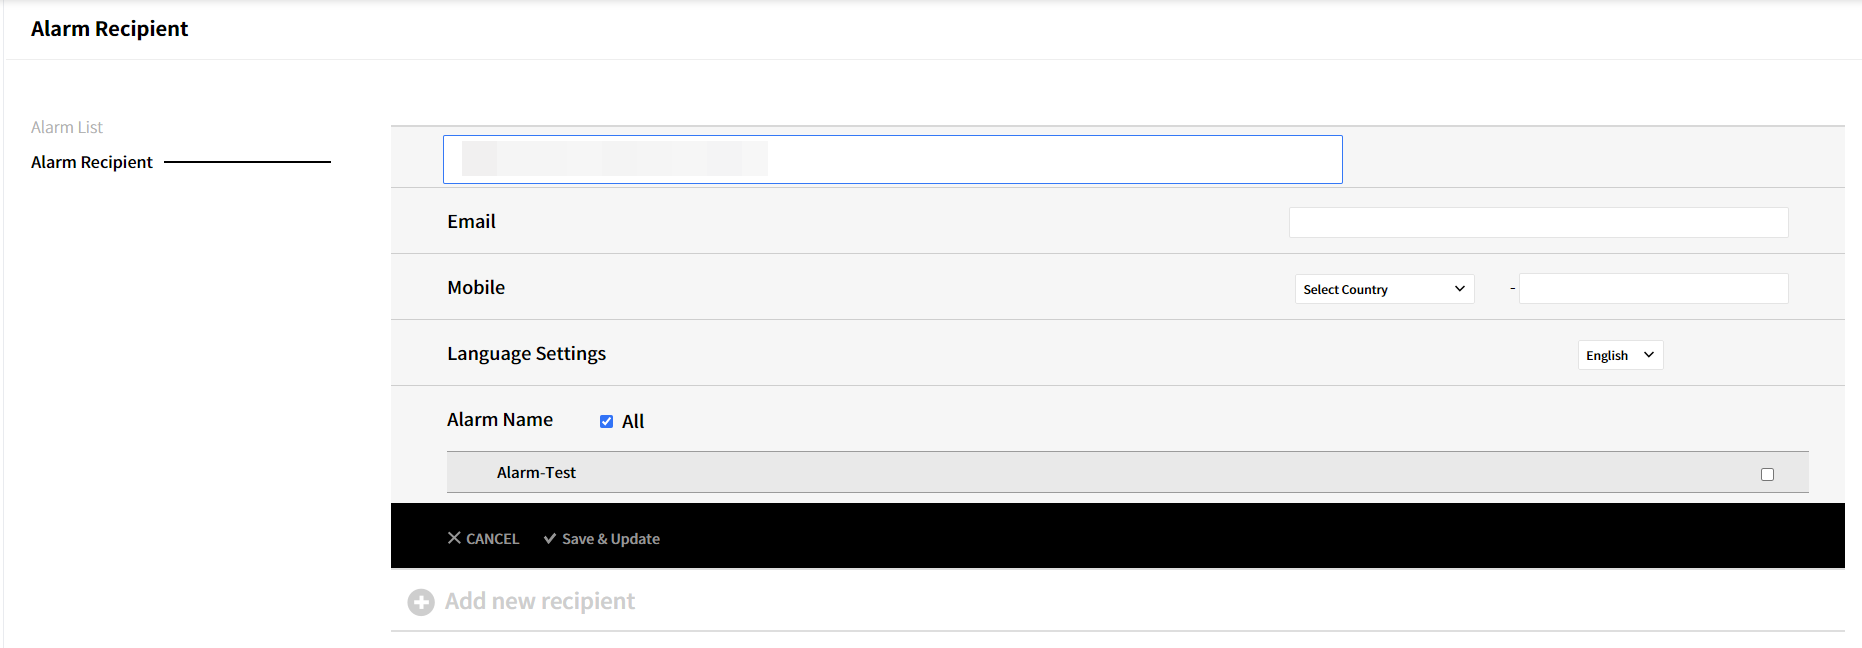
• Add New Recipient button: You can add a new alarm recipient. By clicking the button, you can enter contact information of a new recipient.
• Name of Recipient: Enter a name of an alarm recipient.
• Email: Enter e-mail address.
• Cell Phone: Enter a mobile phone number of a recipient.
AutoSpot
Cost Management > AutoSpot
Depending on your country or region, this feature may not be available.
Getting Started with AutoSpot
AutoSpot helps you to optimize cloud resource costs, and save up to 80% of your cloud resource costs compared to the On-Demand instances by using the excess capacity of cloud service providers. AutoSpot predicts the resource interruption before 15 minutes and migrates the running resource automatically to other Spot Instances, Reserved Instance, or On-demand instances, and therefore guarantees high availability and non-stop service.

Adding AWS Cloud Account
📜 Note: Before using AutoSpot, make sure that you have registered an AWS cloud account on the Service Portal > Cloud Account menu.
Click the [Add Account] button to add a new AWS account.
![]()
Select AWS.
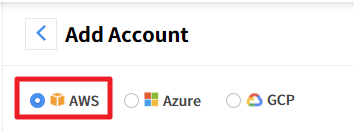
- Add your AWS account with Add via CloudFormation or Add Manually.
Add via CloudFormation
① By using CloudFormation, you can automatically add your AWS account.

② Click [Create External ID] button to create an external ID for linking your account to AutoSpot.

③ Click [Open Template] to move to the AWS console, and sign in to the AWS console with your AWS account.

④ On the AWS console, select the ‘I acknowledge that AWS CloudFormation might create resources’ checkbox as shown in the figure below, and click the [Create] button.

④ Enter AutoSpotRoleArn value in the field blow after the status is changed to Create_Complete.

Add Manually
① Users can manually add an account to AutoSpot.
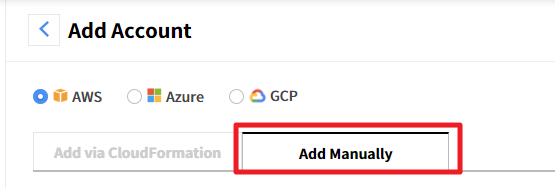
② Click [Create External ID] button to create an external ID for linking your account to AutoSpot.

③ Click the [Open IAM Console] button to move to AWS console.

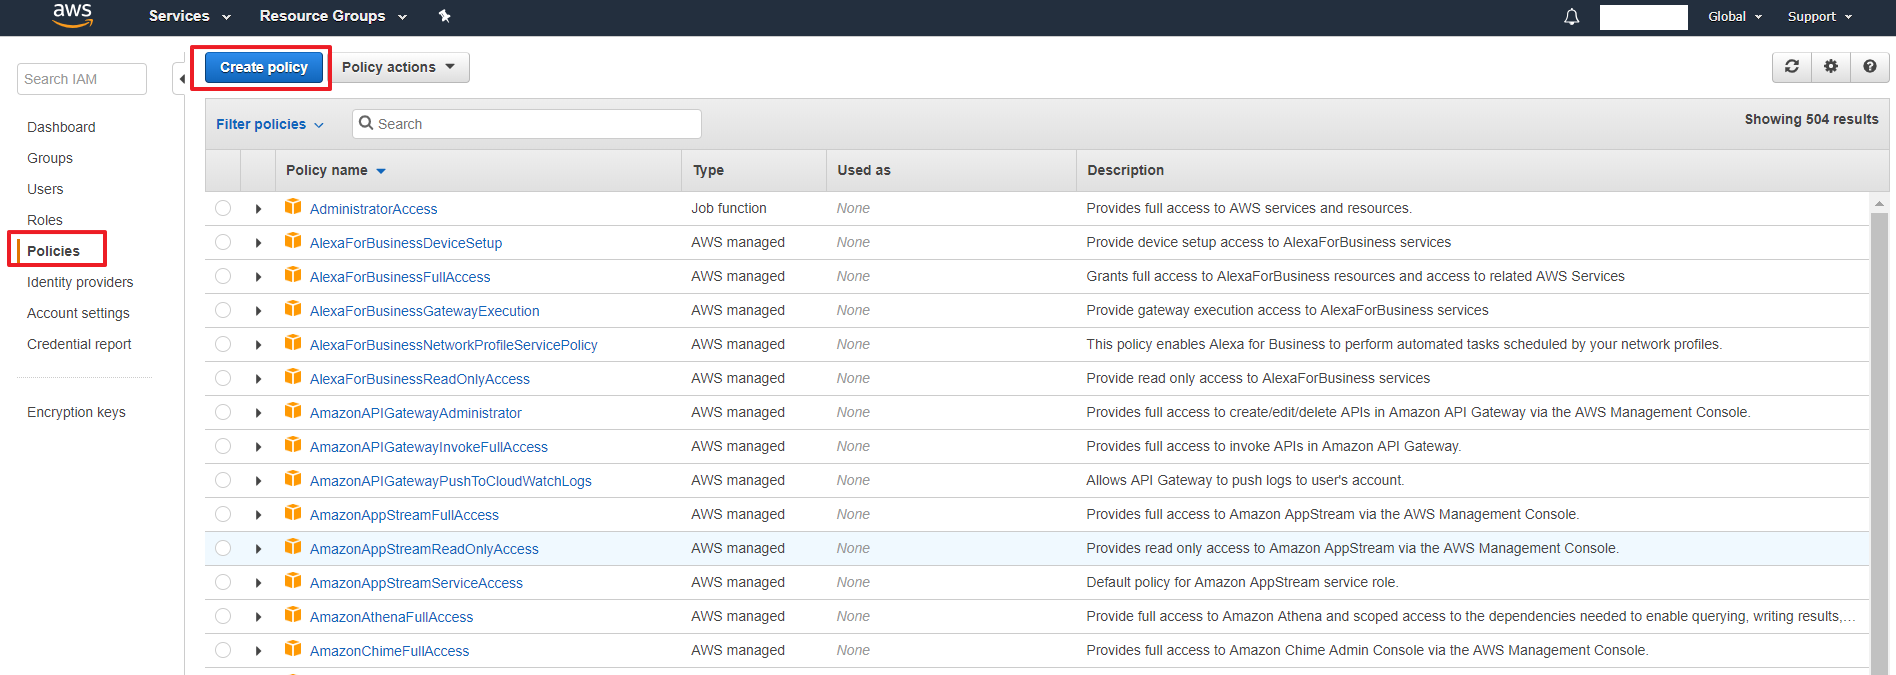
④ On the AWS console, select Policies on the navigation bar and click the [Create Policy].
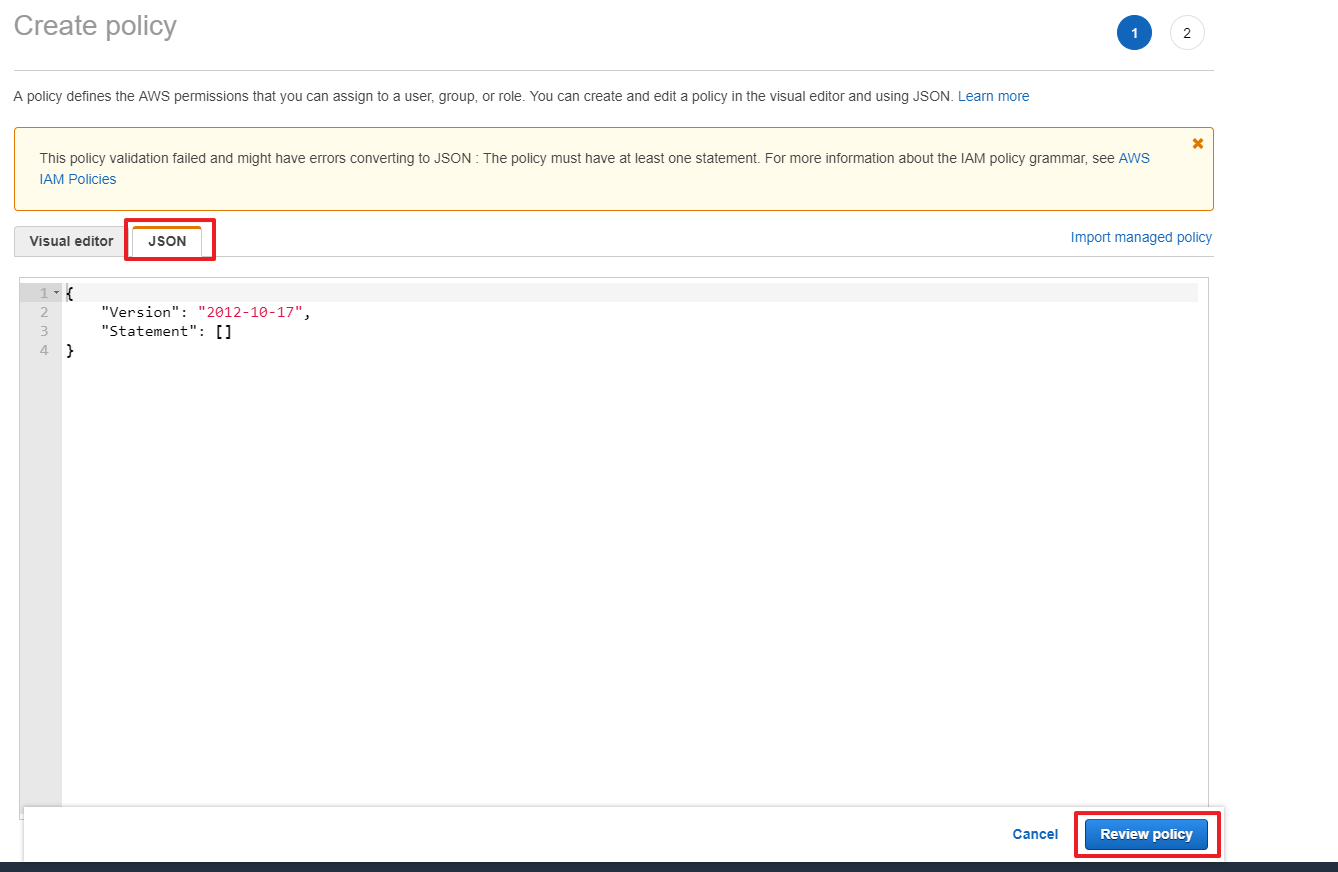
⑤ On the Create Policy screen, click the JSON tab and copy and paste the policy, and then click the [Review Policy] button.
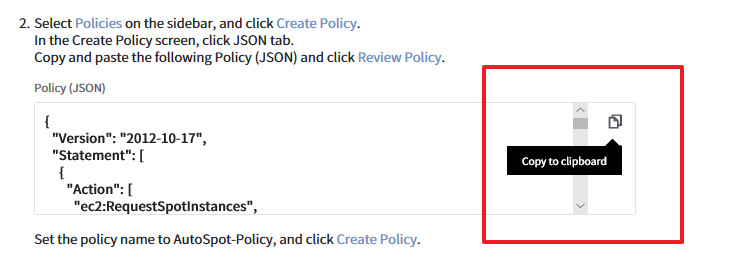
⑥ As shown in the figure below, hover the mouse over to the icons located on the right side, then Copy to Clipboard or View in Popup message will be shown. Click these buttons to copy the policy and then paste it into the JSON tab on the AWS console.
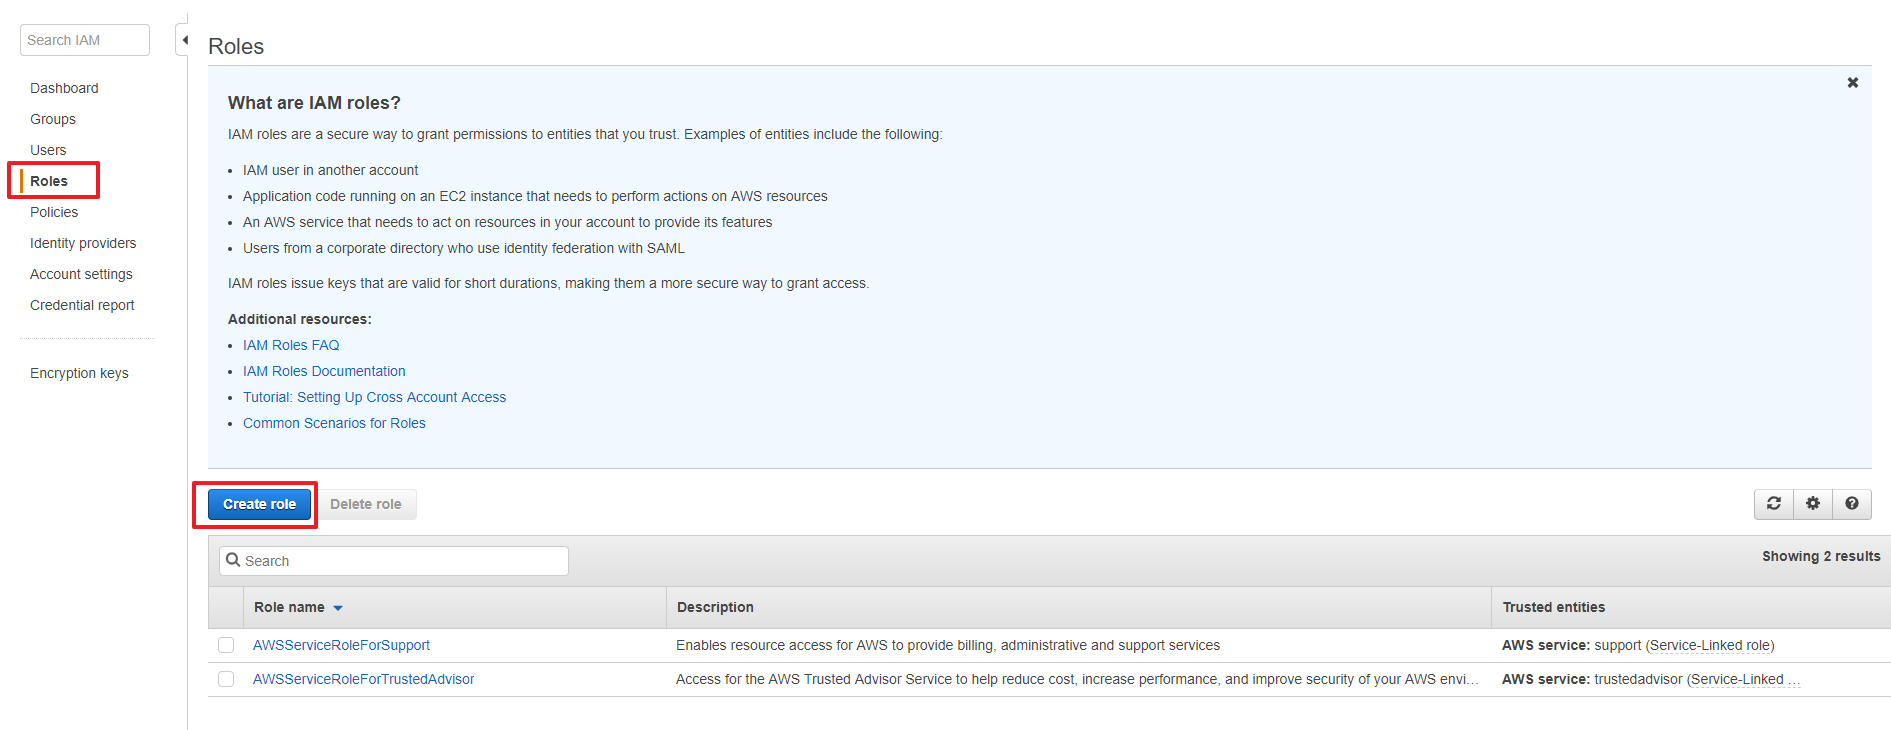
⑦ Choose Role on the navigation bar and click the [Create Role] button.
⑧ Select [Another AWS account] and enter an account ID.
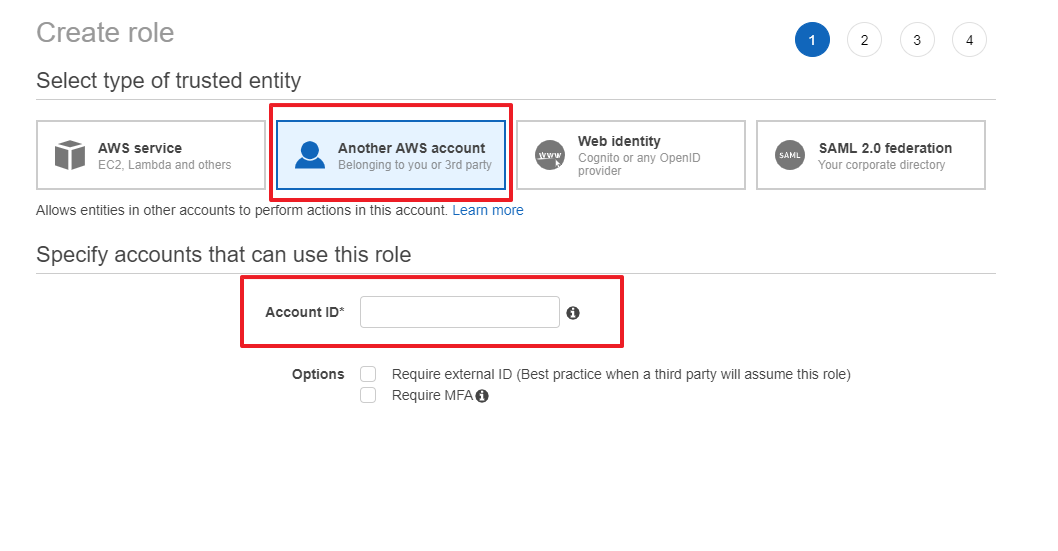
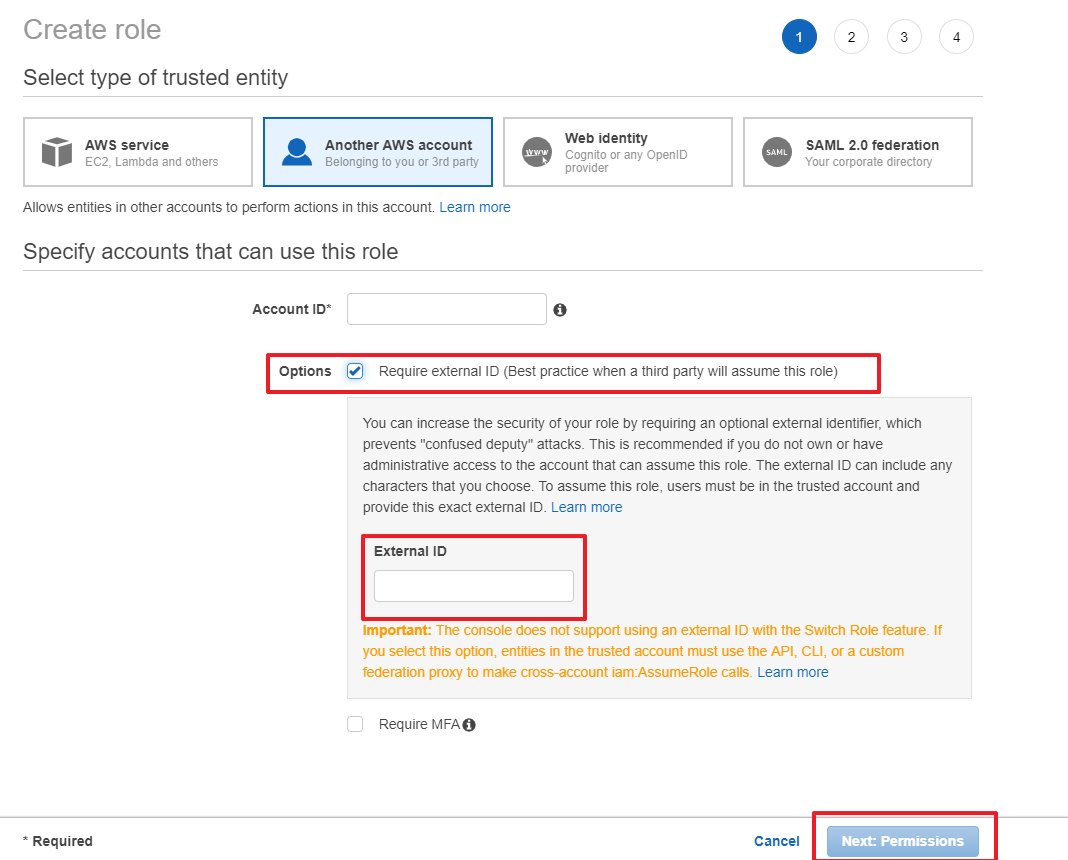
⑨ Select Require External ID checkbox from the Options, and click the [Next: Permission] button after entering External ID.
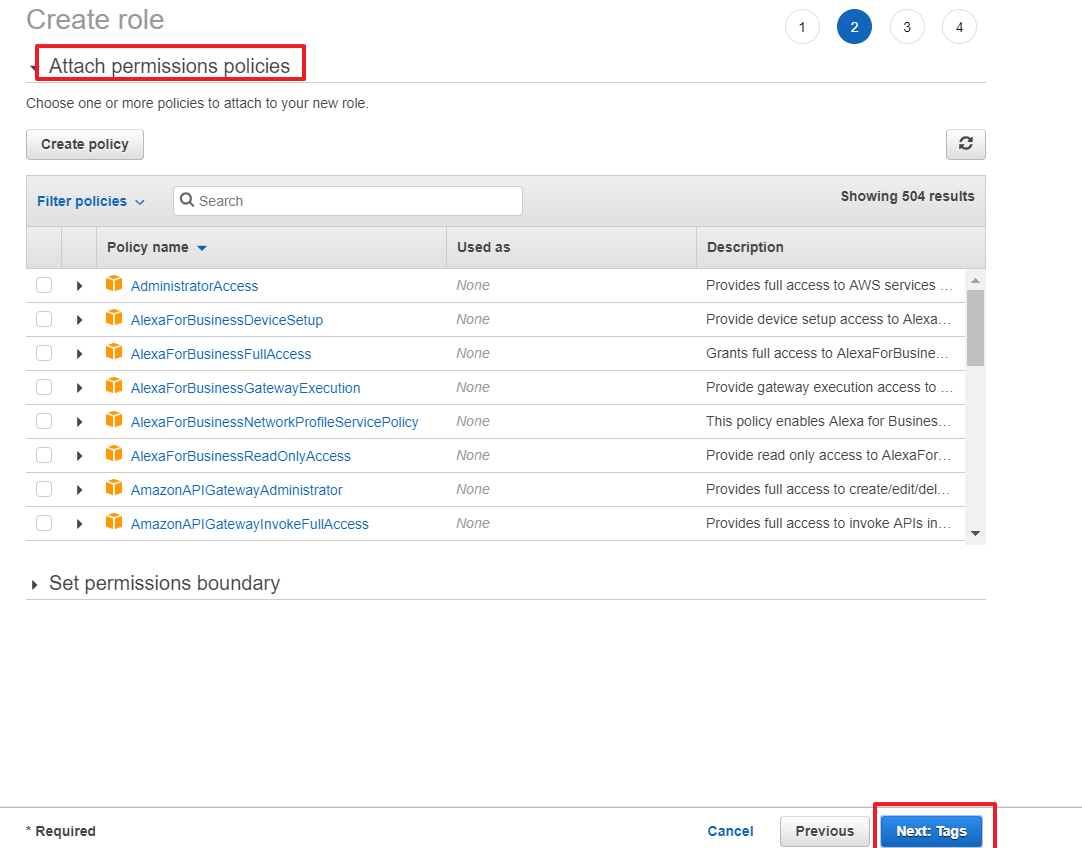
⑩ On the Attach Permission Policies page, select the AutoSpot policy and click the [Next: Tag] button.
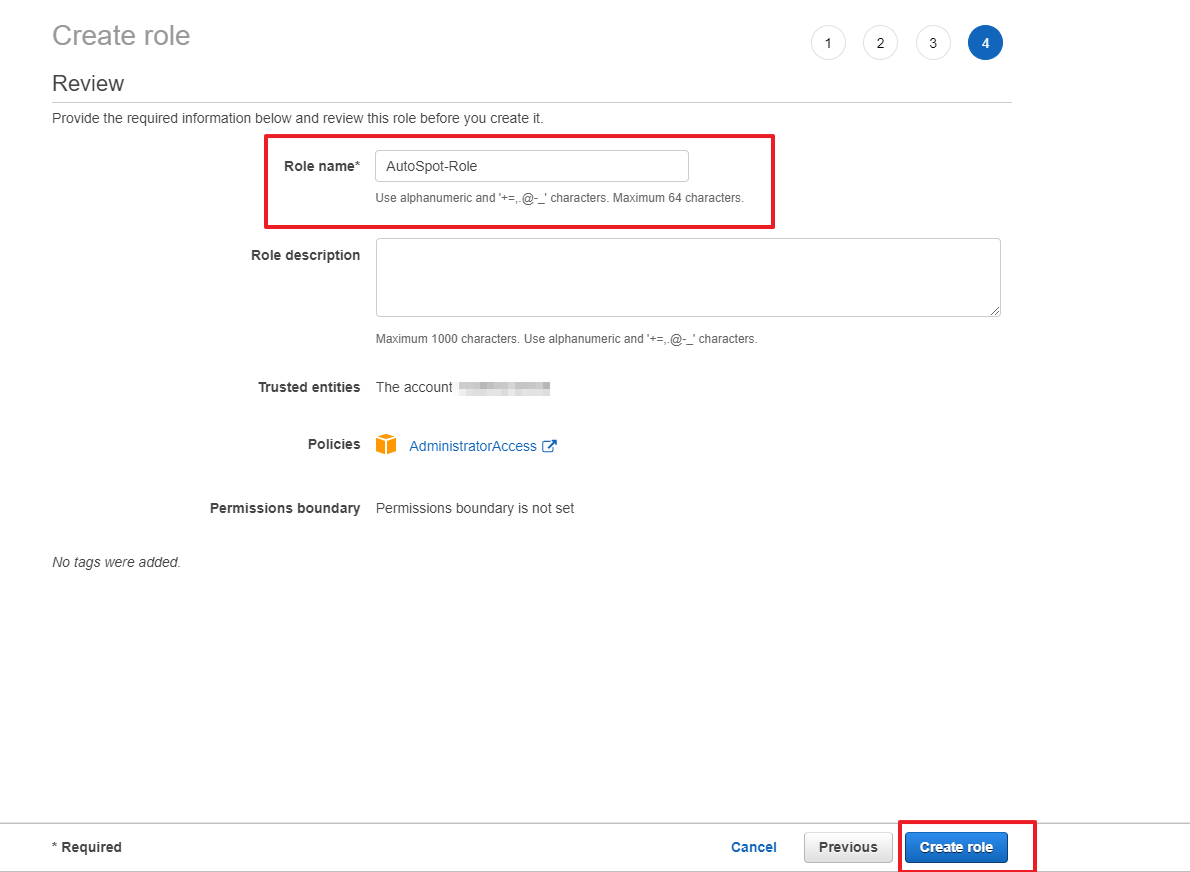
⑪ Enter AutoSpot-Role as a role name and click the Create Role button. Paste RoleArn of AutoSpot-Role in the input field.
⑫ Created accounts will be displayed on the list. Click one of the accounts from the list to use Spot Analyzer, Elastigroup, and Ocean of AutoSpot as shown below.

Tutorials of Elastigroup for AWS
Create a Stateful Elastigroup from Scratch
Introduction
This tutorial covers how to create a stateful elastigroup using the Stateful Creation Wizard, that is able to persist Volumes, Elastic IPs, Private IPs and more, across spot interruptions. Using Stateful Elastigroups, allows you to run a variety of stateful workloads using managed and SLA-driven Spot Instances.
First, we’ll start by creating a new Elastigroup, selecting ‘Stateful’ under the Use Cases tab.
Step 1: General Settings
- Enter a Name for your Elastigroup and select a Region.
- Set the initial capacity for your group.
You can choose to measure capacity either in the number of instances or via a total count of vCPUs - Select your desired VPC to run your Elastigroup in, as well as the Product type and the Image you wish all instances to be instantiated from.
- Select the security groups to be attached to the instances and the key pairs associated with them.
- Lastly, you can optionally choose to add tags to your stateful group’s instances.
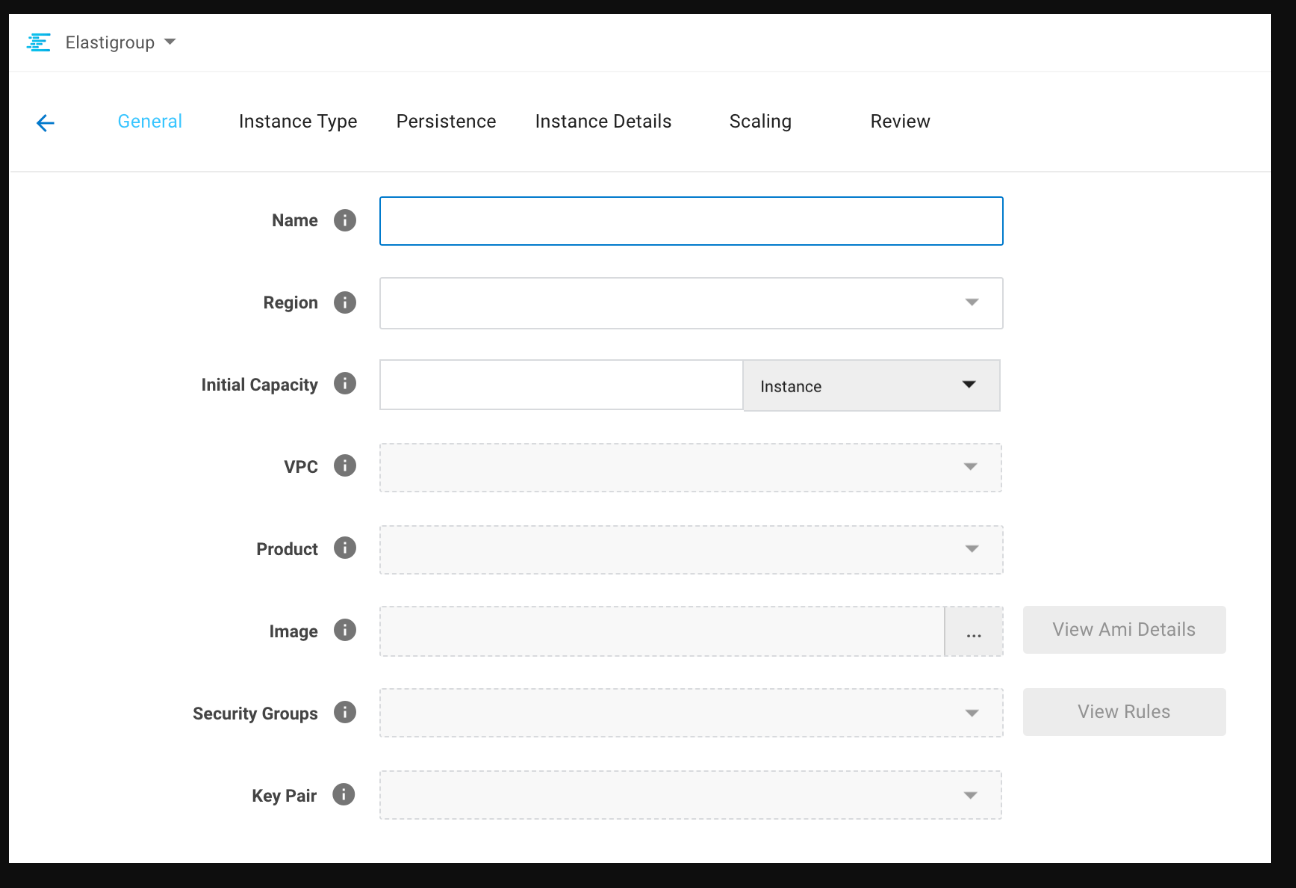
Step 2: Instance Type
- Select the On-Demand instance type you would like to be used in case there aren’t any spot instances found for your instance type.
- Select the Availability Zones you’d like Elastigroup to consider when launching your instances. To maximize your savings Elastigroup calculates the cost of launching Spot instances in the selected Availability Zones. We recommend selecting multiple Availability Zones to increase the number of Spot instance markets available for Elastigroup to consider.
- Select the instance types you would like Elastigroup to consider when launching your spot instances. We recommend selecting multiple instance types to provide Elastigroup with as many Spot instance market options as possible.
📜 Note: We highly recommend selecting multiple Availability Zones and multiple instance types, which provide Elastigroup with more Spot markets and result in lower prices and greater availability.
Step 3: Persistence
In this step, you are required to choose which type of persistence you would like your elastigroup to maintain.
Storage Persistence
Choose whether you would like elastigroup to persist your instance root volume or data volumes, upon interruption.
You can also pick the type of method in which data volumes are maintained, connected, and backed up.
Network Persistence
Choose whether you would like elastigroup to persist network settings, such as Instance private IPs.
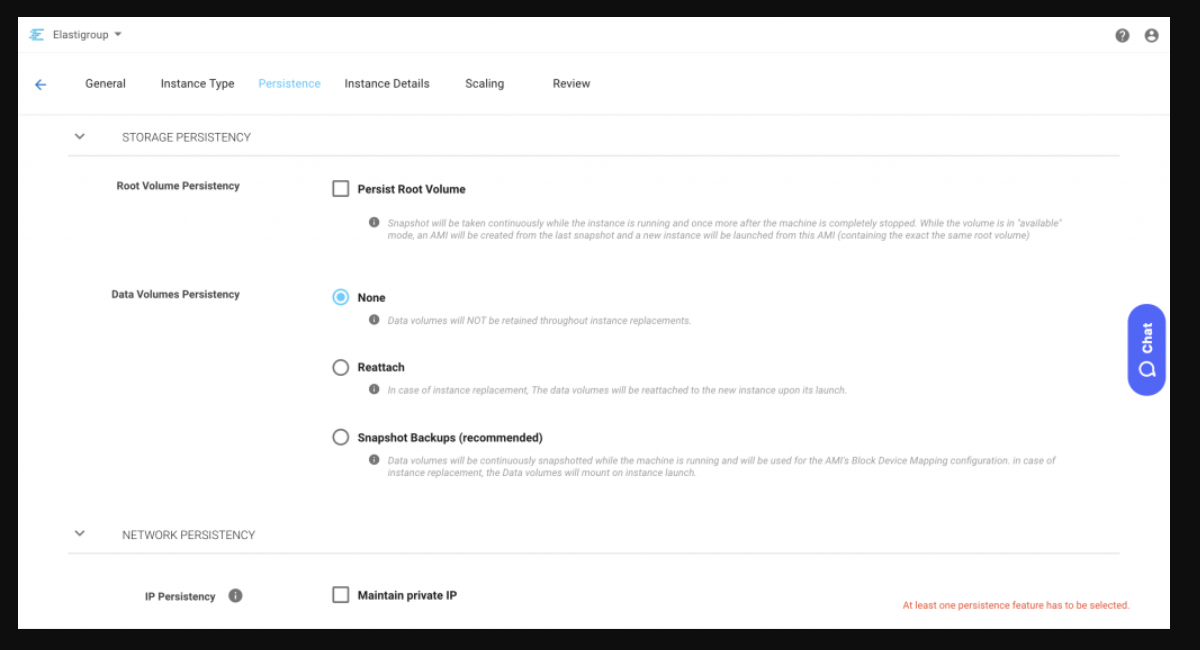
📜 Note: At least one persistence feature has to be selected in this step.
Step 4: Instance Details
- Select launched instance details, like IAM role, tenancy, whether to apply detailed monitoring EBS optimization or EC2 Autohealing.
- Fill in any userdata or shutdown scripts you would like to run upon instance starting or terminating.
Step 5: Scaling policies (Optional)
Optionally create a Target Scaling Policy or a Simple Scaling Policy. For more on Scaling with Elastigroup see the documentation here.
Step 6: Review (Optional)
You can now review your Elastigroup configuration, and finish the creation process.
Elastigroup Actions Menu
1. Deploy/Roll Elastigroup
1.1 Deploying/Rolling An Elastigroup
This tutorial covers executing a Blue/Green deployment for an Elastigroup. Deployments can be performed from the AutoSpot Console by selecting [Deploy] under the Actions menu in the Management view of the desired Elastigroup.
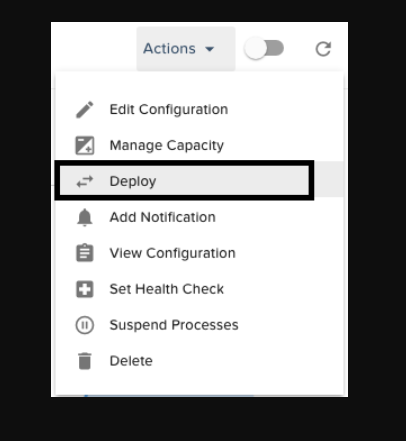
Using the Deploy option you are able to initiate a Deployment or review previous Deployments.
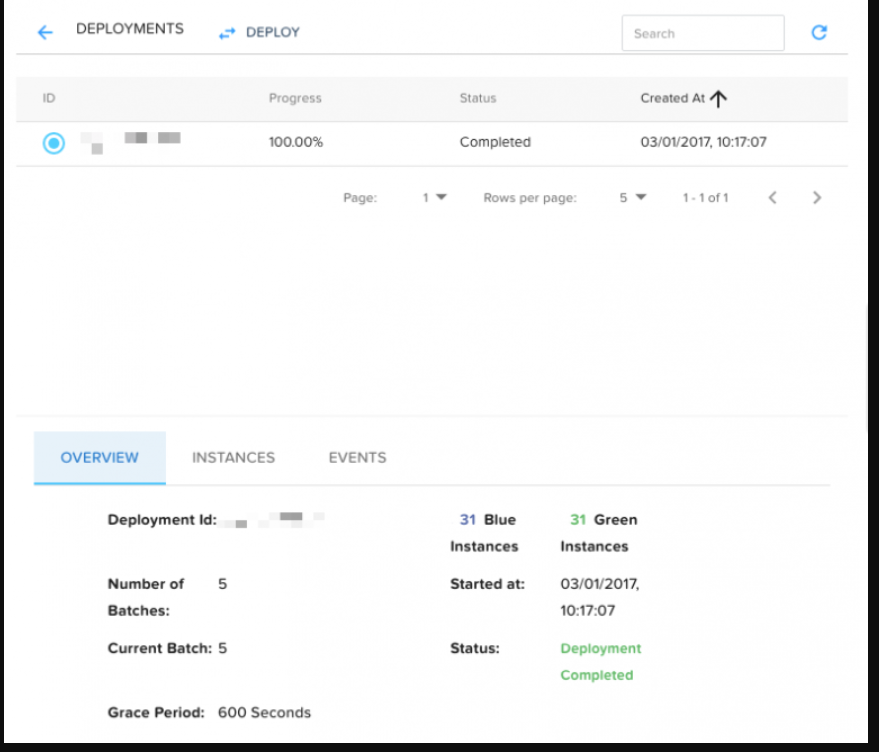
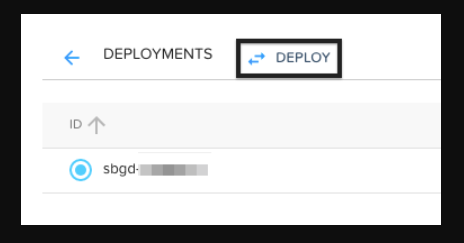
To start a new Deployment simply click the [Deploy] button.
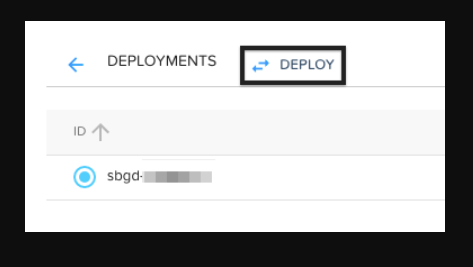
When a deployment process is running, no update can be applied to the group (i.e – capacity update).
You can now set the deployment parameters:
• Batch Size: The size of each Batch in the deployment as a percentage of the total number of instances in the group, meaning a group with 20% will have 5 separate batches.
• Grace Period: The limit of time to wait for an instance to be deemed healthy according to the health check setting before the deployment starts the next batch.
📜 Note: If there is no “Health check” setting set in the Elastigroup, each batch will wait for the entire grace period to end.
This will trigger a Blue/Green deployment. Elastigroup spins up new instances (green) into your cluster, and monitors their status using the configured “health check” (EC2, ELB, MLB, etc..). Once the instances are registered as healthy the old instances (Blue) will be scaled down. This process is split into configurable portions each representing a Batch.
When Should I Roll My Group?
A roll is required once the update may affect the instance configuration, specifically, while modifying the following parameters:
General Tab
Advanced:
- Cluster orientation
- Strategy (Spot Instances Percentage, OnDemandCount, utilizeReservedInstances)
Compute Tab:
Availability Zones
On-Demand Type
Spot Types
Launch Specification (Image, Security group, key pair, tags)
Additional Configurations:
- IAM role
- EbsOptimized
- Detailed monitoring
- Public IP
- Tenancy
- User Data
- Signal and Signal timeout
Stateful:
- Assign specific Private IPs only
⚠️ Attention
• One failed batch is enough to fail the deployment! Make sure you provide ample Grace Period for the instances to become healthy.
• Your Elastigroup won’t perform new rolls or any scale-down activities until the failed roll will be completely stopped or resolved.
• Scaling behavior: The scaling down policy will be suspended until the deployment is finished. We have created this mechanism to allow you to scale up in case needed and avoid losing servers at the same time.
1.2 Roll Failure
There are several reasons why a roll may fail. Some of the more common issues are:
① A problematic version of your application (new AMI, or codebase).
② The Roll grace period was too short.
③ A blue-green deployment will fail if more than 50% of the instances in a specific batch are unhealthy after the grace period.
Troubleshooting Roll Failure
If a deployment fails, the instance remains running for troubleshooting. Some instances in the Elastigroup may have the old configuration, while the rest may have the new configuration. To fix the failed roll, stop and Detach the old/new instances. Update the Elastigroup configuration and re–deploy to apply the configuration updates.
📜 Note: Elastigroup won’t perform new rolls or any scale-down activities until the failed roll will be completely stopped or resolved.
2. Manage Group Capacity
2.1 Update The Elastigroup Capacity Configuration
The Manage Capacity option in the Elastigroup’s Actions menu simplifies the process of updating the Elastigroup Target, Minimum, and Maximum configurations.
Before Updating the Elastigroup Capacity
• If the group has an unexpected capacity configuration, check for scheduled tasks that may have triggered capacity updates.
• Note that capacity updates affect the limits that the Elastigroup is able to scale to.
Updating Elastigroup Capacity
To update the Elastigroup capacity, select the desired Elastigroup in the Elastigroups view. Under the Actions menu, select [Manage Capacity].
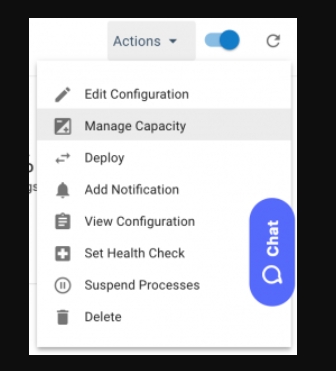
Modify the Target, Minimum and Maximum as needed and click [UPDATE].
⚠️ Warning: The capacity update will take effect immediately. Once the update is initiated, the Elastigroup will begin to scale up or down accordingly.
3. Set Health Checks
3.1. Configure Elastigroup’s Custom Health Checks
AutoSpot offers an option for you to use our own custom Health Check Service (HCS) in your Elastigroup. You can read all about it right here: AutoSpot Custom Health Check Service – HCS. After setting up HCS in your VPC you can reference it for the desired Elastigroup. To get started enter the Management view of the desired Elastigroup and under the Actions menu select [Set Health Check].
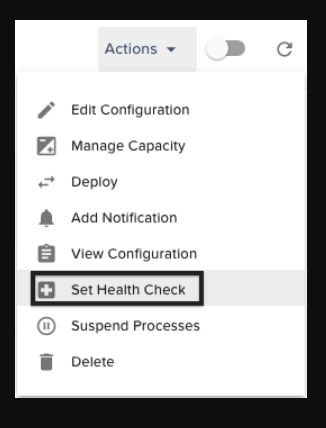
The Health Check Service window will open. Set the following parameters:
| Parameter | Description |
|---|---|
| Name | Name your Health Check for convenience. |
| ProxyAddress | The public host/IP of your selected instance you installed service on. This will be set like http://publicip. |
| Protocol | Which protocol will AutoSpot use to check the healthiness of your instances. Supported for now are HTTP and HTTPS. |
| Endpoint | The path of the Health Check in each instance. |
| Interval | The interval (in seconds) between the checks. Minimum of 10. |
| Timeout | The timeout (in seconds) to wait for each instance to answer the check. If it did not answer, we mark this attempt as unhealthy. |
| UnhealthyThreshold | The number of consecutive failed health checks that must occur before declaring an instance unhealthy. |
| HealthyThreshold | The number of consecutive successful health checks that must occur before declaring an instance healthy. |
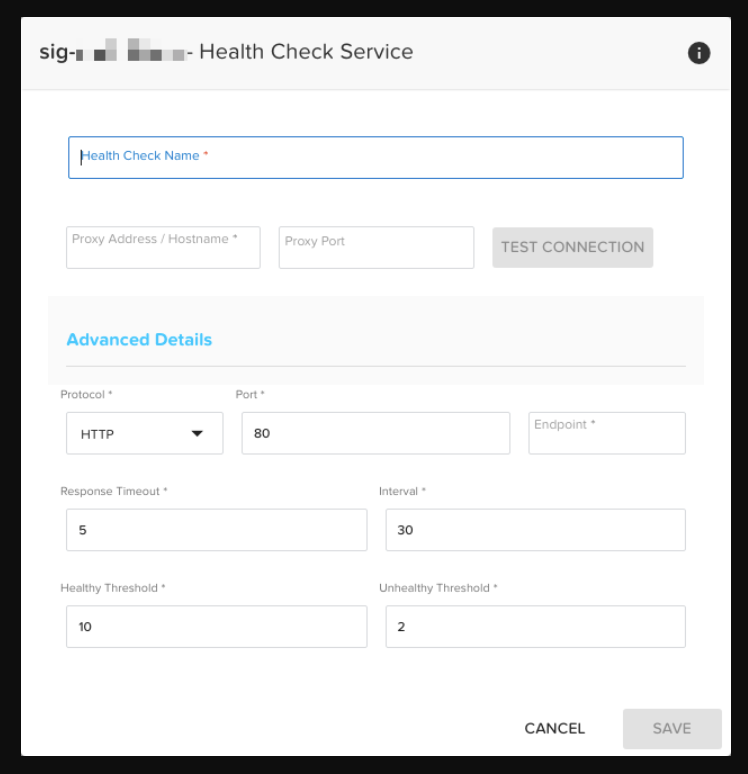
Save the settings and make sure that the HCS is also being used in the Auto-Healing setting of the group.
4. Suspend Processes
Suspend processes give you the option to easily put any scaling or auto-healing actions on hold. You can access the dialogue under the Elastigroup view Actions button.
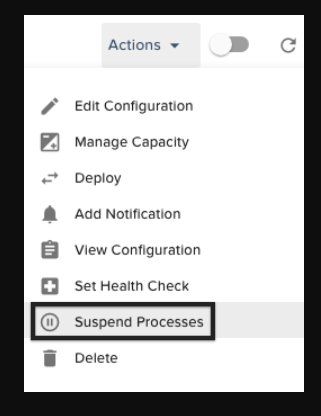
Simply select to [Pause] or [Play] the scaling activities or auto-healing instance replacements.
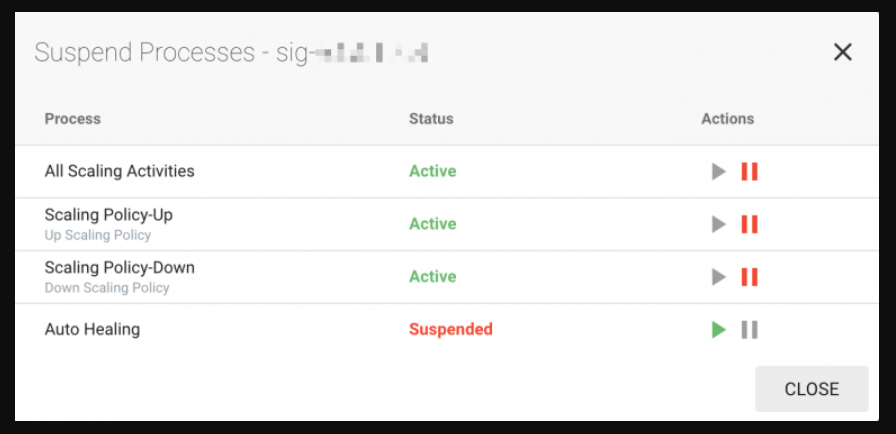
📜 Note: while scaling actions are suspended – you will not be able to monitor the metric in Scaling graph under the Monitoring or Instances Tab.
5. Notifications
5.1. Creating Notifications
5.1.1. Setting Up Elastigroup’s Notifications
Elastigroup’s Notifications allow you to receive notifications for different events in the Elastigroup based on SNS or other subscriptions such as Email or HTTP endpoints. This article covers getting started with Elastigroup’s Notifications and customizing the notifications content to meet your needs.
Prerequisites
- A running Elastigroup
Step 1: Open the Notifications Modal
In your Elastigroup click on the [Actions] button and select [Add Notifications].
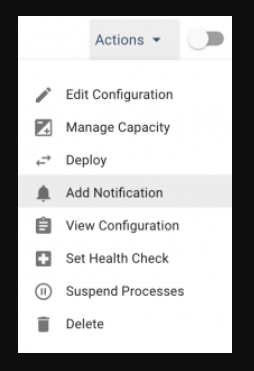
Click the [Subscribe] or [Subscribe to a Notification] button.
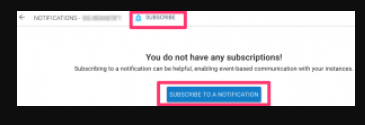
📜 Note: Existing notifications can’t be modified. To make changes, create a new notification and remove the old one.
Step 2: Configure Notification
For SNS select aws-sns as the Protocol Type and the SNS Topic ARN the notifications will be posted to. To post the notifications to an HTTP/HTTPS endpoint, select web as the Protocol Type and enter the endpoint.
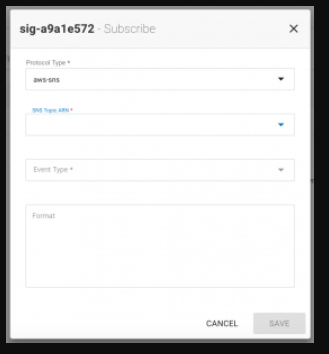
📜 Note:Setting up Notifications for additional Platforms such as “email” and “email-json” are currently only available via our API.
Step 3: Event Types
• Group Deployment Completed: Triggers a notification when a deployment process has finished successfully (For more information, see Deploy).
• Group Deployment Failed: Triggers a notification when a deployment process has failed to finish with errors.
• Group Update Completed: Triggers a notification when the Elastigroup updates successfully. Useful for monitoring Elastigroup updates by other users or provisioning tools.
• Instance Launch: Triggers a notification when a new instance is launched in the Elastigroup.
• Instance Launch Failed: Triggers a notification when an attempt to launch an instance in the Elastigroup fails.
• Instance Terminate: Triggers a notification when an instance is marked for termination. This notification is issued prior to Instance Terminated.
• Instance Terminated: Triggers a notification when one of the instances is terminated.
• Scale Failed - Group Max Capacity: Triggers a notification when the group hits the max capacity defined in the Elastigroup, preventing additional scale-up actions from taking place.
• Signal Timeout – Instance Not Ready: Triggers a notification when a signal reaches its timeout. For more on configuring signals for Elastigroups click here.
• Unhealthy Instance: Triggers a notification when one of the instances in the group is recognized as unhealthy based on the Health Check configured. The Unhealthy Instance event type also applies to HCS users. For more on configuring Health Checks see our documentation here.
Step 4: Format (optional)
In the “Format” field you can optionally change the default output of the notification.
The format of the notification content supports the following variables: instance-id, event, resource-id, resource-name, resource-id, subnet-id, availability-zone
Default Notification Content:
                    {
                         "event": "<event>",
                         "instanceId": "<instance-id>",
                         "resourceId": "<resource-id>",
                         "resourceName": "<resource-name>"
                    }
Custom Content Format Example:
                    {
                        "event": "%event%",
                        "resourceId": "%resource-id%",
                        "resourceName": "%resource-name%",
                        "myCustomKey": "My content is set here",
                       "AWS_Account_ID": "1234567890"
                    }
Instance Launch:
                    {
                    "default": "spotinst:notification:instance",
                    "event": "AWS_EC2_INSTANCE_LAUNCH",
                    "instanceId": "i-0d1c09565f353e90e",
                    "resourceId": "sig-675240da",
                    "resourceName": "ElasticSearch_Test"
                    }
Instance Terminated:
                    {
                     "default": "spotinst:notification:instance",
                     "event": "AWS_EC2_INSTANCE_TERMINATE",
                     "instanceId": "i-0d1c09565f353e90e",
                     "resourceId": "sig-675240da",
                     "resourceName": "ElasticSearch_Test"
                    }
5.2. Elastigroup Notifications For Slack
5.2.1. Get Elastigroup Notification in a Slack Channel
Elastigroup notifications can be sent automatically to a pre-defined Slack channel. In order to define the Channel, create a webhook URL here:
https://slack.com/apps/A0F7XDUAZ-incoming-webhooks
After getting the URL, navigate to Elastigroup settings > Account, and choose Notifications.
Check the Slack checkbox and paste your webhook URL.
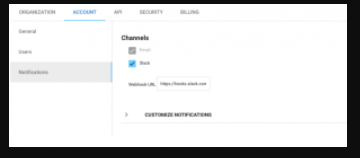
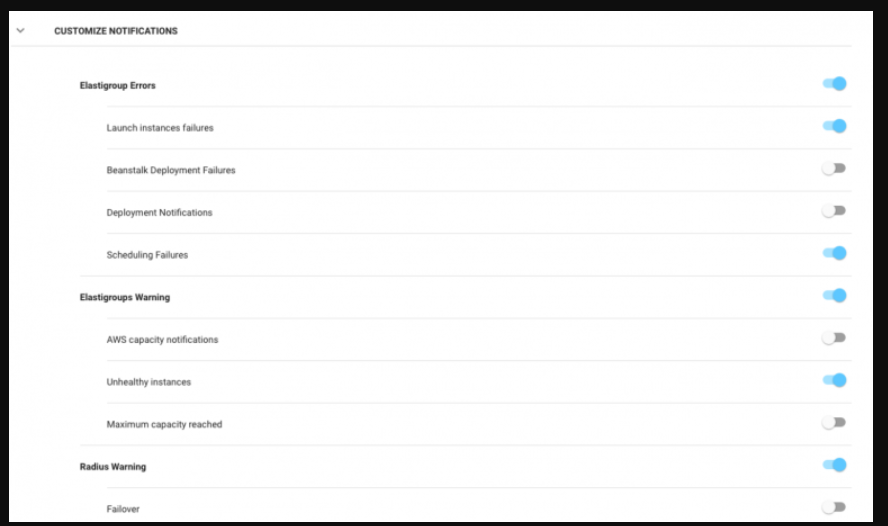
You can configure which notifications will be published:
5.3 Customizing Email Notifications
5.3.1. Configuring Custom Email Notifications
By default, AutoSpot will notify all the users in your account for every error or warning event (Unless they unsubscribe from the service). You can customize Elastigroup Notifications to send notifications for the events that matter to you.
Enabling Custom Email Notifications Per User
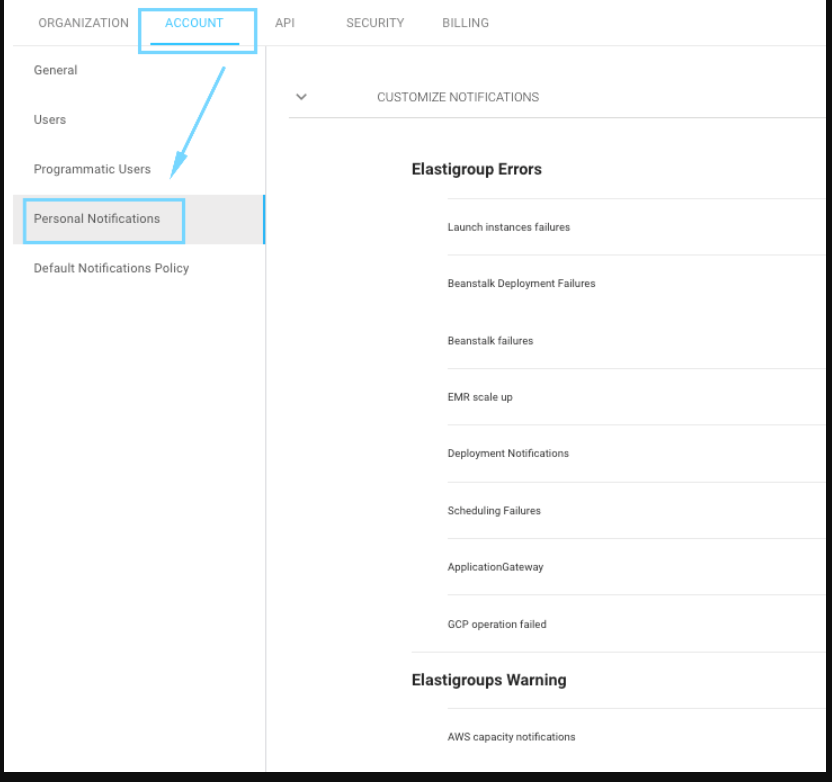
① Open the settings menu, navigate to the Account tab and select [Personal Notifications].
② Expand Customize Notifications and select what you want to disable (or enable).
Enabling Custom Email Notifications Per Account
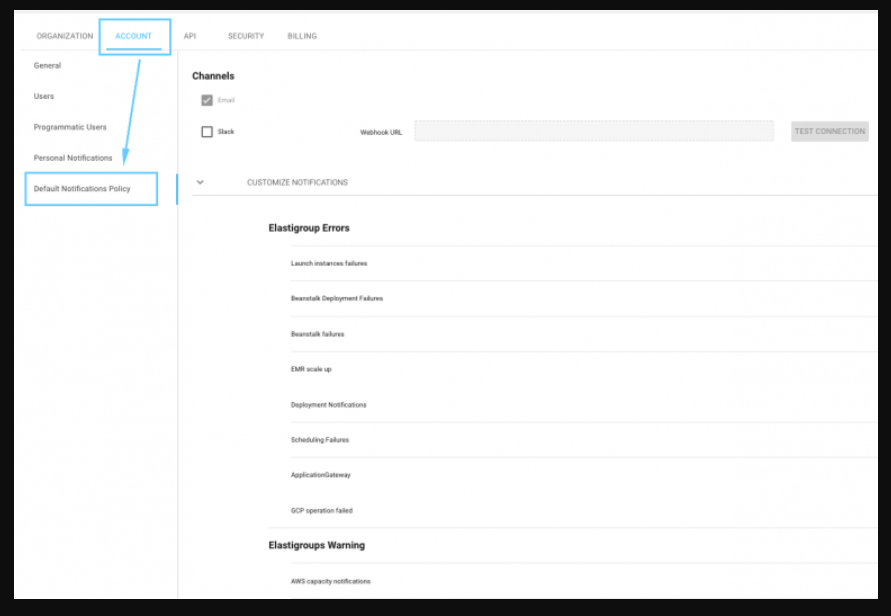
① Open the settings menu, navigate to the Account tab and select [Default Notifications Policy].
② Select the Notifications you would like to disable for all users connected to this account. This action can be done by Account Editors/Organization Admins.
📜 Note: The default account notification policy is available only for users who didn’t define their own Notification policy. Users can define their own Notification policy using “Personal Notifications” page.
KMS Encryption And AutoSpot
Introduction
AWS Key Management Service (KMS) is a service that makes it easy for you to create and control the encryption keys used to encrypt your data. You can easily use encrypted volumes with spot instances provisioned by AutoSpot. In order for AutoSpot to be able to utilize your encrypted volumes, you need to grant permissions to access the custom KMS used to encrypt the volumes.
How to use custom keys with AutoSpot?
Using custom keys requires adjusting the custom keys permissions to include the AutoSpot required roles.
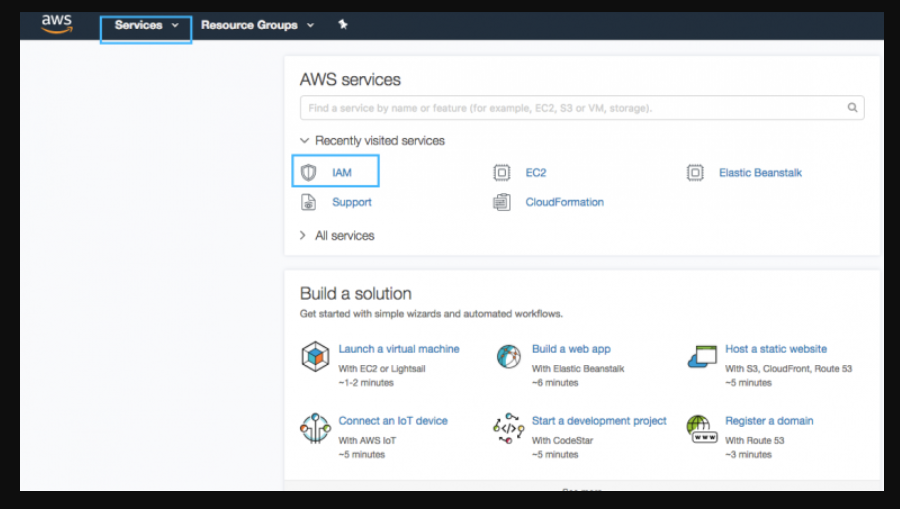
Step 1: Log in to your AWS IAM management console
Login to your AWS console and navigate to the IAM management console.
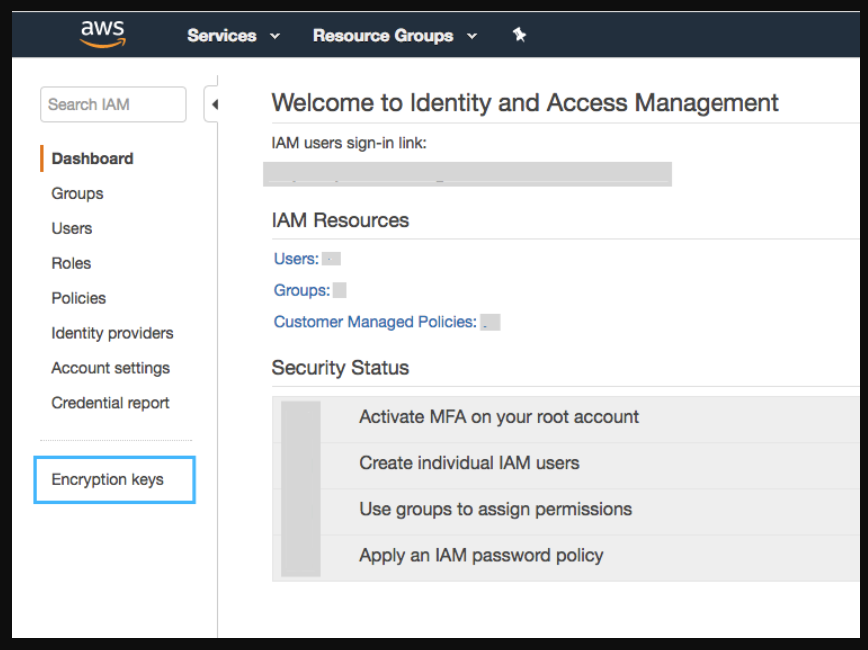
Step 2: Click on Encryption keys
Step 3: Click on the custom key you want to encrypt your volumes with
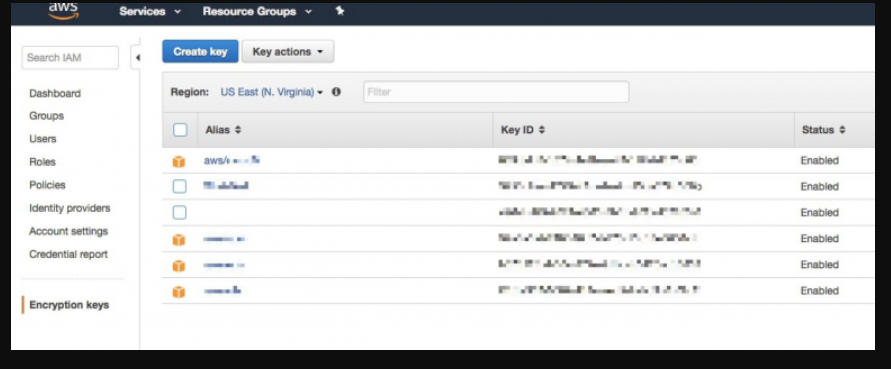
Step 4: Scroll down to Key Users
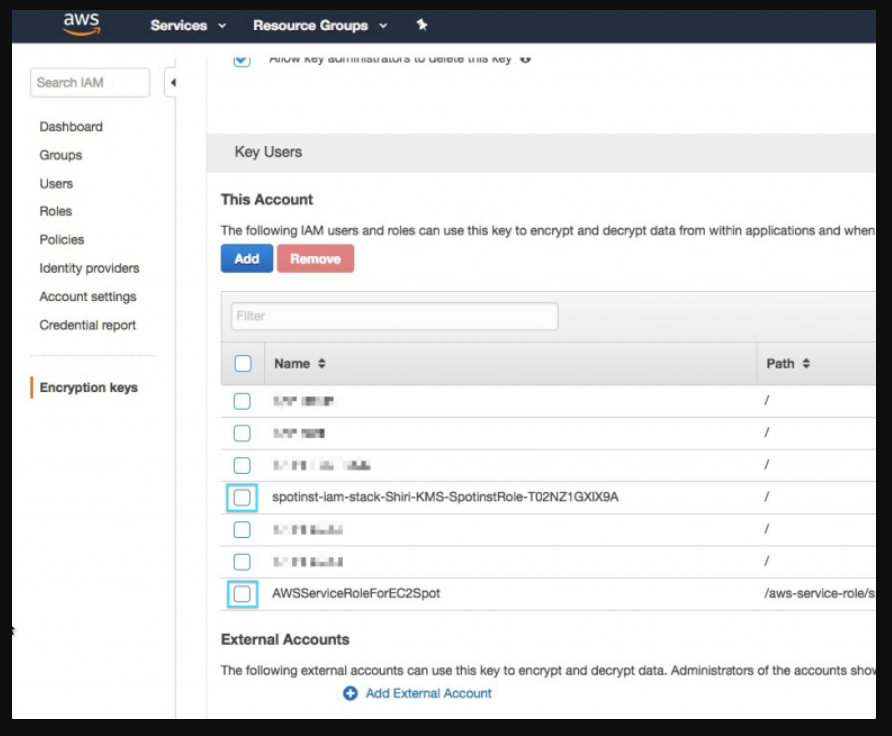
You should add two roles to this custom key:
• AWSServiceRoleForEC2Spot (Linked-Service role that AWS creates automatically for each account)
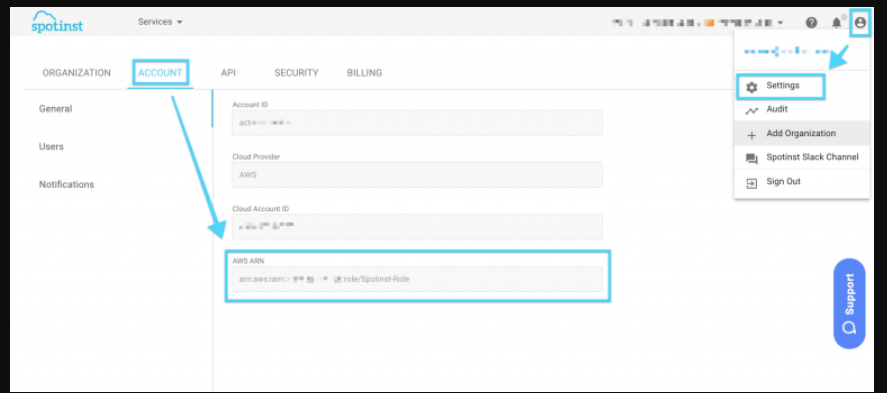
• AutoSpot cross-account IAM role (The one you created when entering credentials to AutoSpot)
You can find your AutoSpot cross-account IAM role in the AutoSpot settings under the Account menu available via this link: https://console.spotinst.com/#/settings/account/general
Step 5: Configuring the Key in the Elastigroup Block Device Mapping
You can add the required Key to the Elastigorup Block device mapping configuration. For more information, see Setting Block Device Mapping.
Adding the following:
kmsKeyId – String – ID for a user-managed CMK under which the EBS Volume is encrypted
Example 1:
                    "blockDeviceMappings": [
                       {
                         "deviceName": "/dev/sdf",
                         "ebs": {
                           "encrypted": true,
                           "kmsKeyId": "bajkadk-12345-1234-1234-1234567",
                           "volumeSize": 20
                         }
                       }
                     ]
Example 2:
In case you have a snapshot which is encrypted by the Custom KMS key:
                    "blockDeviceMappings": [
                        {
                          "deviceName": "/dev/xvdb",
                          "ebs": {
                            "deleteOnTermination": false,
                            "encrypted": true,
                            "snapshotId": "snap-90gh20c09281b1234",
                            "volumeType": "gp2"
                          }
                        }
                      ]
Using Cross-Account KMS Key To Encrypt EBS Volumes With AutoSpot
Introduction
The previous post discussed KMS keys, what they are used for, and how to use them with our ElastiGroup.
This works just fine, as everything is being done within the same AWS account.
How about if you wanted to do this cross-account? Here’s a short overview.
Let’s start with a few assumptions:
• You’ve done the key creation as specified on our previous post regarding.
• Account actKey will represent the account that holds the KMS key.
• Account actInst will represent the account that will run the Instances.
• Key and Instances must be in the same region
Follow these steps:
① Create KMS key in account actKey.
② Add Account actInst account number in External Accounts inside the key properties and save the changes.
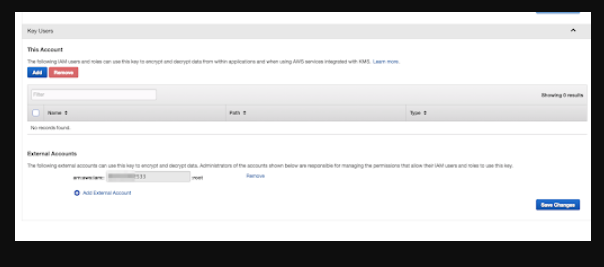
③ Switch to policy view inside the key properties, and remove the following condition, save the changes.
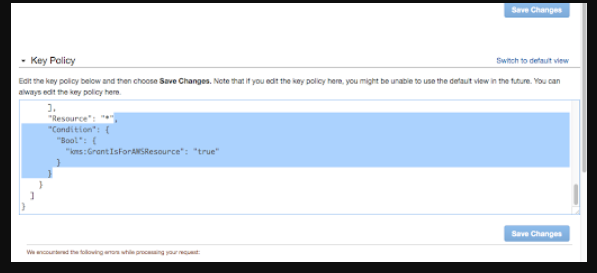
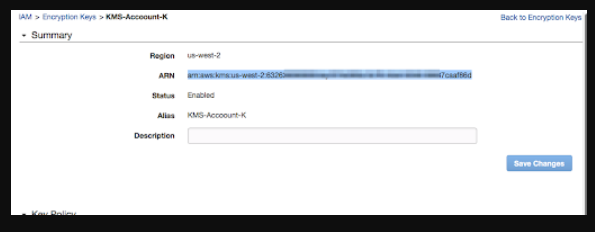
④ Save the key ARN.
⑤ Create a policy in account actInst, inserting the following JSON (Be sure to change the Key ARN).
                    {
                        "Version": "2012-10-17",
                        "Statement": [
                            {
                                "Sid": "AllowUseOfTheKey",
                                "Effect": "Allow",
                                "Action": [
                                    "kms:Encrypt",
                                    "kms:Decrypt",
                                    "kms:ReEncrypt*",
                                    "kms:GenerateDataKey*",
                                    "kms:DescribeKey"
                                ],
                                "Resource": [
                                    ""
                                ]
                            },
                            {
                                "Sid": "AllowAttachmentOfPersistentResources",
                                "Effect": "Allow",
                                "Action": [
                                    "kms:CreateGrant",
                                    "kms:ListGrants",
                                    "kms:RevokeGrant"
                                ],
                                "Resource": [
                                    ""
                                ]
                            }
                        ]
                    }
⑥ The next steps will be performed in account actInst using AWS CLI, please note the user that your AWS CLI is configured with.
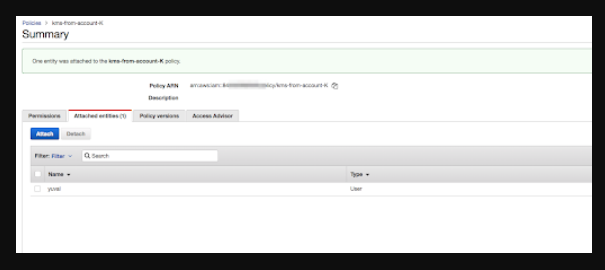
⑦ Attach the policy you created, to the user from the previous step.
⑧ Copy AutoSpot Role ARN (Can be found in the AutoSpot console, after clicking on the person icon on the top right corner).

⑨ Run the following command in a terminal (grant for the AutoSpot role).
aws kms create-grant --key-id <b><i><KMS key-ARN></i></b> --grantee-principal <b><i><Spotinst role ARN></i></b> --operations "Encrypt" "Decrypt" "RetireGrant" "DescribeKey" "GenerateDataKey" "GenerateDataKeyWithoutPlaintext" "ReEncryptFrom" "ReEncryptTo" "CreateGrant" --name spotinst-grant
⑩ Look for AWSServiceRoleForEC2Spot role and copy its ARN.
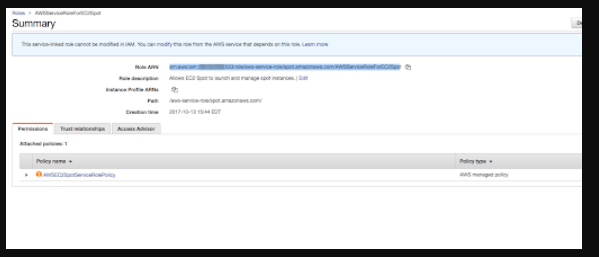
⑪ Run the following command in terminal (grant for the spot instances role).
> aws kms create-grant --key-id <b><i><KMS key-ARN></i></b> --grantee-principal <b><i><AWSServiceRoleForEC2Spot ARN></i></b> --operations "Encrypt" "Decrypt" "RetireGrant" "DescribeKey" "GenerateDataKey" "GenerateDataKeyWithoutPlaintext" "ReEncryptFrom" "ReEncryptTo" "CreateGrant" --name spot-grantThat’s it! You can now add your KMS key-id to the BDM section in Elastigroup’s configuration:
(https://api.spotinst.com/elastigroup-for-aws/concepts/compute-concepts/block-device-mapping/)
                     "blockDeviceMappings": [
                        {
                          "deviceName": "/dev/sdf",
                          "ebs": {
                            "encrypted": true,
                            "kmsKeyId": "",
                            "volumeSize": 20
                          }
                        }
                      ]
Create An Elastigroup From Scratch
Introduction
This tutorial covers the general creation of an Elastigroup, using an empty template. The Empty Template is Available under Uses Cases in the Creation Wizard. To create an Elastigroup based on an existing workload such as AWS’s Elastic Beanstalk or AutoScaling Groups, select your workload type under Use Cases and import a copy of your workload. To create an Elastigroup from scratch from the Onboarding Wizard select Create an Elastigroup from Scratch.
Step 1: General Settings
• Enter a Name for your Elastigroup and select a Region.
• Add the Target, Minimum and Maximum Capacities for your Elastigroup
Step 2: Compute Settings
• Select your desired VPC to run your Elastigroup in, as well as the Product type and the On-Demand type to use in the event that no Spot Instances are available in your desired markets.
• Select the Availability Zones you’d like Elastigroup to consider when launching your instances. To maximize your savings Elastigroup calculates the cost of launching Spot instances in the selected Availability Zones. We recommend selecting multiple Availability Zones to increase the number of Spot instance markets available for Elastigroup to consider.
• Select the instance types you’d like Elastigroup to consider when launching your instances. We recommend selecting multiple instance types to provide Elastigroup with as many Spot instance market options as possible.
📜 Note: We highly recommend selecting multiple Availability Zones and multiple instance types, which provide Elastigroup with more Spot markets and result in lower prices and greater availability.
• Choose an Image, Security Groups and (optionally) the Key Pair to use for your instances.
Step 3: Configure Scaling Policies (Optional)
Optionally create a Target Scaling Policy or a Simple Scaling Policy. For more on Scaling with Elastigroup see the documentation here.
Step 4: Review and Create
All that’s left to do is review your settings and launch your Elastigroup!
Link An EC2-Classic Instance To a VPC
Introduction
In order to link an instance running within EC2-Classic to a VPC security group, you need to use a custom User-data script as part of your Elastigroup configuration to allow the registration of instances to the VPC.
Step 1: Create an IAM Role
As a preceding step you should also create an IAM role for the instance that will have the following permission in its policy:
                    {
                        "Version": "2012-10-17",
                        "Statement": [
                            {
                                "Sid": "Stmt1500534977000",
                                "Effect": "Allow",
                                "Action": [
                                    "ec2:AttachClassicLinkVpc"
                                ],
                                "Resource": [
                                    "*"
                                ]
                            }
                        ]
                    }
This IAM role should be selected in the Elastigroup configuration under Additional settings – Compute Tab.
Step 2: Enter a user-data script
This should be entered into the User-Data field under Additional settings – Compute Tab.
                    #!/bin/bash -x
                    echo "Running sportInst user data script" >> /var/log/cloud-init-output.log
                    instance_id=$(curl -s http://169.254.169.254/latest/meta-data/instance-id)
                    echo " Installing pip"
                    yum install -y python-pip
                    echo "Make sure aws-cli installed and up-to-date" >> /var/log/cloud-init-output.log
                    pip install awscli --upgrade --user
                    export PATH=~/.local/bin:$PATH
                    echo "Attach the EC2-Classic instance to VPC"
                    aws ec2 attach-classic-link-vpc --instance-id $instance_id --vpc-id VPC_ID --groups SECURITY_GROUPS --region REGION
Make sure you replace VPC_ID, SECURITY_GROUPS and REGION with the values you would like to apply. Continue with the group creation or update the group configuration.
Updating The AutoSpot Policy
Introduction
While setting up your AutoSpot Account – we use a cloud formation stack to register our IAM Role Policy in your AWS account. This Policy holds permissions that are needed for AutoSpot’s account to handle your AWS resources. Refer the below link for the AWS arn of your IAM role:
https://console.spotinst.com/#/settings/account/general
📜 Note: It is important to keep this Policy updated with the latest version listed here – AutoSpot Policy.
Step 1: Login to your AWS IAM management console
Login to your AWS console and navigate to the IAM management console.
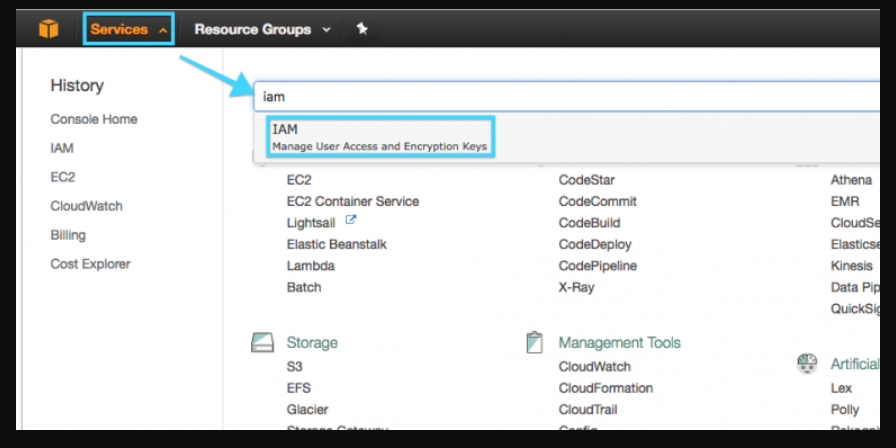
Step 2: locate your AutoSpot Policy
Click on Policies from the side menu.
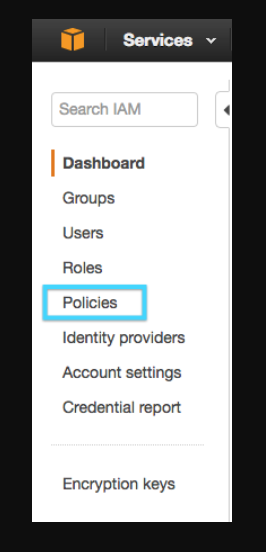
Search for AutoSpot policy and select it.
Step 3: Editing the Policy
In the Policy screen – select the Permissions tab, view the JSON and click [Edit Policy]:
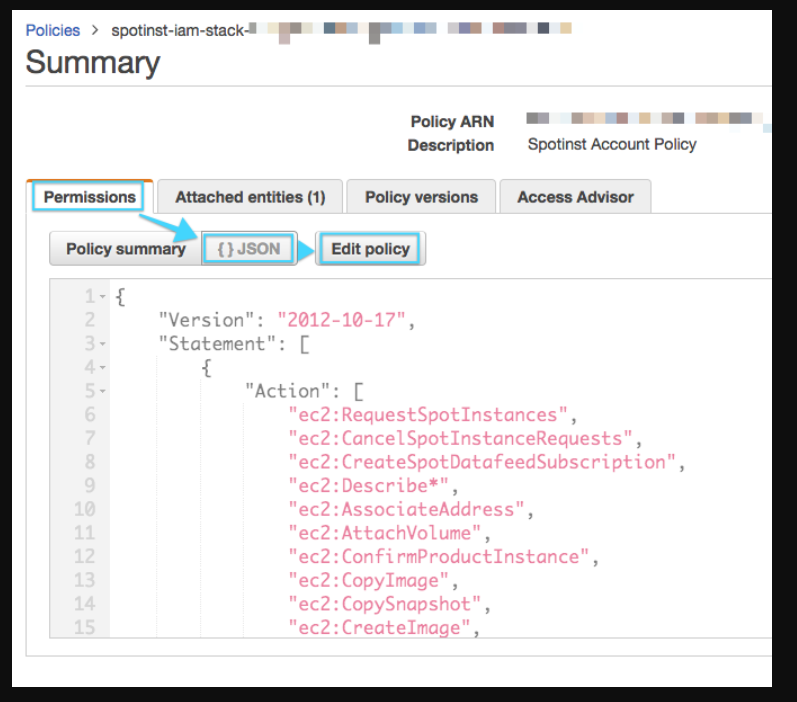
You can now remove the JSON and replace it with the latest policy available in our API Docs.
Step 4: Verify and Save
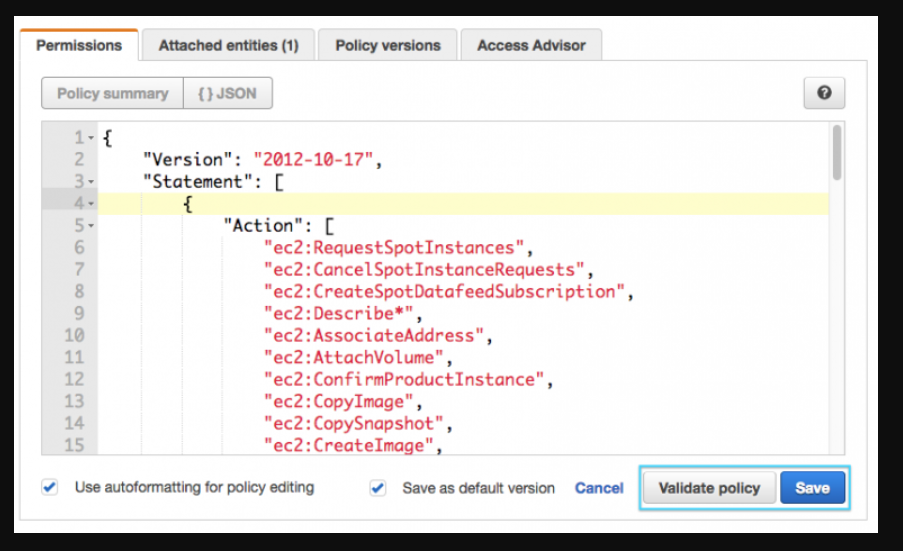
Restrict Your AutoSpot IAM Policy
Introduction
AutoSpot uses the secure Cross-Account Role to access your AWS account. The role includes a restricted list of policy, you could further limit this policy list based on the AWS Resource and apply conditions to restrict it to a specific region or VPC or based on tags.
You can find Additional examples in AWS docs, as well as a simplified way right here: Easier way to control access to AWS regions using IAM policies.
The example for each case is stated below:
Example 1
In case you want to restrict the policy to a specific VPC you can add the following Condition:
                    {
                      "Statement": [
                        {
                          "Sid": "ExampleForRestrictVPC",
                          "Action": [
                            "ec2:RequestSpotInstances"
                          ],
                          "Resource": [
                            "*"
                          ],
                          "Condition": {
                            "StringEquals": {
                              "ec2:vpc": "arn:aws:ec2:REGION:ACCOUNTNUMBER:vpc/VPC-ID"
                            }
                          },
                          "Effect": "Allow"
                        }
                      ],
                      "Version": "2012-10-17"
                    }
Example 2:
Restrict the policy based on Tags:
                    {
                      "Statement": [
                        {
                          "Sid": "ExampleForRestrictTags",
                          "Action": [
                            "ec2:RequestSpotInstances"
                          ],
                          "Resource": [
                            "*"
                          ],
                          "Condition": {
                            "ForAllValues:StringLike": {
                              "aws:TagKeys": [
                                "foo",
                                "bar"
                              ]
                            }
                          },
                          "Effect": "Allow"
                        }
                      ],
                      "Version": "2012-10-17"
                    }
Example 3:
Restrict the policy to a specific Region:
                    {
                      "Statement": [
                        {
                          "Sid": "ExampleForRestrictRegion",
                          "Action": [
                            "ec2:RequestSpotInstances"
                          ],
                          "Resource": [
                            "*"
                          ],
                         "Condition": {
                            "StringEquals": {
                              "ec2:Region": "us-west-1"
                            }
                          },
                          "Effect": "Allow"
                        }
                      ],
                      "Version": "2012-10-17"
                    }
Furthermore, you could use the above Condition statements to restrict a specific AWS resource as shown below:
1.7.1. Restrict the access to the EC2 instances in the N. Virginia region:
                    {
                      "Statement": [
                        {
                          "Sid": "GeneralSpotInstancesAccess",
                          "Action": [
                            "ec2:RequestSpotInstances",
                            "ec2:CancelSpotInstanceRequests",
                            "ec2:CreateSpotDatafeedSubscription",
                            "ec2:Describe*"
                             ......
                             ......
                             ......
                             ......
                          ],
                          "Effect": "Allow",
                          "Resource": [
                            "*"
                          ],
                          "Condition": {
                            "StringEquals": {
                              "ec2:Region": "us-east-1"
                            }
                          }
                        }
                      ],
                      "Version": "2012-10-17"
                    }
1.7.2. Restrict the access to ElasticBeanstalk environments in a particular VPC:
                    {
                      "Statement": [
                        {
                        "Sid": "GeneralAccessElaticBeanstalk",
                        "Action": [
                          "elasticbeanstalk:Describe*",
                          "elasticbeanstalk:RequestEnvironmentInfo",
                          "elasticbeanstalk:RetrieveEnvironmentInfo",
                          "elasticbeanstalk:ValidateConfigurationSettings",
                          "elasticbeanstalk:UpdateEnvironment",
                          "cloudformation:GetTemplate",
                          "cloudformation:DescribeStackResources",
                          "cloudformation:DescribeStackResource",
                          "cloudformation:DescribeStacks",
                          "cloudformation:ListStackResources",
                          "cloudformation:UpdateStack",
                          "cloudformation:DescribeStackEvent",
                          "cloudformation:DescribeStackEvents",
                          "logs:PutRetentionPolicy",
                          "logs:createLogGroup"
                          ],
                          "Effect": "Allow",
                          "Resource": [
                            "*"
                          ],
                          "Condition": {
                            "StringEquals": {
                              "ec2:vpc": "arn:aws:ec2:REGION:ACCOUNTNUMBER:vpc/VPC-ID"
                            }
                          }
                        }
                      ],
                      "Version": "2012-10-17"
                    }
Example 4
In case you only want to check how much you can Save using AutoSpot, you could use only our Spot Analyzer and it requires the following policies:
                    {
                      "Statement": [
                        {
                          "Sid": "SpotAnalyzer",
                          "Action": [
                                    "ec2:Describe*",
                                    "ec2:MonitorInstances",
                                    "elasticloadbalancing:Describe*",
                                    "cloudwatch:GetMetricStatistics",
                                    "cloudwatch:ListMetrics",
                                    "iam:ListRoles",
                                    "iam:ListAccountAliases",
                                    "iam:GetPolicyVersion",
                                    "iam:ListPolicies",
                                    "elasticbeanstalk:Describe*",
                                    "autoscaling:Describe*",
                                    "ecs:List*",
                                    "ecs:Describe*"
                                    ],
                          "Effect": "Allow",
                          "Resource": [
                            "*"
                          ]
                          }
                        ],
                        "Version": "2012-10-17"
                    }
You may find additional information in AWS Documentations
Registering Instances To Domain
In order to register an instance to your domain, a user data script needs to be applied to your Elastigroup settings, under Compute tab.
What the script does:
① Checks if the machine is already member in the domain, if it is the script does nothing
② Set the DNS server on the network interface (needed to discover the domain)
③ Adds the instance to the domain
④ Restart the machine (for changes to take effect)
Add the following User Data (the below example applies to Windows machines):
                    <powershell>
                    $isMember = (Get-WmiObject -Class Win32_ComputerSystem).PartOfDomain
                    if (!$isMember)
                    {
                    $dnsserver = "10.0.0.1"
                    $domain = "myDomain"
                    $password = "myPassword!" | ConvertTo-SecureString -asPlainText -Force
                    $username = $domain\myUserAccount
                    $ou = "OU=testOU,DC=domain,DC=Domain,DC=com"
                    $nic = Get-NetAdapter
                    Set-DNSClientServerAddress –interfaceIndex $nic.ifIndex –ServerAddresses ($dnsserver)
                    $credential = New-Object System.Management.Automation.PSCredential($username,$password)
                    Add-Computer -DomainName $domain -Credential $credential -OUPath $ou
                    shutdown -r -t 00
                    }
                    </powershell>
The following values need to be changed to match your specifications:
📜 Note: $ou is optional – if not required, delete this line and remove the -ou flag and value from the Add-Computer command. The script assumes that the instance has only 1 network interface.
Publish Elastigroup Metrics To CloudWatch
Elastigroup can optionally publish custom metrics to CloudWatch. These metrics can be used to report data to any third party tool, such as Datadog or Grafana. Elastigroup reports the following metrics per AWS account:
- #instances (OD and Spot) per instance type
- CPU
- Memory
- Disk
- NetworkIn
- NetworkOut
The custom namespace of these metrics is AutoSpot with 2 dimensions of Elastigroup ID and Instance type. To publish these metrics to CloudWatch add the following permission to the IAM Policy: cloudWatch:PutMetricData
Once this is done, contact your account manager to have AutoSpot begin publishing the Elastigroup metrics for you. At AutoSpot, your data privacy is of utmost importance, which is why we require your confirmation before publishing data of any kind to third-party tools such as CloudWatch.
WordPress On Spot: Step-By-Step Guide
Introduction
This step-by-step guide will help you get a website up and running with WordPress on Spot Instances. The WordPress Website will be installed on an auto-scale Elastigroup. You will go through configuring and launching an EC2 Spot instance, getting your WordPress username and password, and logging into your WordPress admin portal.
Pre-conditions: Before starting this tutorial, make sure to have an account in AutoSpot Console with valid credentials.
Step 1: Create Elastigroup

Your Elastigroup’s general information.
• Name – Choose a name for your Elastigroup (We encourage our clients to name their Elastigroup’s based on the specific workload it will manage).
• Region – Choose in which region this Elastigroup will be running.
• Description – Define any additional description for your Elastigroup.
Capacity
Setting the desired capacity of the Elastigroup.
• Target – Number of running instances/vCPU weight in your Elastigroup
• Minimum – In the case of a ‘scale down’ policy action, this is the minimum number of running instances/vCPU weight in the group.
• Maximum – In the case of a ‘scale up’ policy action, this is the maximum number of running instances/vCPU weight in the group.
Compute Tab
This is where we can set up the Compute related specification, including Network and the launch configuration.
• VPC – Choose your VPC network
• Product – Select your OS, if you’re unsure, select “Linux/UNIX”. If you have both EC2-Classic and VPC networks enabled in your account, you must explicitly choose it in this field as “Amazon VPC”
• On-Demand Type – Choose your default On-Demand instance type. This will also allow Elastigroup to benchmark the best Spot types based on price and performance. This will also be the instance type that will be used in case “Fallback to On-Demand” option is enabled in the Strategy tab.
After setting the VPC you can move on to selecting the AZ’s you would like to use.
• Availability Zones – Select in which availability zones you would like to launch your instances. You can select one or more AZs for your Elastigroup.
📜 Note: It is recommended to choose as many AZs as possible, it will enable higher diversity and available markets for our algorithm to bid on.
• Selecting subnets – Select the desired subnet in each availability zone.
Spot Types
Select the Spot instance types within your Elastigroup. After selecting your desired spot types you will also see the SpotMarket Scoring – giving you a notion of how the markets are going to behave- the higher the score the better!
📜 Note: It is recommended to choose as many instance types as possible, it will enable higher diversity and available markets for our algorithm to bid on.
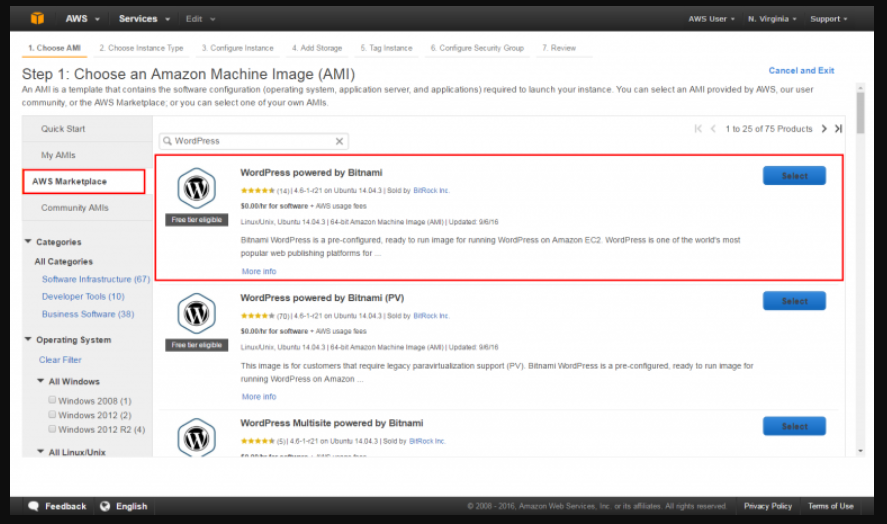
Image – Log in to your AWS account, and go to the AMI marketplace. Choose the following AMI, and paste the specific ID for your region:
Security Group – specify one or more security groups to associate with the instances launched in this Elastigroup.
Key Pair – Specify the name of the key pair to associate with your instances.
Tags – Assign tags consisting of a case-sensitive key-value pair.
Scaling
You can add scaling policies to your group to help you adjust computing capacity based on increasing load or quiet hours. You can set as many policies as you like to guarantee the group capacity changes according to your needs. You can add as many scaling rules as you wish. We use CloudWatch metrics for scaling rules.
Step 2: Test your environment
Once your instance is running, you can now test your WordPress website. Find the Public IP for your instance under Instances in your Elastigroup:
![]()
Copy the Public IP into a new tab in your web browser, and you should see a Hello World blog page appear.
Step 3: Make Changes to your Website
Now that you have your WordPress site up and running, it’s time to log into its administration page so you can customize your site. To find your password, follow the steps below:
① Switch back to your EC2 management console in your web browser. Select WordPress instance, and click the [Actions] button. In the drop down menu, select Instance Setting, and choose [Get System Log].

② In the system log window, scroll through to the bottom to find the password that’s surrounded by hash marks.
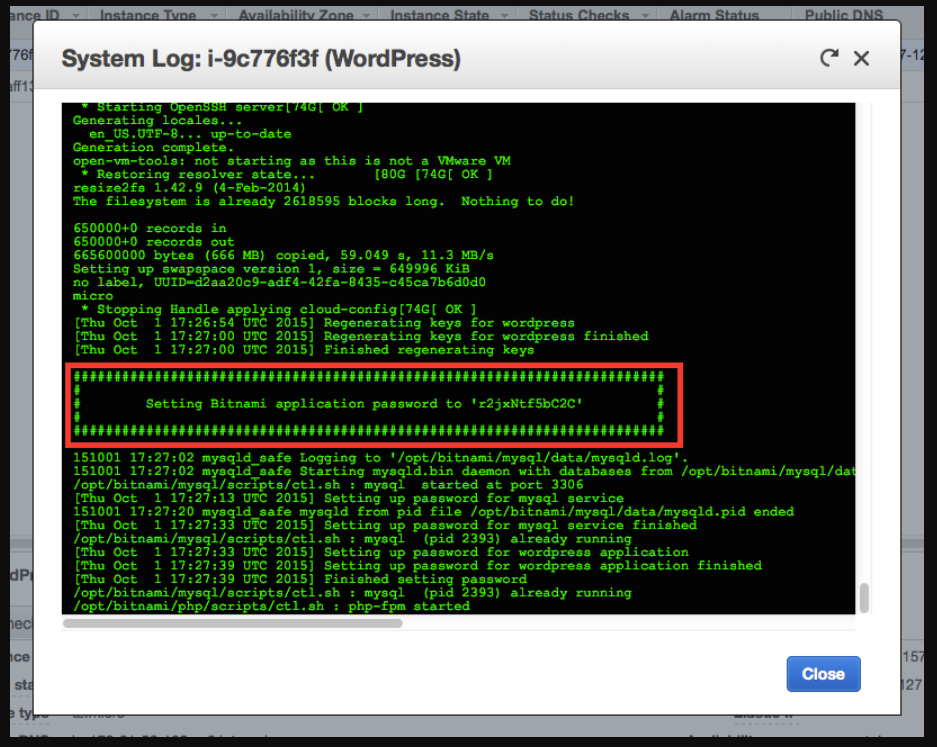
③ Now that you have your password, switch back to the tab that you used to access the WordPress Hello World page. Add /admin to the end of the URL so it looks something like 54.192.32.144/admin. Hit enter. Enter the Username user and the Password that you read from the log file.
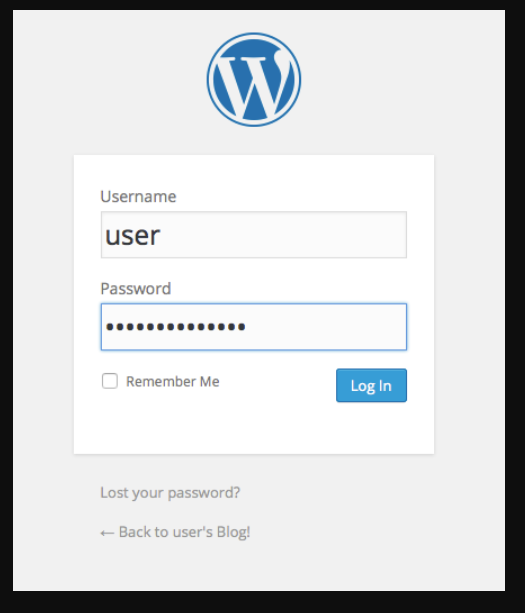
Congratulations! You now have your WordPress site up and running. You can now manage, customize, and configure it as you like.
Filtering API Responses Based On Group Parameters
Introduction
While using the AutoSpot API you might want to filter the response you are getting for long outputs, such as the list of Elastigroups based on Tag values. In order to filter the API response, we recommend using the jq framework, as it is a lightweight tool, you can get this add-on via https://stedolan.github.io/jq/.
Step 1:
Please Install jq on your system: https://stedolan.github.io/jq/download/
Step 2:
Run your API calls via curl with the added jq query.
Example 1:
                    curl -s -X GET -H Authorization: Bearer ${token}
                    https://api.spotinst.io/aws/ec2/group |
                    jq '.response|.items[]|select(.compute|.launchSpecification|.tags[]|.tagValue| test(staging))'
This will show the Elastigroups configurations that have a tag value equal to staging.
Example 2:
                    curl -s -X GET -H Authorization: Bearer ${token}
                    https://api.spotinst.io/aws/ec2/group |
                    jq '.response|.items[]|select(.compute|.launchSpecification|.tags[]|.tagValue| test(TagValue) ) | {name: .name, id: .id}'
This will show the name and ID for Elastigroups that have a tag value equal to TagValue. For more operators and additional options, see https://stedolan.github.io/jq/tutorial/.
Tutorials of Ocean for AWS
Kubernetes
Create an Ocean Cloud Cluster
AutoSpot Ocean is a managed infrastructure service for Kubernetes that automatically adjusts infrastructure capacity and size to meet the needs of all Pods, Containers and applications.
This tutorial covers the general creation of an Ocean cluster using the AutoSpot Console. To get started with the Ocean Creation Wizard, log on to your AutoSpot account and in Cloud Clusters under the Ocean Menu select Create Cluster.
Step 1: Create Cluster
Select a use case template to create your Ocean Cluster.
Step 2: General Settings
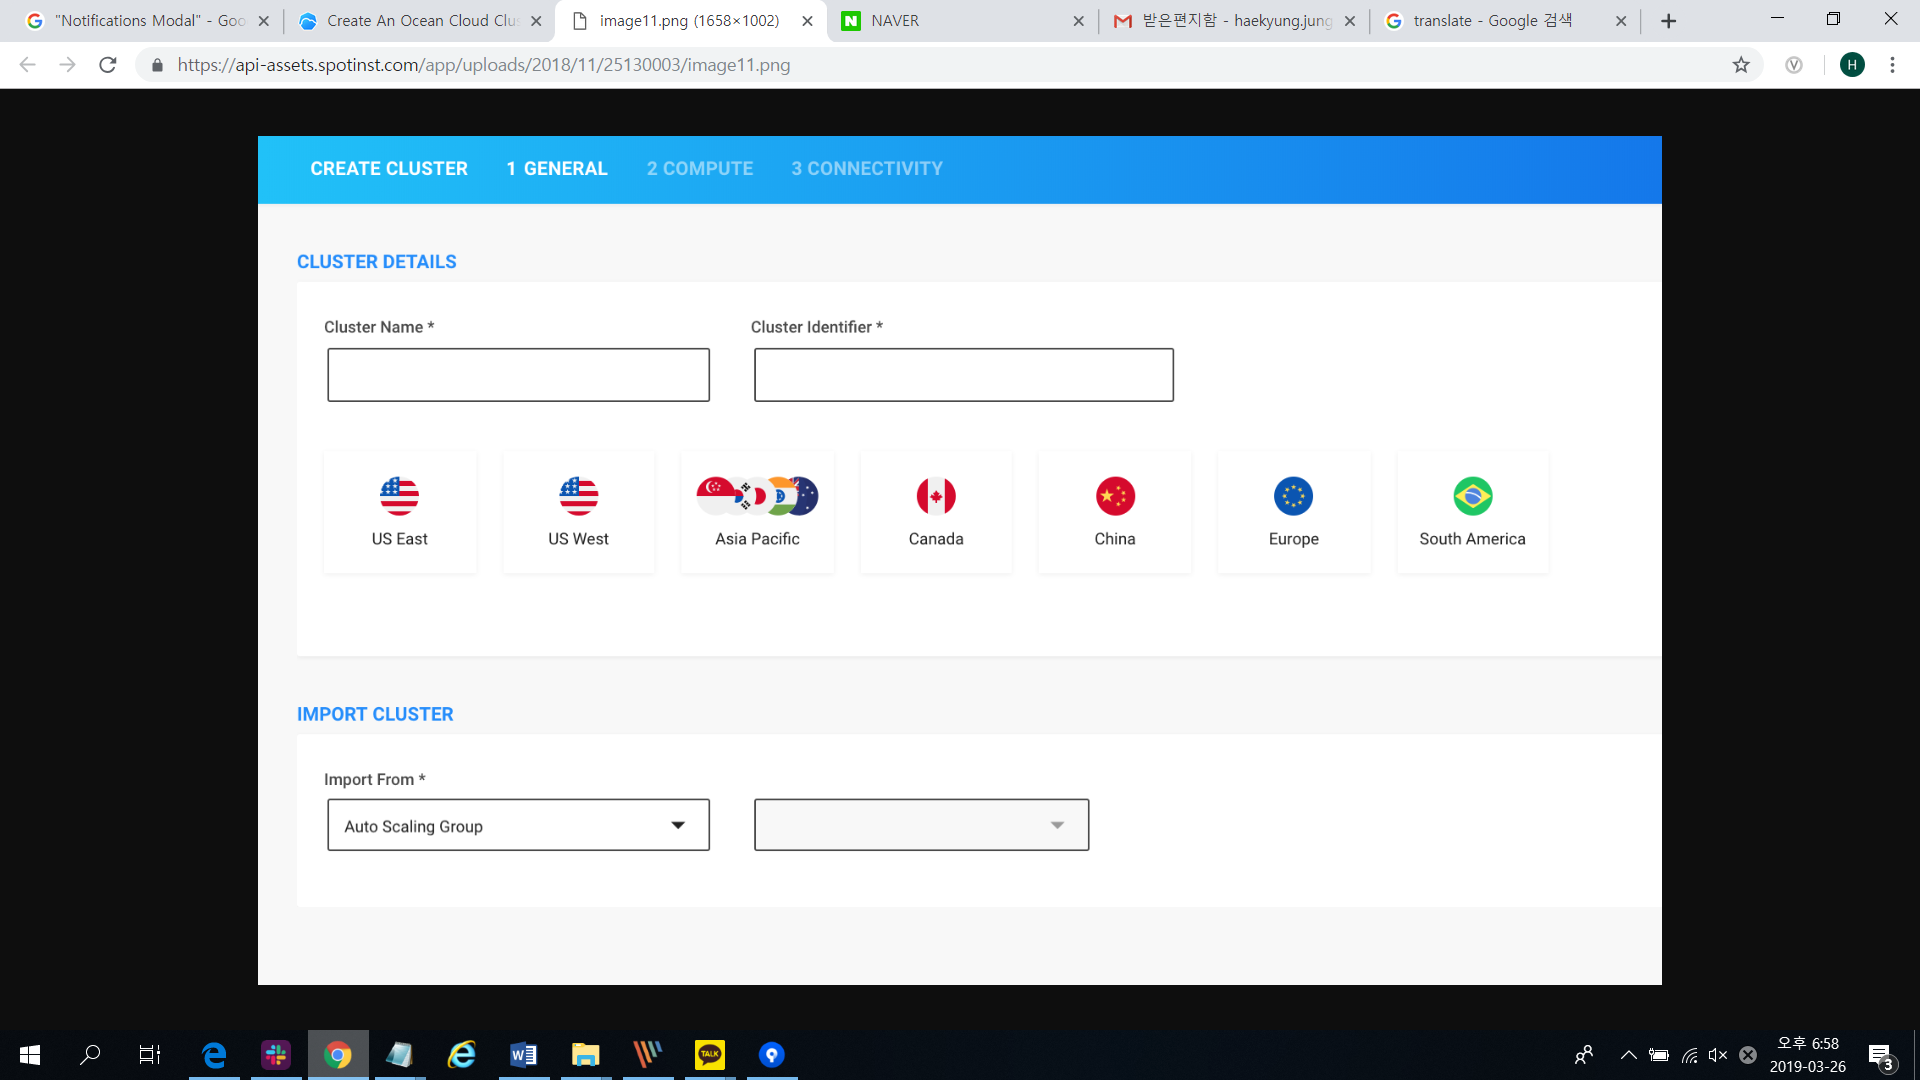
Enter a Cluster Name and Identifier and select a [Region]. Select an [Auto Scaling Group] or [Instance] to import the cluster configuration from.
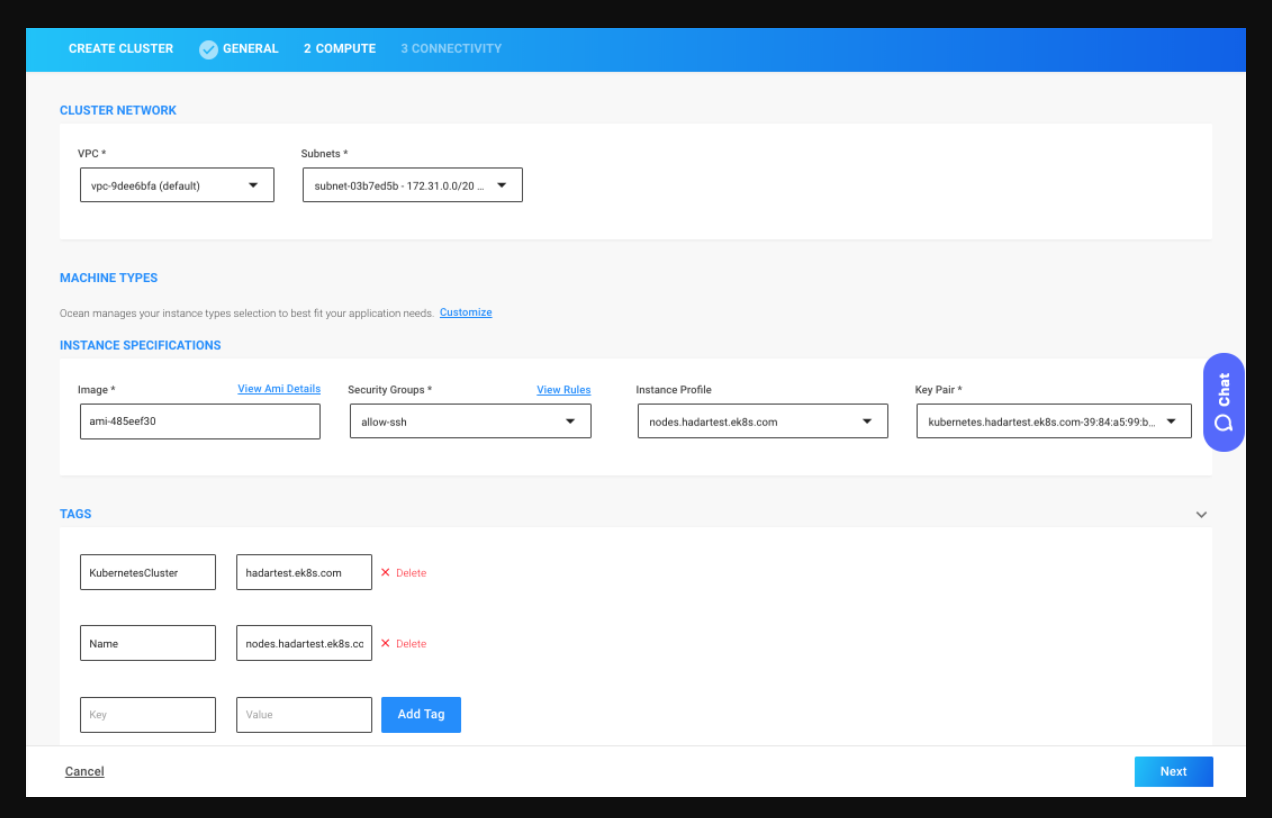
Step 3: Compute Settings
- Confirm or change the settings imported by the Ocean Creation Wizard.
Step 4: Connectivity
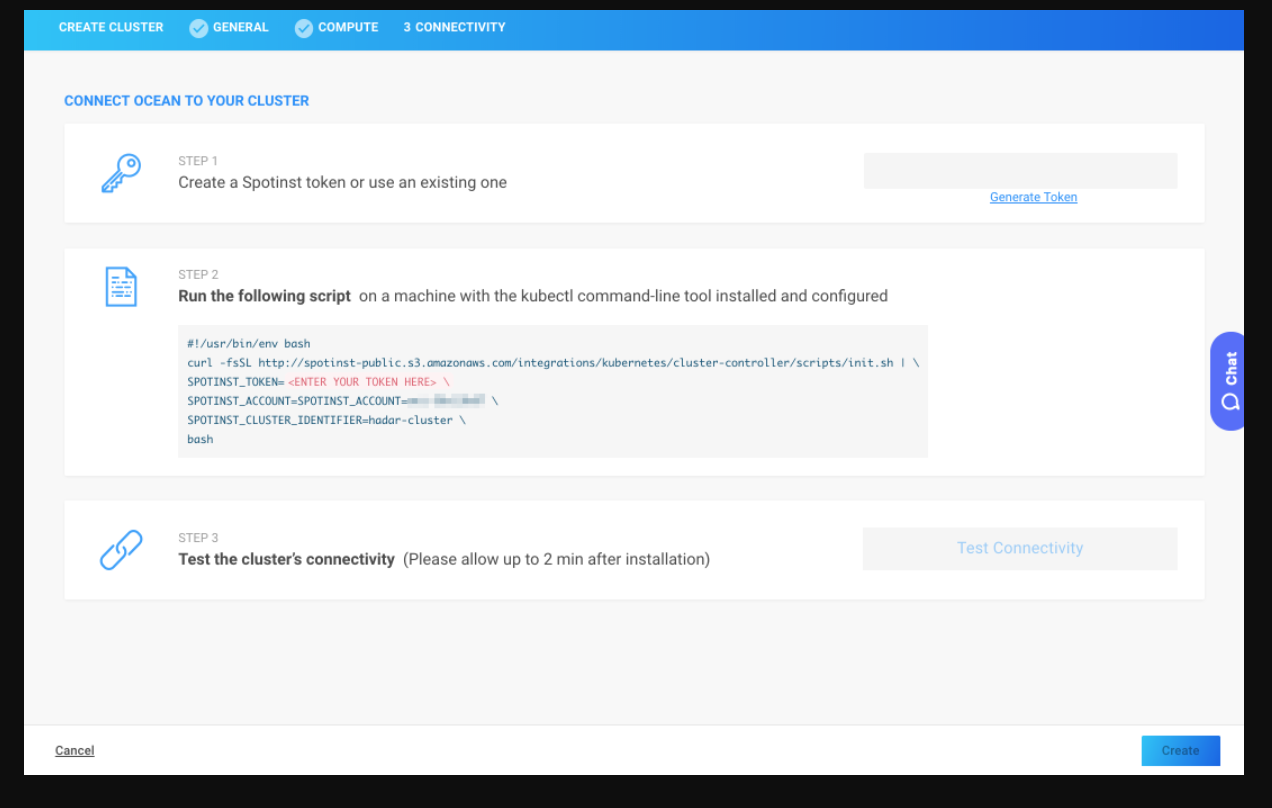
Create an AutoSpot token or use an existing one. Install the AutoSpot Controller Pod. Learn more about the AutoSpot Controller Pod and Ocean’s anatomy here. Click [Test Connectivity] to ensure the controller functionality
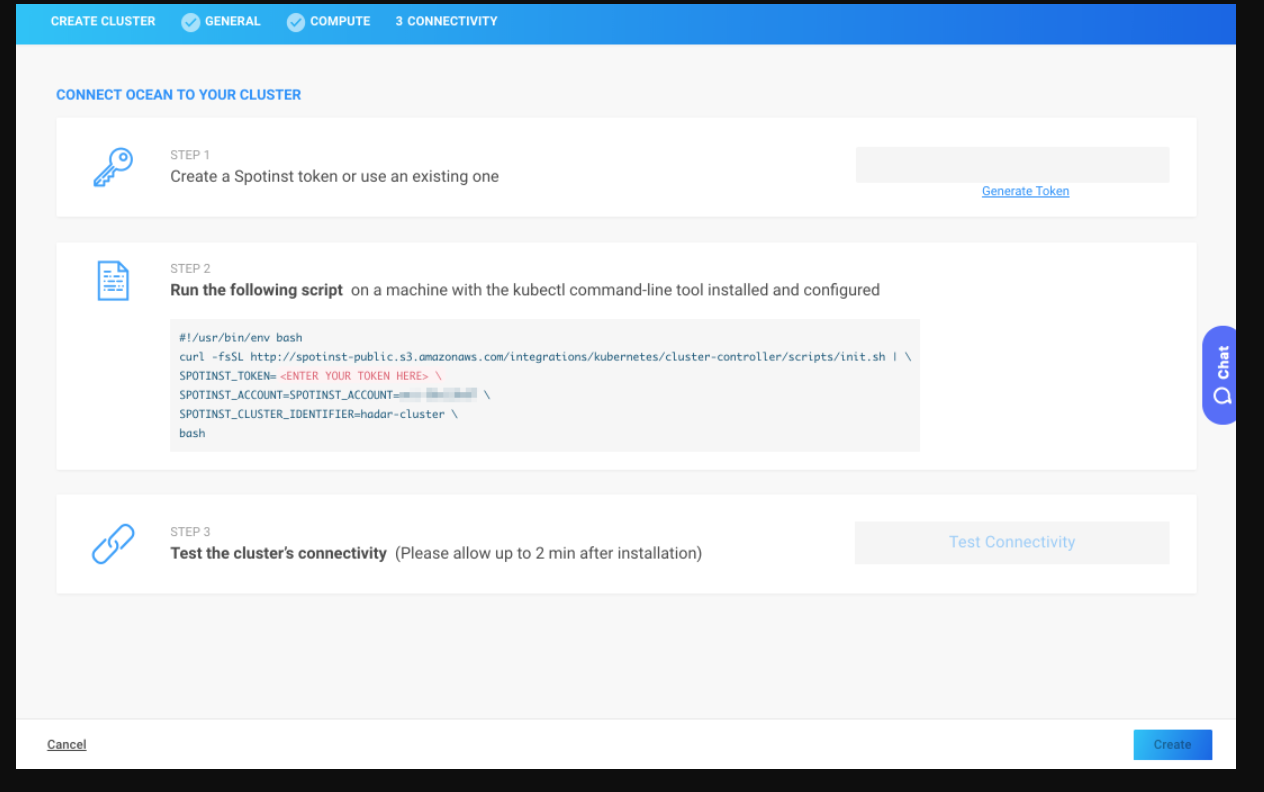
You’re all set! Ocean will now ensure better cost-effective capacity and size for your cluster.
Migrate Existing Elastigroups To Ocean
The following tutorial covers importing an existing Elastigroup running a Kubernetes cluster to Ocean.
📜 Note: Ocean manages the entire K8s cluster nodes. If the nodes are distributed across multiple Elastigroups, all of these Elastigroups should be migrated at once.
Prerequisites
To complete this tutorial, gather the following information:
① List the Elstigroups connected with the target Kubernetes Cluster
For each of the elastigroups, save the following data for future use
• Autoscaler labels
• User-data script
• AMI id
② From one of the Elastigroups, get the Cluster Identifier (ID)
This is used to connect the existing AutoSpot Controller installed on the Kubernetes cluster to Ocean.
③ Instance ID of an instance within the Elastigroup
The instance selected is used to import the cluster configurations.
Step 1: Disable Autoscaling On The Imported Elastigroups
The first step is to disable the autoscaling in the source groups to allow Ocean to take over.
① Navigate to the Elastigroups configured for your Kubernetes cluster.
② For each of the groups, perform the following steps:
• Click [Edit Configuration] under the Actions menu.
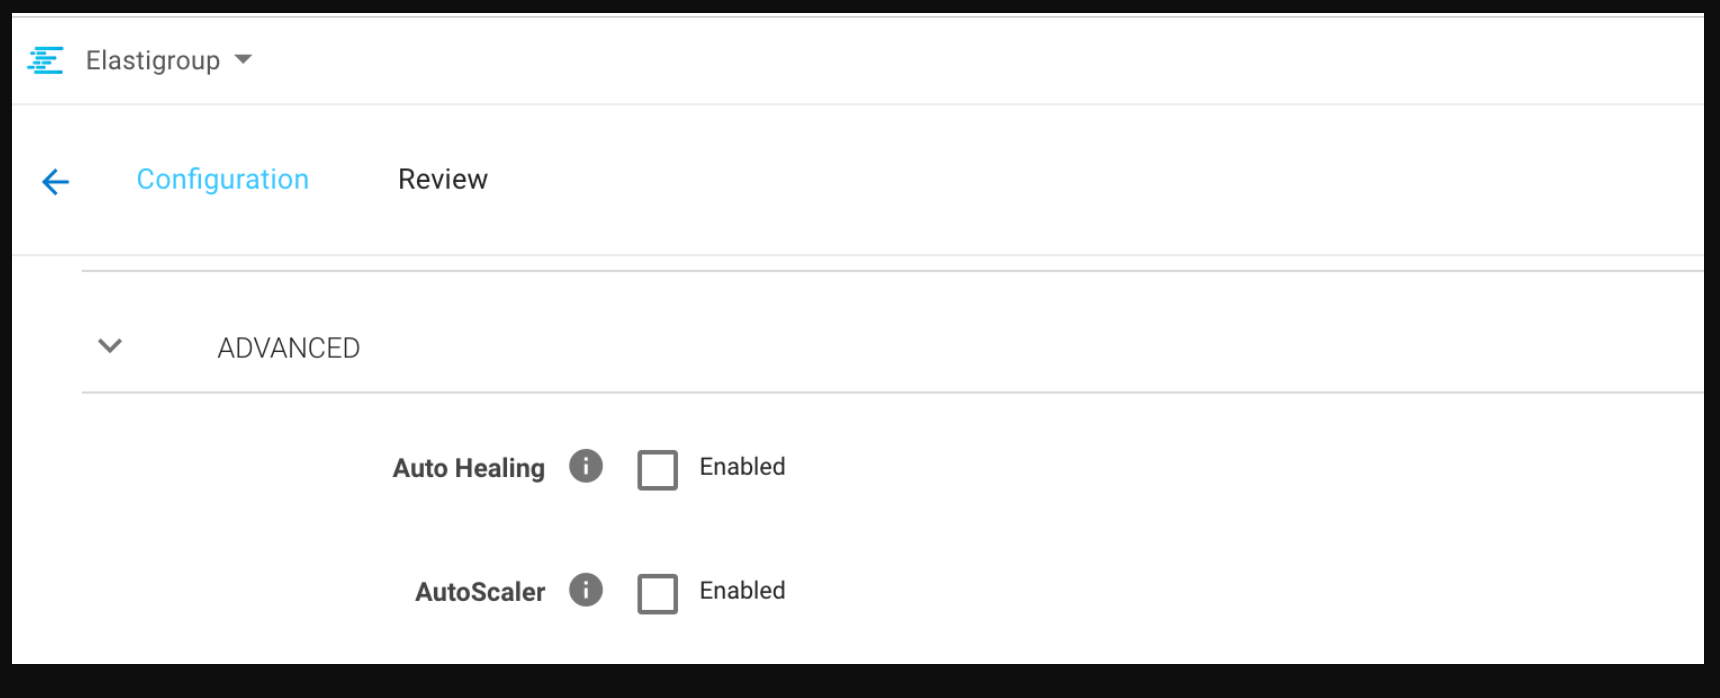
• Scroll down to the (Advanced) section
• Remove the Autoscaler selection.
• Continue to the review page and click [Update] to commit the changes.
Step 2: Create An Ocean Cluster
• In the sidebar, navigate to the Cloud Clusters view located under Ocean.
• Click the [Create Cluster] button to open the Ocean Creation Wizard.
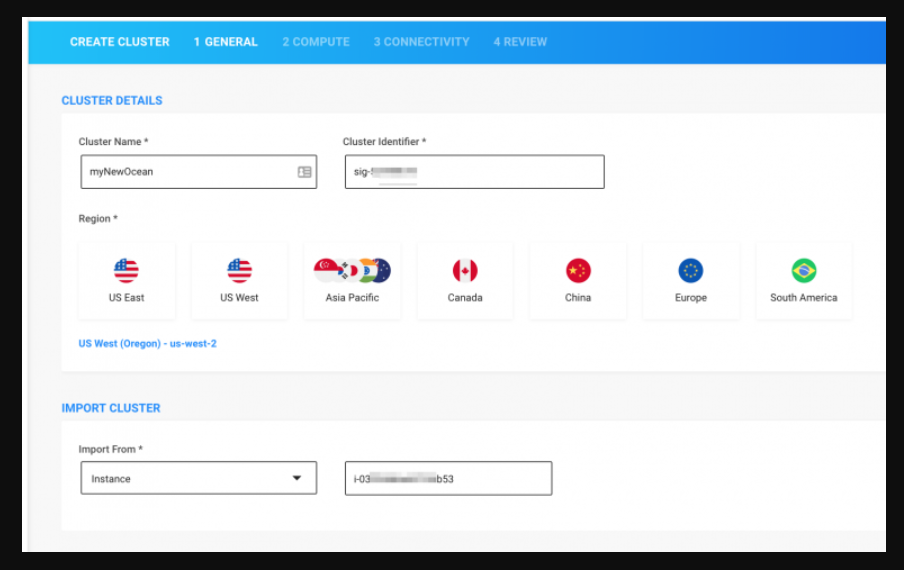
• Enter a Cluster Name and the Elastigroup’s Cluster Identifier.
• Select a Region to deploy the Ocean cluster into.
• Enter the Instance ID from which to import the cluster configuration.
• Click [Next].
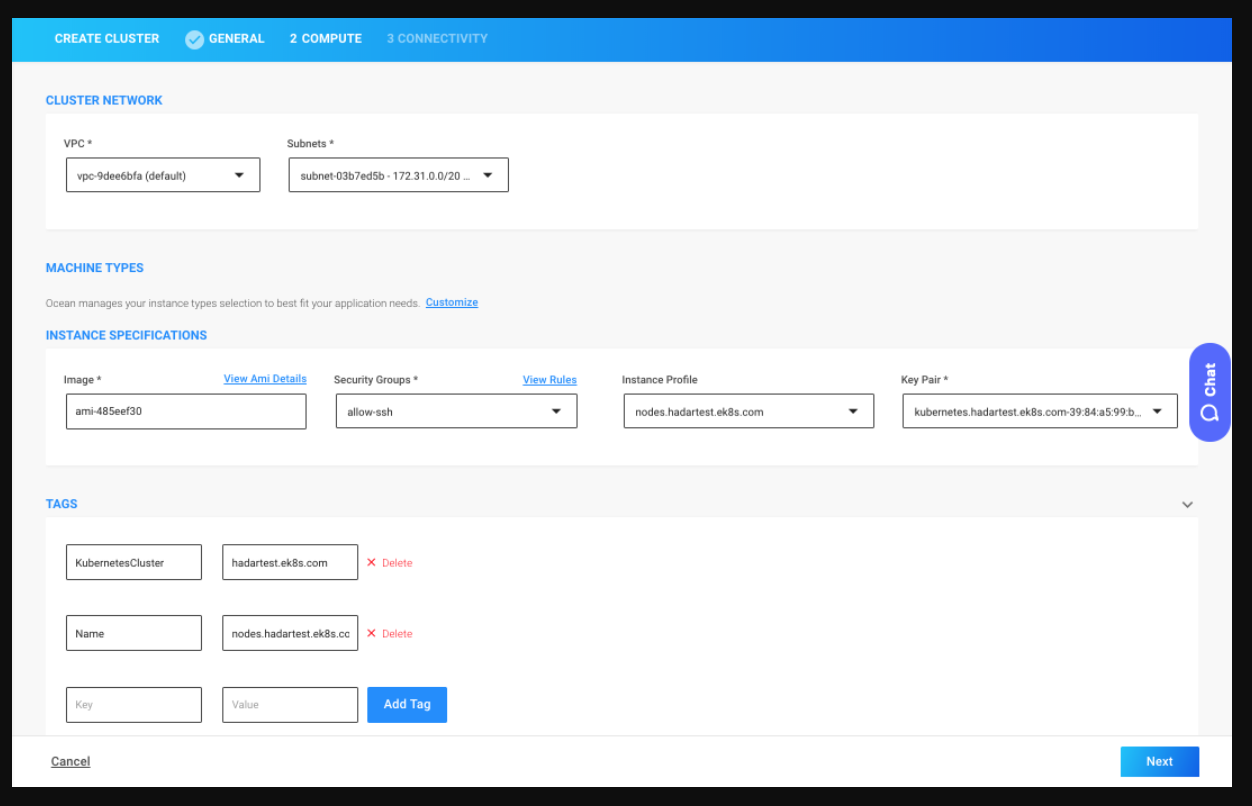
• Confirm or modify the configurations imported by the Ocean Creation Wizard.
• Click [Test Connectivity] to ensure the controller functionality
Step 3: Configure Ocean Custom Launch Specifications
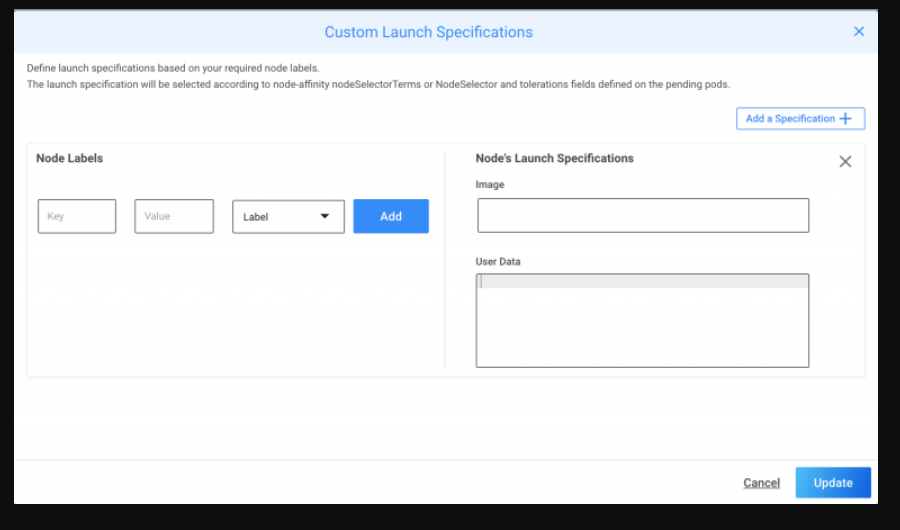
The next step is to configure the Ocean cluster to handle all the different label sets configured on the current Elastigroups.
• Navigate to your Ocean cluster
• Click on the [Actions] menu and select Custom Launch Specifications
• For each of the Elastigroups running the Worker Nodes
- Click Add Specification
- Add the Labels sets gathered as part of the prerequisites
- Set the matching User-Data and AMI
• Click [Save Changes] to commit changes
Step 4: Downscale The Source Elastigroups
The last step is to downscale the existing worker nodes and allow Ocean to launch the proper instances to fit the cluster needs.
• Navigate to the Elastigroups configured for your Kubernetes cluster.
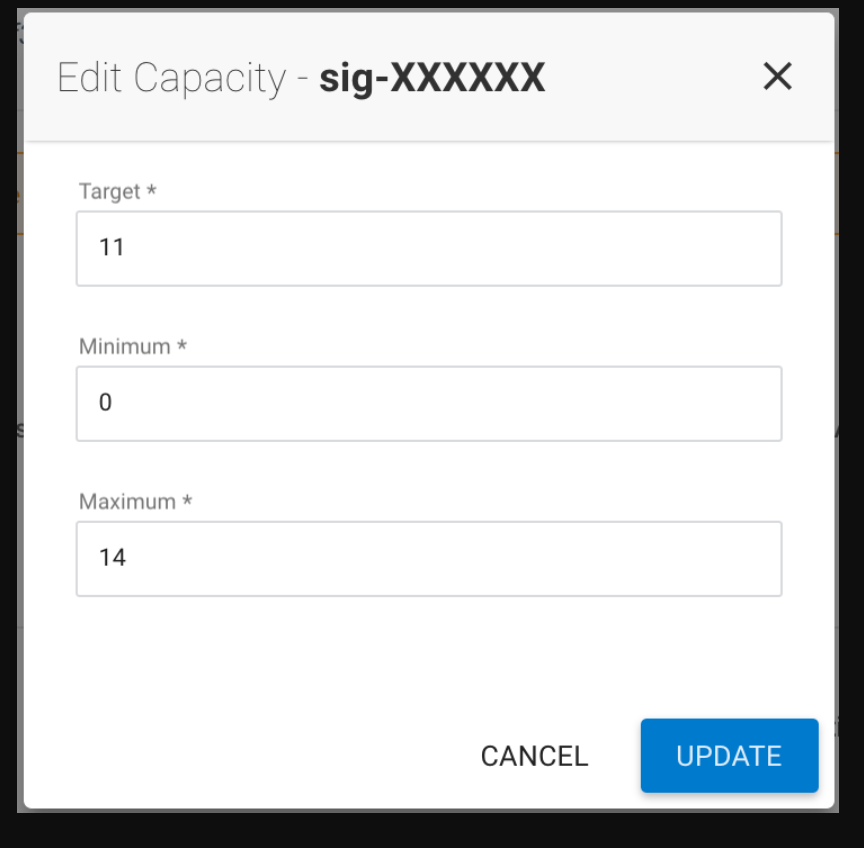
• On the Actions menu, Click [Manage Capacity].
• Reduce the target capacity.
📜 Note: It is highly recommended to reduce the target capacity in batches of 10-20% and repeat this step until complete downscale.
• Navigate to your Ocean Cluster and verify that it is spinning up the required resources and handles the cluster pending pods.
Step 5: Sit Back And Relax, Ocean Got You Covered!
In case of any issues, please contact our support engineers via chat or email.
Launch An Ocean Cluster Associated With A New EKS Cluster
Running Ocean For A New EKS Cluster
This guide covers the requirements to launch Amazon EKS and create an Ocean to manage the cluster worker nodes.
Prerequisites
① kubectl (Amazon EKS-vended)
② awscli 1.16.18+
③ aws-iam-authenticator
Step 1: Create the Ocean and EKS Clusters
CloudFormation
To create new Ocean and EKS clusters, launch the CloudFormation template with the link below, complete the parameters in the template and click Create.

Terraform
To create new Ocean and EKS clusters, download and run the following Terraform plan:
Download: ocean_eks.tf
Step 2: Configure Worker Nodes Managed by Ocean To Join The EKS Cluster
Download the EKS cluster configuration using the following command:
aws eks update-kubeconfig --name $CLUSTER_NAMEConnect kubectl to your EKS cluster
kubectl get svcInstall the AutoSpot Kubernetes Controller
Step 3: Update AWS Authentication Config-Map
Download the AWS authenticator configuration map
curl -O https://amazon-eks.s3-us-west-2.amazonaws.com/1.10.3/2018-06-05/aws-auth-cm.yamlIn the aws-auth-cm.yaml file, replace the
<ARN of instance role (not instance profile)>snippet with theNodeInstanceRolevalue from the Outputs tab of EKS cluster CloudFormation Stack.Apply the updated aws-auth-cm.yaml to the cluster.
kubectl apply -f aws-auth-cm.yaml
⚠️ Warning: Do not modify any other lines in this file.
That’s it! Ocean will now manage the worker nodes, optimizing cluster resource utilization and maximizing savings with Spot instances.
Troubleshooting
If you receive the error
"aws-iam-authenticator": executable file not found in $PATH, then your kubectl is not configured for Amazon EKS. For more information, see Configure kubectl for Amazon EKS.You can list your cluster nodes with the following command:
kubectl get nodes
Upgrade Elastigroup To Ocean Using KOPS
In this tutorial, we will provide you with the process of how to upgrade an Elastigroup cluster created by KOPS to an Ocean cluster.
Are you new to Ocean?
AutoSpot Ocean allows you to run K8s containers, eliminating the operational overhead of worrying about the underlying VM infrastructure, while gaining deeper cluster visibility and dramatically reducing costs by utilizing Spot and reserved instances. In case you require more information, you can check out our Ocean product page.
In addition to that, you can have another read on using KOPS with Elastigroup.
📜 Note: In any case you are dissatisfied with Ocean, you always have the option to revert back to Elastigroup.
Prerequisites
① KOPS version is 1.11.1 or above.
② List of Elastigroups you wish to upgrade.
Step 1: Modify the KOPS Feature Flag variable
This step is taking into account that you have created your K8s with AutoSpot’s official provider version of KOPS.
- In case you are using the unofficial version of KOPS with AutoSpot, we highly recommend migrating your ASG to the official version, as it will add an additional layer of visualization and visibility of your K8s cluster in the AutoSpot UI. Please do so by following Step 3 in this Document.
Please browse to the AutoSpot scripts location and modify the environmental variables in the 00-env.sh file
Modify the following variable:
export KOPS_FEATURE_FLAGS=+Spotinst,SpotinstOcean
Step 2: Upgrade the current Elastigroup to Ocean from AutoSpot UI
Browse to AutoSpot console and select the Elastigroup you wish to upgrade.
Click on [Upgrade to Ocean] icon on the top-right menu, and then select [Upgrade] on the pop-up window.
Please wait for the following message to validate that the upgrade process is complete:

Step 3: Modifying the Ocean Cluster Name
On Ocean’s cluster page, click on Actions > [Edit Cluster]:
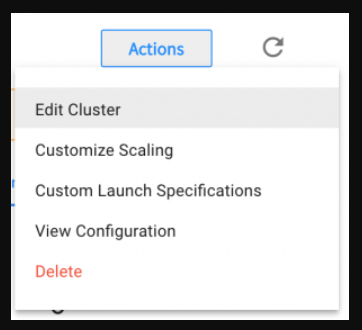
Navigate to the [REVIEW] tab and switch to JSON view:

Enter edit mode:

Change the group name by removing the Ocean:: prefix:

That’s it! From now on, Ocean will be hosting your cluster, and you will be able to continue to manage your cluster using KOPS.
The main difference is that now you can stop worrying about your infrastructure and enjoy a serverless experience.
⚠️ Warning: If you are using multiple Instance-Groups, you should run this process individually.
Adding Azure Cloud Account
Before using AutoSpot, make sure that you have registered an Azure cloud account on the Service Portal > Cloud Account menu.
If your Azure account is already registered on the Service Portal > Cloud Account menu, you are now ready to add an Azure account to the AutoSpot menu. Adding an Azure account according to the below guide requires going back and forth between the AutoSpot Add Account page and the Azure Portal.
- If this is your first time adding an Azure account to the AutoSpot menu, you can find the Add Account button on the center of the page or the upper-left side of the page. Click the [Add Account] button to add a new Azure account.

- Select Azure.
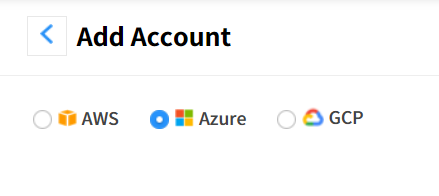
- Let’s go to the Azure Portal to register a new application. Click the [App Registration] button in Step 1 on the AutoSpot Add Account page.
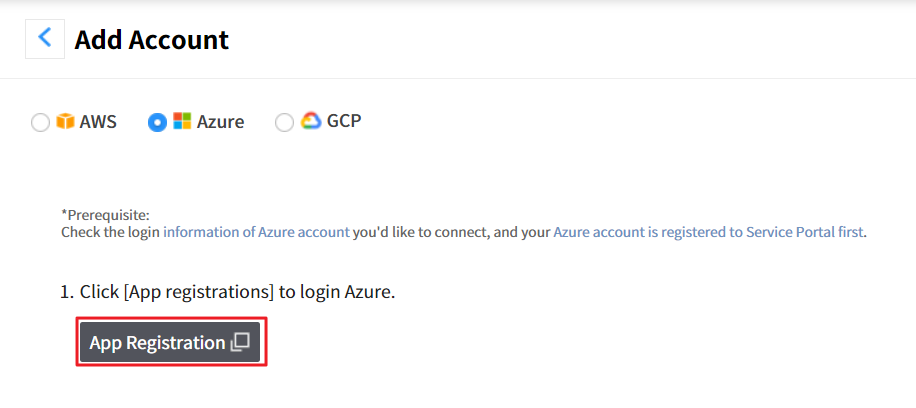
📜 Note: You need to have sufficient permissions to register an application with your Azure AD tenant, and assign to the application a role in your Azure subscription. See Azure Portal Documentation for more details.
- Click the [+ New Registration] button on Home > App registrations.

- On the registration page, enter Name, Supported account types, Redirect URI as below.
| Input item | Input value |
|---|---|
| Name | AutoSpot |
| Supported account types | Accounts in this organizational directory only (Default) |
| Redirect URI | Web, https://spot.io/ |
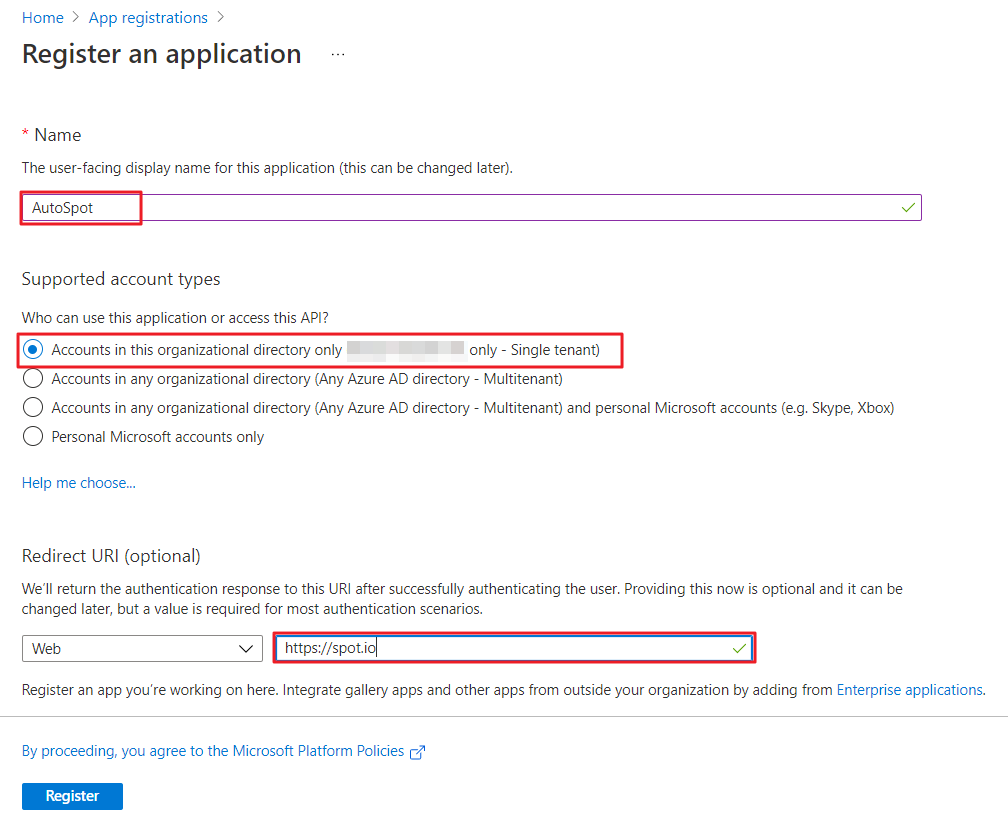
📜 Note: Spot was formerly known as Spotinst.
Click the [Register] button.
Copy Application (client) ID and Directory (tenant) ID from the Overview page of the newly added application and paste them into Step 3 on the AutoSpot Add Account page.


- Coming back to the Azure Portal, go to the Certificates & secrets menu on the left.
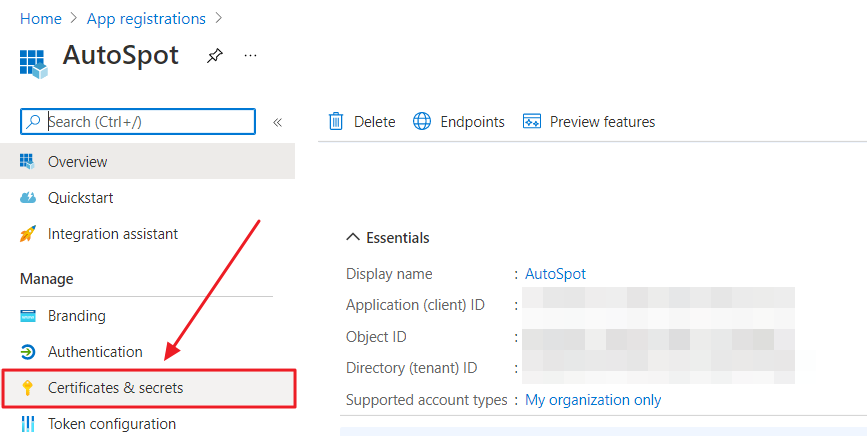
- Click the [+ New client secret].

- Enter Description and select secret value expiration period in Expires, and click the [Add].
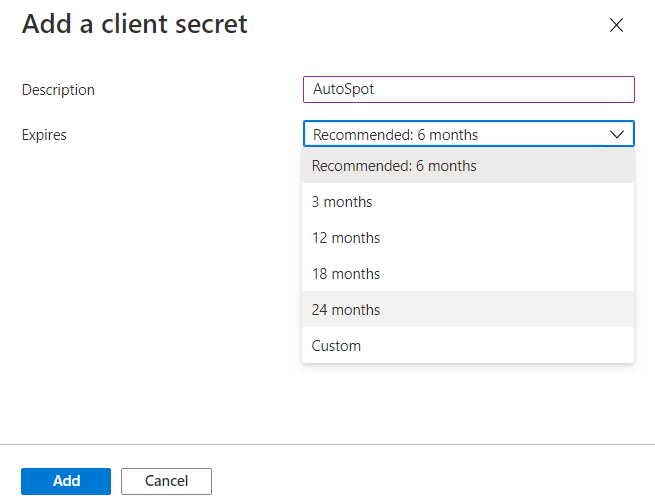
- Copy the Client secret value and paste it in Step 5 on the AutoSpot Add Account page.


Step 6 on the AutoSpot Add Account page shows the Subscription ID list, which is the currently registered subscription lists on the Service Portal. Select a subscription ID to use for AutoSpot.
Click the [Use Subscription ID] button to go to the Access control (IAM) page on Azure Portal.
Click the [Add] button to select Add role assignment.
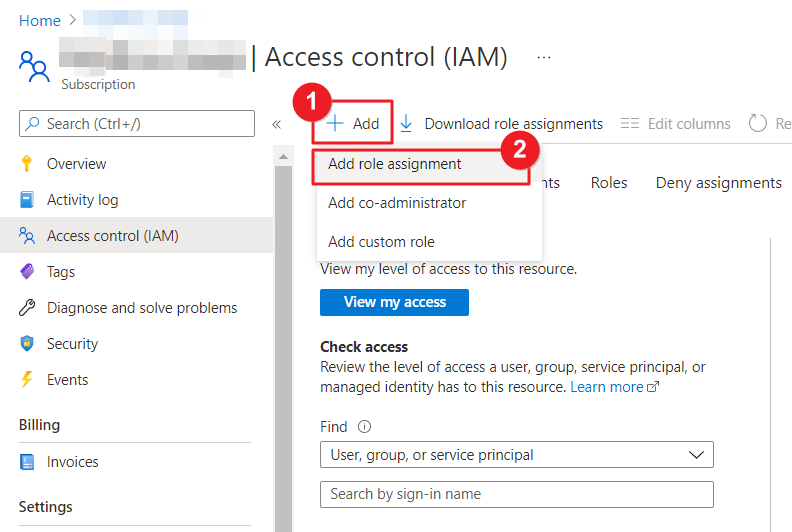
- Select Contributor for Role and click the [Next] button.

- Select Members and enter AutoSpot in the Description field.
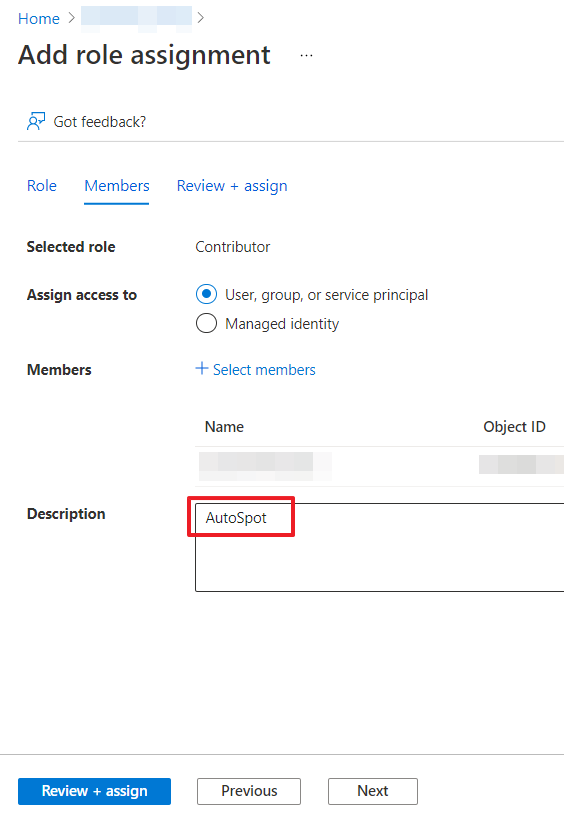
If the Review + assign button is activated, it means you have entered all required fields. Click the [Review + assign] button.
At last, coming back to the AutoSpot Add Account page, click the [Add] button on the lower right to complete adding a new Azure account on the AutoSpot menu.
Adding GCP Cloud Account
Before using AutoSpot, make sure that you have registered a GCP cloud account on the Service Portal > Cloud Account menu.
If your GCP account is already registered on the Service Portal > Cloud Account menu, you are now ready to add a GCP account to the AutoSpot menu. Adding a GCP account according to the below guide requires going back and forth between the AutoSpot Add Account page and the GCP Console.
If this is your first time adding a GCP account to the AutoSpot menu, you can find the Add Account button on the center of the page or the upper-left side of the page. Click the [Add Account] button to add a new GCP account.
![]()
Select GCP.
- Click the [Login] button in Step 1 on the AutoSpot Add Account page to go to the GCP Console Sign in page.
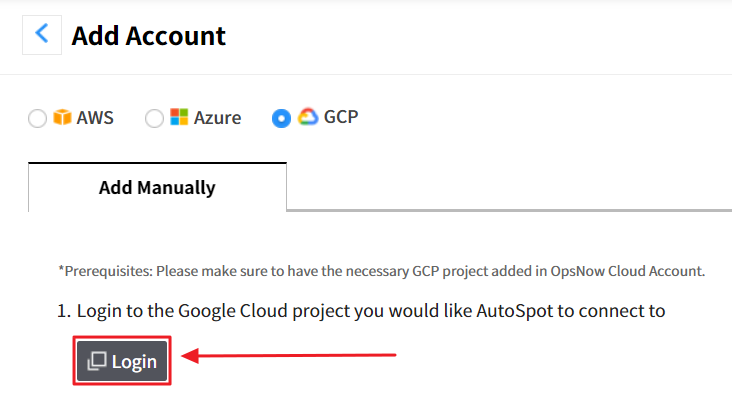
- ① Select a project to add the AutoSpot service and ② go to Service Accounts page.

- Click [+ CREATE SERVICE ACCOUNT] to create a new service account.
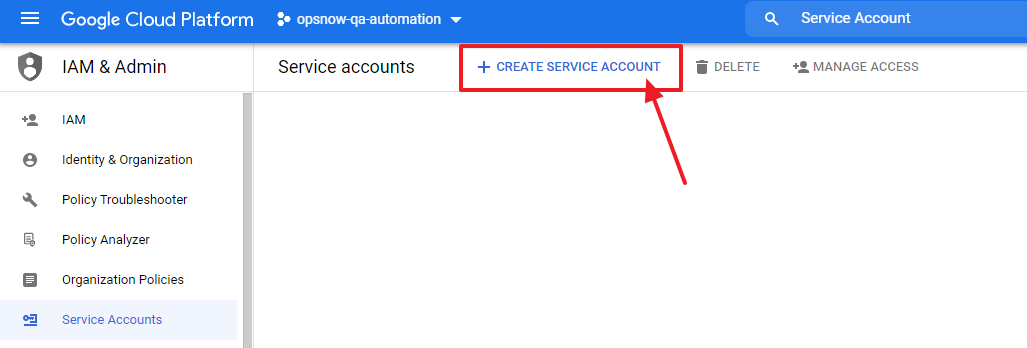
- Enter
autospot-rolein the Service account name field.
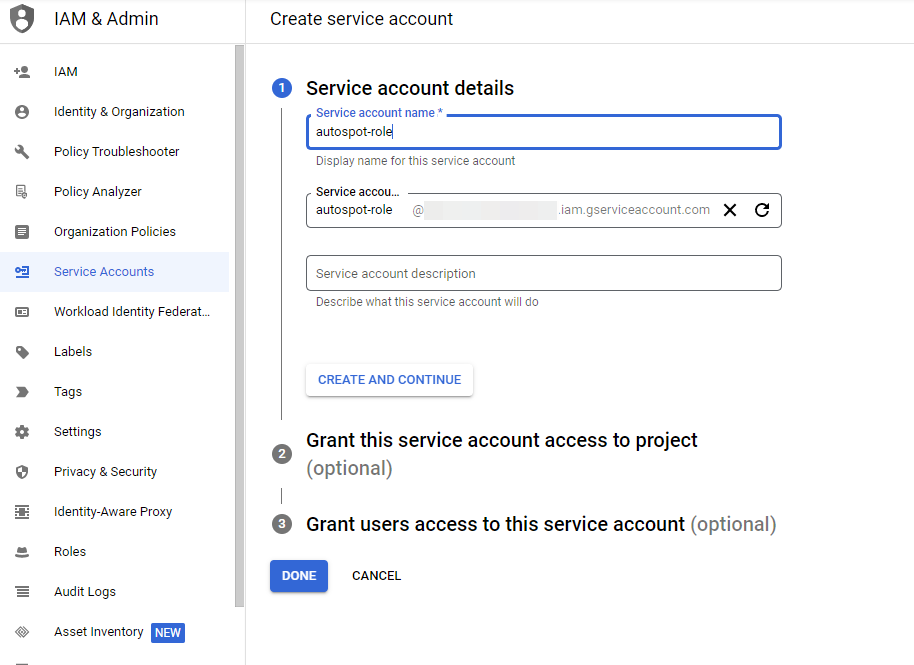
Click the [CREATE AND CONTINUE] button to create a service account.
In Step 2, search and grant Editor Role to the service account and click the [CONTINUE] button. Depending on the user’s permission, Editor role grant might not be available. In such a case, please contact your account administrator.
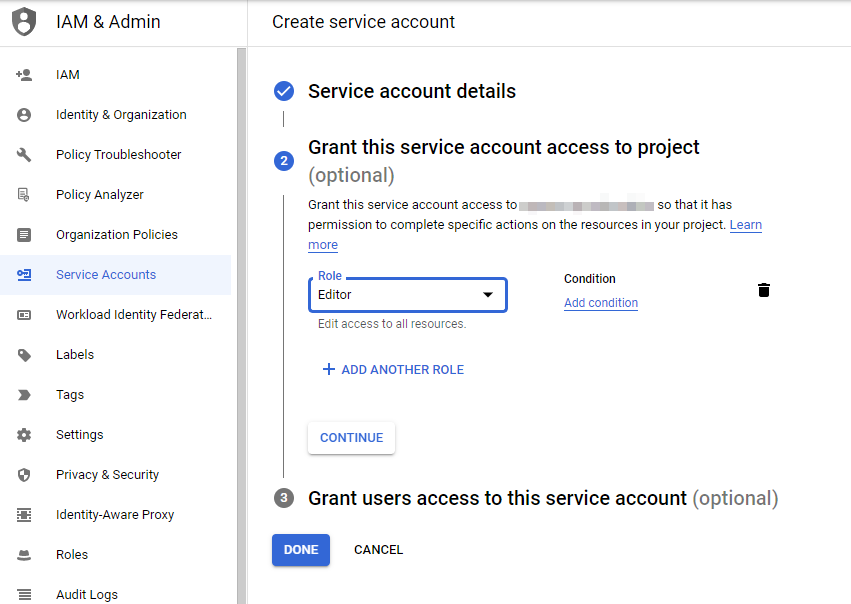
Check API Library whether both of the
Identity and Access Management (IAM) APIandCompute Engine APIare enabled. If they are not, click the [ENABLE] button to use them. (Required)Create a new service account key and upload the JSON key in Step 5 on the AutoSpot Add Account page by clicking the [Upload Private Key] button.
On the AutoSpot Add Account page, click the [Add] button on the lower right to complete adding a new GCP account on the AutoSpot menu.
Commitment Savings
Depending on your country or region, this feature may not be available.
Cloud Service Providers such as AWS, Azure, and GCP offer various pricing options. For On-Demand Instances, you pay as much as you used the resources based on the actual use time without any commitment. Reserved Instances (RI) make long-term usage commitments and offer significant savings. If you have a consistent and predictive amount of cloud resource usage, the commitment-based discount pricing models can help you maximize savings up to 72%⁕ compared to On-Demand pricing.
Check out the new and integrated [Commitment Savings] menu to view and monitor all insightful information on one page, and start saving more!
⁕ AWS EC2 Instance Savings Plans provide the lowest price, offering savings of up to 72%, and the more flexible option, which is AWS Compute Savings Plans, helps you to reduce your costs by up to 66%.
Term Definition
- On-Demand Pricing: You pay for On-Demand Instances compute capacity by the hour or second with no long-term commitments.
- Commitments: Commitments let you buy compute capacity at a discounted hourly rate or price in exchange for a commitment to the usage of specific instances for a predefined period. AWS Reserved Instances (RI) and GCP Committed Use Discounts (CUD) are among the most well-known examples.
- On-Demand Cost Equivalent: This is a calculated value of used commitment, based on the public On-Demand prices. It is an estimated cost assuming the On-Demand rates were applied instead of commitment savings by converting the Used Commitment amount using the On-Demand rates.
- Utilization: One of the indicators of how well you are using or benefiting from the commitment. This is the percentage of the used commitment out of the total purchased commitment. In a sense, the higher the utilization, the greater the cloud cost savings.
- Utilization = (Used commitment amount ÷ Total purchased commitment amount) × 100
- Coverage: Another indicator of how well you are using or benefiting from the commitment. This shows how much of your cloud usage was covered by the purchased commitments.
- Coverage = (On-Demand Cost Equivalent ÷ Total cost) × 100
- Savings Rate: This shows the savings effect of the commitment in numbers. First, we convert the discounted cloud resource cost into On-Demand prices and then subtract the purchased commitment amount from the converted amount. Then, divide this amount by the converted amount, which is the On-Demand Cost Equivalent amount.
- Savings Rate = (Total Savings ÷ On-Demand Cost Equivalent) × 100
- Total Savings: The difference between the On-Demand Cost Equivalent amount and the total purchased commitment amount.
- Total Savings = On-Demand Cost Equivalent - Purchased commitments
- Total Cost: Total cost of commitment-eligible cloud resource usage
- Total Cost = Commitment amount + On-Demand spend not covered by the commitments
- Payment Options:
- All Upfront: You pay for the entire commitment term with one upfront payment. This option provides you with the largest discount compared to On-Demand Instance pricing.
- Partial Upfront: You make a low upfront payment. You will be charged a discounted hourly rate for the instance for the duration of the commitment term.
- No Upfront: You are not paying anything upfront. You will be billed monthly for the commitments.
- Reserved Instances Offering Classes:
- Standard RI: This offering class provides the highest discounts (up to 72% compared to On-Demand pricing). This is a suitable option if your usage is consistent. If you purchase Standard RI, instance types cannot be changed, but it allows you to modify Availability Zone, scope, networking type, and instance size (only with Linux OS).
- Convertible RI: Convertible RI is a type of Reserved Instance with attributes that can be changed during the term. This offers up to 54% savings compared to On-Demand pricing. You can exchange one or more Convertible RI for another Convertible RI with a different configuration, including instance family, OS, and tenancy. There are no limits to how many times you perform an exchange, as long as the new Convertible RI is of an equal or higher value than the original Convertible RI that you are exchanging. The Convertible RI is useful for customers who can commit to using EC2 instances for a three-year term in exchange for a significant discount on their EC2 usage, are uncertain about their instance needs in the future, or want to benefit from changes in price.
- Instance Types: This indicates the type of cloud resources comprised of varying combinations of CPU, memory, storage, and networking capacity. One example is ‘m4.2xlarge’.
Available Pricing Models
AWS Savings Plans (SP)
Savings Plans (SP) are a flexible pricing model that offers low prices on AWS usage, in exchange for a commitment to a consistent amount of usage (measured in $/hour) for a 1- or 3-year term. To maximize the benefits of the AWS Savings Plans, discover the valuable insights in the Commitment Details Savings Plans tab menu such as utilization, coverage, inventory, and so on. You can also dive deeper to see the utilization and coverage trend charts to understand the current status at a glance. Leveraging the abundant information provided in the Commitment Savings menu, you will get the answers to the following questions:
- How much should I commit for the Savings Plans hourly commitment?
- The Commitment Recommendations page provides specific information required for purchasing Savings Plans, including Savings Plan purchase type, term, Hourly Commitment amount, and payment option.
- Which term should I choose for the Savings Plans commitment?
- 1-year
- 3-year
- What kind of Savings Plans purchase type should I choose?
- EC2 Instance Savings Plans: Applies to instance usage within the committed EC2 family and region, regardless of size, tenancy, and operating system. You can save up to 72% compared to the On-Demand rates.
- Compute Savings Plans: Applies to EC2 instance usage, AWS Fargate, and AWS Lambda service usage, regardless of region, instance family, size, tenancy, and operating system. This is the most flexible Savings Plans pricing type.
- Mixed Savings Plans: Both EC2 Savings Plans type and Compute Savings Plans type are mixed appropriately and apply to your cloud usage.
- Where do the Savings Plans commitment discounts apply?
- Amazon EC2 usage
- AWS Fargate for AWS Elastic Container Service(ECS) usage
- AWS Fargate for AWS Elastic Kubernetes Service(EKS) usage
- AWS Lambda usage
- Amazon SageMaker usage
🔔 Notification: See Comparing AWS Savings Plans and Reserved Instances for a more detailed comparison of AWS Savings Plans and EC2 Reserved Instances pricing models.
📜 Note: For more information, see Savings Plans documentation in the AWS User Guide.
AWS Reserved Instances (RI)
📜 Note: AWS Reserved Instances are also known as ‘Reservations’ and ‘Reserved Instances (RI)’.
Amazon EC2 Reserved Instances (RIs) provide a significant discount (up to 72%) compared to On-Demand pricing and provide a capacity reservation when used in a specific Availability Zone. To maximize the benefits of the AWS RI, discover the valuable insights in the Commitment Details [Reserved Instances] tab menu such as utilization, coverage, inventory, and so on. You can also dive deeper to see the utilization and coverage trend charts to understand the current status at a glance. Leveraging the abundant information provided in the Commitment Savings menu, you will get the answers to the following questions:
- How many Reserved Instances should I purchase?
- The Commitment Recommendations page provides specific information required for purchasing Reserved Instances, including platform, offering class, instance type, term, payment option, and recommended quantity.
- Which term should I choose for the Reserved Instances commitment?
- 1 year (1 month to 12 months)
- 3 years (12 months to 36 months)
- Which offering class should I choose?
- Convertible, or
- Standard
- Where do the Reserved Instances commitment discounts apply?
- Amazon EC2 usage,
- Amazon RDS usage,
- Amazon Redshift usage, and
- Amazon ElastiCache usage
- For what kinds of resources the recommendations are provided?
- Amazon EC2,
- Amazon RDS,
- Amazon OpenSearch,
- Amazon Redshift, and
- Amazon ElastiCache
🔔 Notification: See Comparing AWS Savings Plans and Reserved Instances for a more detailed comparison of AWS Savings Plans and EC2 Reserved Instances pricing models.
📜 Note: For more information, see Reserved Instances documentation in the AWS User Guide.
Comparing AWS Savings Plans and Reserved Instances
Reserved Instances (RI) are easier to manage since they are purchased based on the instance quantity. However, it is inconvenient for users because they have to buy additional RIs to apply the discount on different OS, instance sizes, and tenancy. On the other hand, the Savings Plans pricing model lets users commit a certain spend per hour, and therefore, they cannot secure certain computing capacity reservations. However, Savings Plans offer flexibility in changes in OS, instance size, AZ, and tenancy. If you want to secure a capacity reservation, you may look into the AWS On-Demand Capacity Reservations (ODCR).
If your compute usage goes over the committed usage using both AWS Reserved Instances and Savings Plans pricing models, any remaining usage is charged at the On-Demand rates. Also, these cannot be canceled, refunded, or exchanged after the purchase or commitment of both plans.
Refer to the table below to find your best pricing models and start saving on cloud costs.
| Item | Compute SP | EC2 Instance SP | Convertible RIs⁕⁕ | Standard RIs |
|---|---|---|---|---|
| Discount rate⁕ | Up to 66% | Up to 72% | Up to 66% | Up to 72% |
| Change instance family (ex: m4 → c5) |
✓ | — | ✓⁕⁕ | — |
| Automatically applies pricing on any instance family |
✓ | — | — | — |
| Instance size flexibility (ex: Large → 2xLarge) |
✓ | ✓ | ✓⁕⁕ | ✓⁕⁕⁕ |
| Automatically applies pricing on any instance size |
✓ | ✓ | —⁕⁕⁕⁕ | X⁕⁕⁕⁕ |
| Automatically applies pricing on any tenancy or OS |
✓ | ✓ | — | — |
| OS Flexibility (ex: Windows → Linux) |
✓ | ✓ | ✓⁕⁕ | ✓ |
| Share commitment across tenancy (ex: Shared → Dedicated) |
✓ | ✓ | ✓⁕⁕ | — |
| Share commitment across AWS organizations |
✓ | ✓ | ✓ | ✓ |
| Offers 1- and 3-year terms | ✓ | ✓ | ✓ | ✓ |
| All Upfront | ✓ | ✓ | ✓ | ✓ |
| Partial Upfront | ✓ | ✓ | ✓ | ✓ |
| No Upfront | ✓ | ✓ | ✓ | ✓ |
| Region flexibility | ✓ | — | — | — |
⁕ Discount rate compared to the On-Demand instance pricing
⁕⁕ User must make the change manually.
⁕⁕⁕ Linux instance size can be changed.
⁕⁕⁕⁕ The size of Regional Convertible RIs and Regional Standard RIs can be changed.
- Comparing supported AWS services
| AWS Service | Compute SP | EC2 Instance SP | Convertible RIs | Standard RIs |
|---|---|---|---|---|
| EC2 | ✓ | ✓ | ✓ | ✓ |
| RDS | — | — | — | ✓ |
| Redshift | — | — | — | ✓ |
| ElastiCache | — | — | — | ✓ |
| OpenSearch | — | — | — | ✓ |
| DynamoDB | — | — | — | ✓ |
| Fargate | ✓ | — | — | — |
| Lambda | ✓ | — | — | — |
- How the discounts are applied
Savings Plans are applied to the highest savings percentage, which is the same as the deepest discount rate, first. For example, if you have Windows c5.xlarge (saving 19%) and Linux c5.xlarge (saving 37%), then Savings Plans will be applied to Linux c5.xlarge first.
Savings Plans and Reserved Instances are applied to the eligible usage in the below order:
- Zonal (Availability Zone) RIs
- Regional RIs
- EC2 Instance Savings Plans
- Compute Savings Plans
- On-Demand Instances
Azure Reserved Instances (RI)
Depending on your country or region, this feature may not be available.
Azure Reserved Instances (RI) provide a significant discount of up to 72% compared to pay-as-you-go pricing by allowing you to pre-purchase the base costs of your Azure cloud resource usage for a period of 1 or 3 years.
📜 Note: Azure Reserved Instances are also known as ‘Reservations’ and ‘Reserved Instances (RI)’.
- How many Reserved Instances should I purchase?
- The Commitment Recommendations page provides specific information required for purchasing Reserved Instances, including region, instance flexibility group, SKU, term, and Recommended Quantity.
- Which term should I choose for the Reserved Instances commitment?
- 1-year
- 3-year
- Where do the Reserved Instances commitment discounts apply?
- Virtual Machines usage
- Storage usage
- Postgre usage
- MySQL usage
- SQL Database usage
- Azure Database for MySQL usage
- SQL Managed Instance usage
- Azure Database for MariaDB usage
- Redis Cache usage
- For what kind of resources the recommendations are provided?
- Virtual Machines
📜 Note: For more information, see What are Azure Reservations? documentation in the Microsoft Azure Docs.
GCP Committed Use Discounts (CUD)
🔔 Notification: Currently, the commitment recommendations are available only for the Compute Engine product in the Commitment Recommendations.
Committed Use Discounts (CUD) are committed use contracts or commitments in return for heavily discounted prices for GCP VM usage. When you purchase a CUD, you purchase Compute Engine resources—such as vCPUs, memory, GPUs, local SSDs, and sole-tenant nodes—at a discounted price in return for committing to paying for those resources for 1 year or 3 years. Commitments are ideal for predictable and steady-state usage. Unlike AWS or Azure RI, you can choose a certain number of vCPU cores and memory capacity when you purchase the commitment.
- What commitments should I purchase?
- The Commitment Recommendations page provides specific information required for purchasing commitments, including region, duration, resource type, and commitment type.
- Which duration should I choose for the CUD commitment?
- 1 year
- 3 years
- Where do the CUD commitment discounts apply?
- Compute Engine (Virtual Machines)
- For what kind of resources the recommendations are provided?
- Virtual Machines
📜 Note: For more information, see Committed use discounts documentation in the Google Cloud Docs.
GCP Sustained use discounts (SUD)
🔔 Notification: Currently, the Sustained use discounts data is only available in the Commitment Summary menu.
Sustained Use Discounts (SUD) apply to certain Google Compute Engine resources that are used for more than 25% of a billing month and are not receiving any other discounts. The discount increases incrementally with usage and you can get up to a 30% net discount off of the resource cost for instances that run the entire month.
- Sustained use discounts apply to the following resources:
- The vCPUs and memory for general-purpose custom and predefined machine types
- The vCPUs and memory for compute-optimized machine types
- The vCPUs and memory for memory-optimized machine types
- The vCPUs and memory for sole-tenant nodes
- The 10% premium cost for sole-tenant nodes, even if the vCPUs and memory in those nodes are covered by committed use discounts
- GPU devices
📜 Note: For more information, see Sustained use discounts documentation in the Google Cloud Docs.
Commitment Summary
Commitment Savings > Commitment Summary
You can view the essence of all cloud service providers’ active commitment information on one page in the Commitment Summary menu.
Filtering Data
To view the desired commitment savings information, filter data according to the following steps on the Commitment Summary page.
① First, select Cloud Service in the upper right corner. Currently, AWS, Azure, and GCP are supported. For illustrative purposes, AWS is selected here.
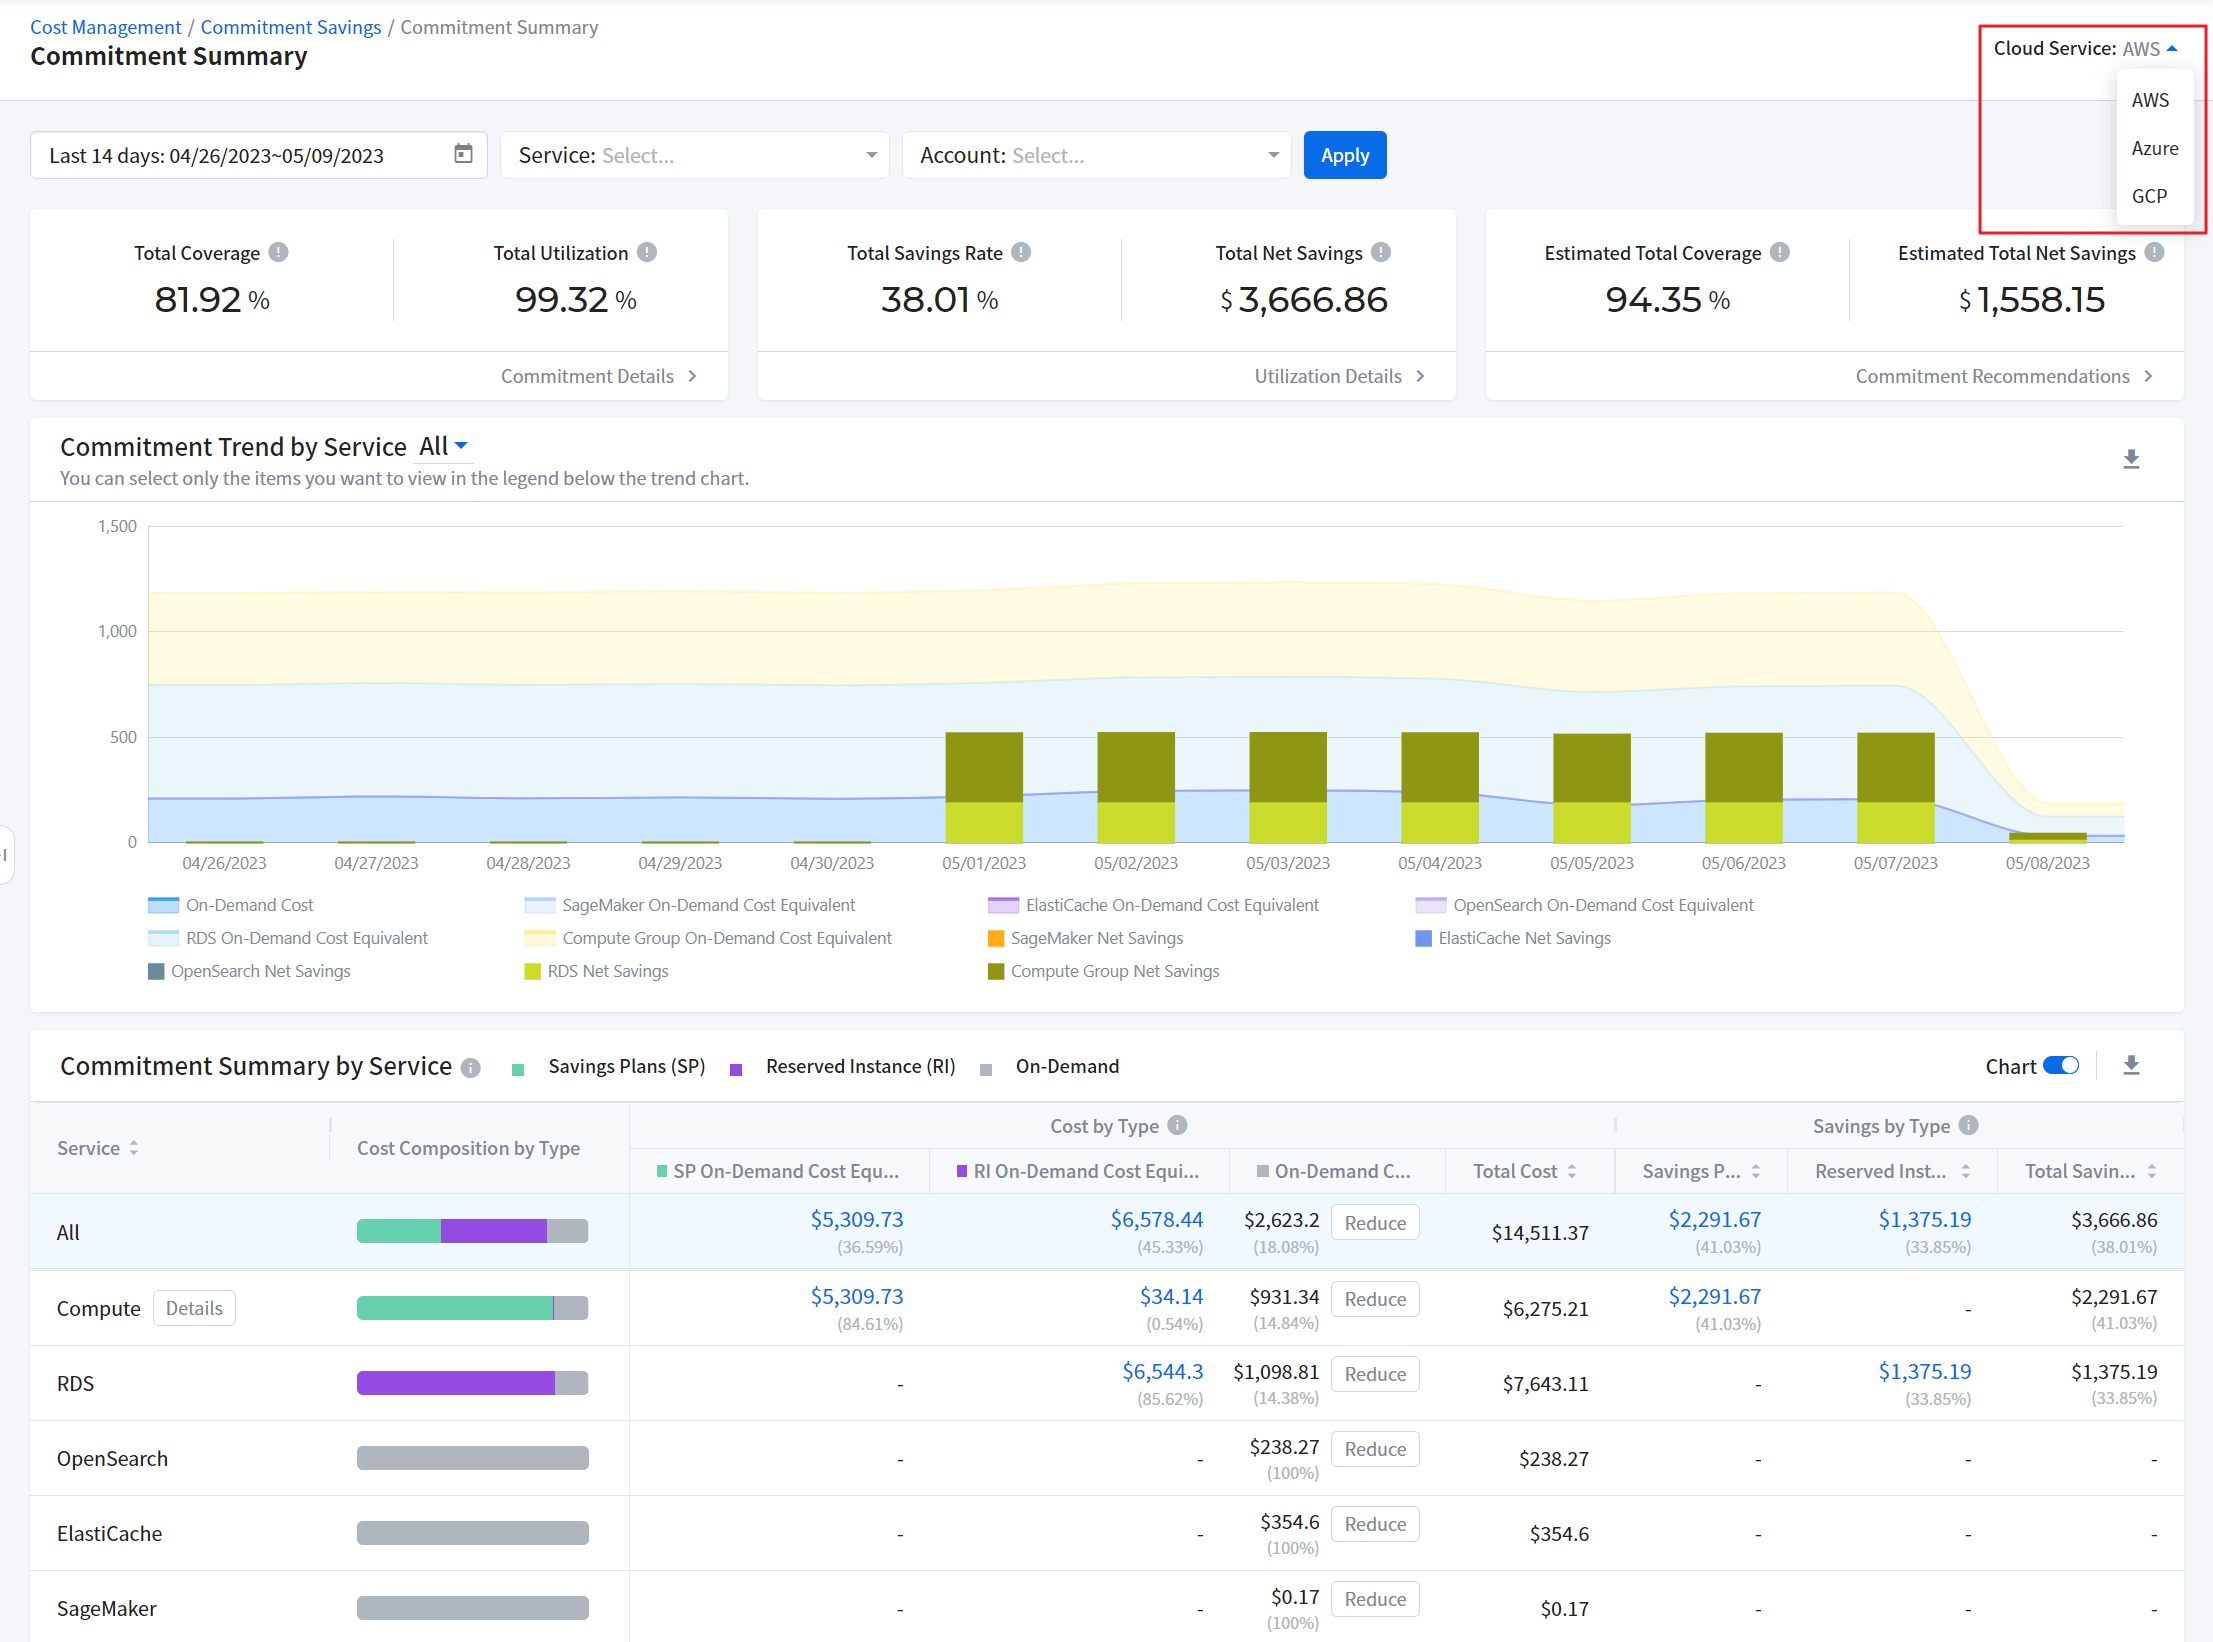
② Click the calendar and set the date range in the upper left corner, and then click [Apply].
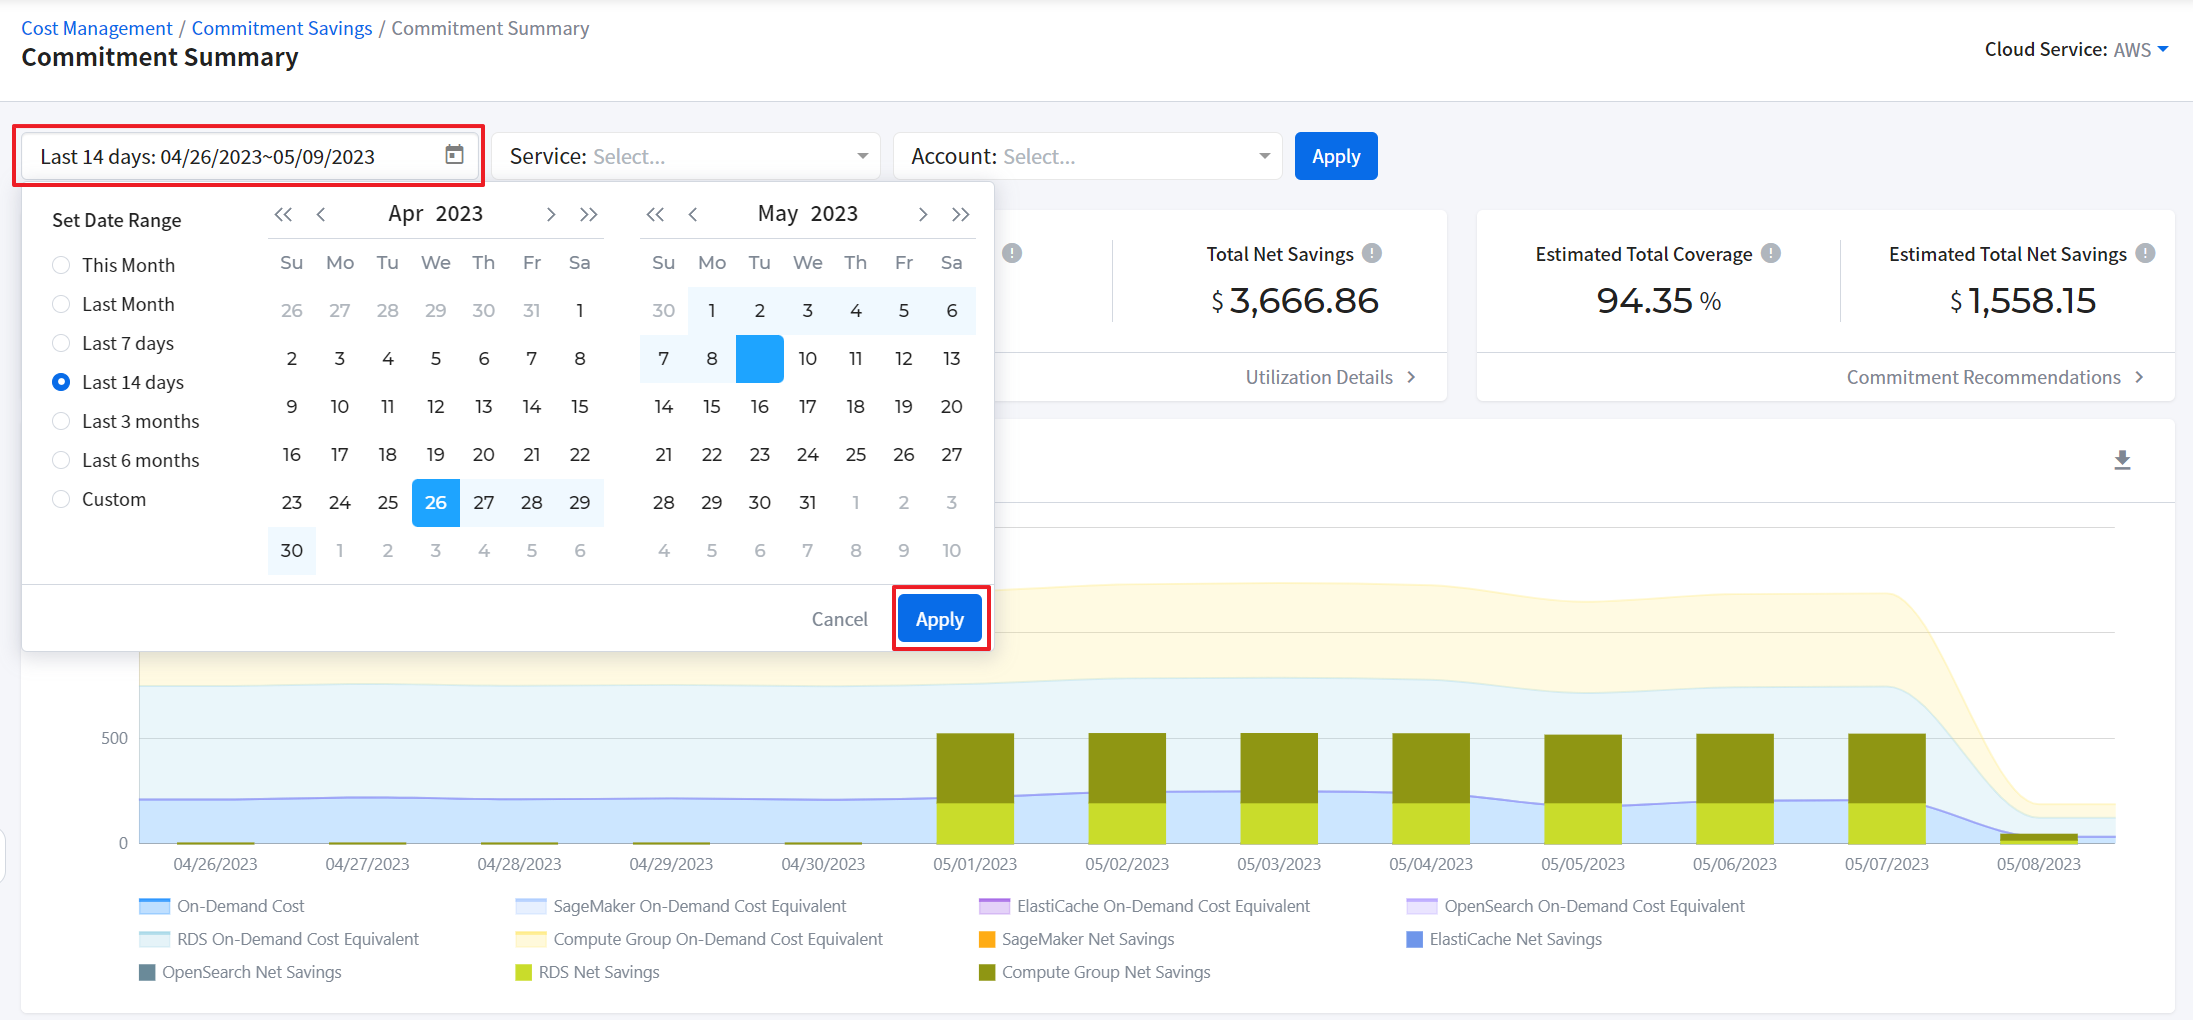
③ Select Service. For Azure and GCP, select Product.
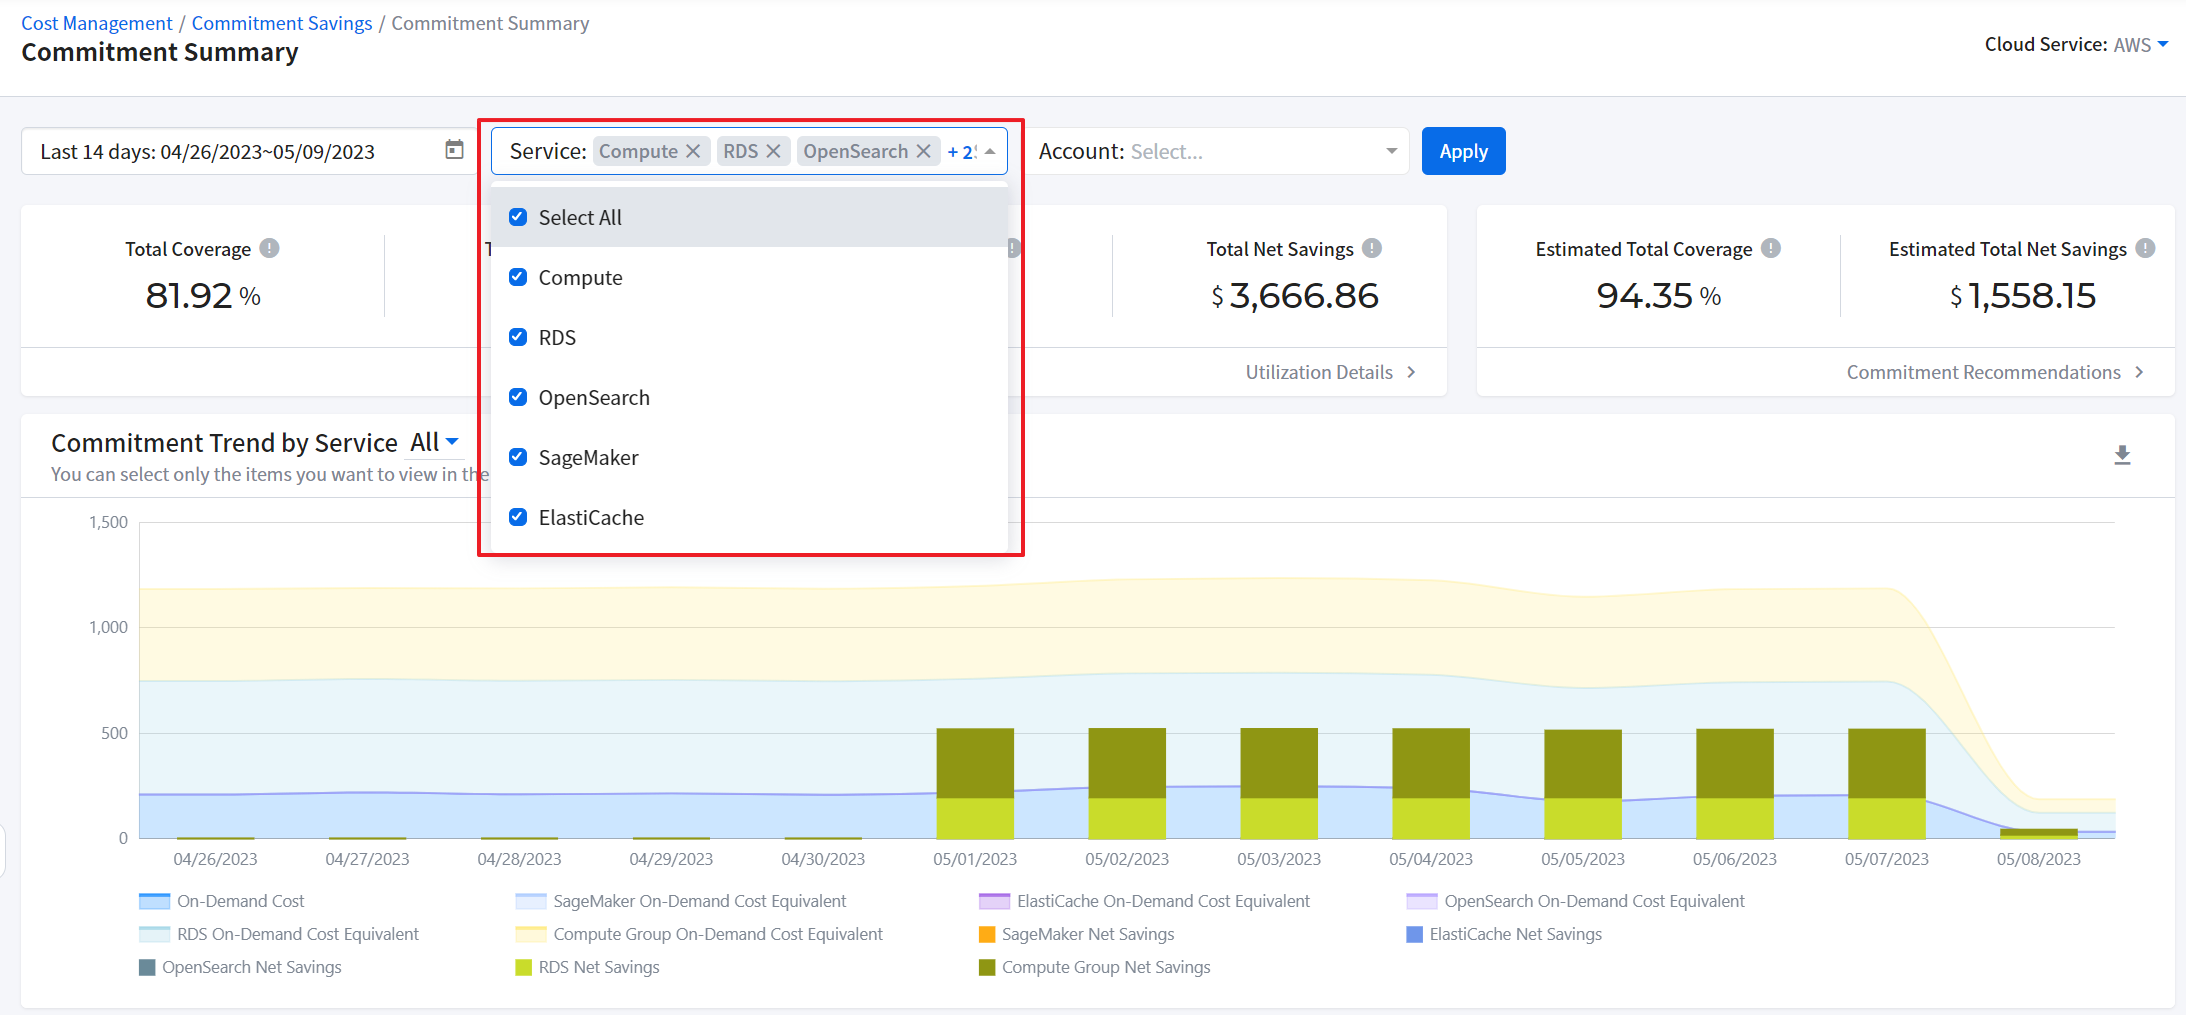
④ Select Accounts. For Azure, select Subscriptions and for GCP, select Projects to view data. If you want to view all data, check off [Select All].
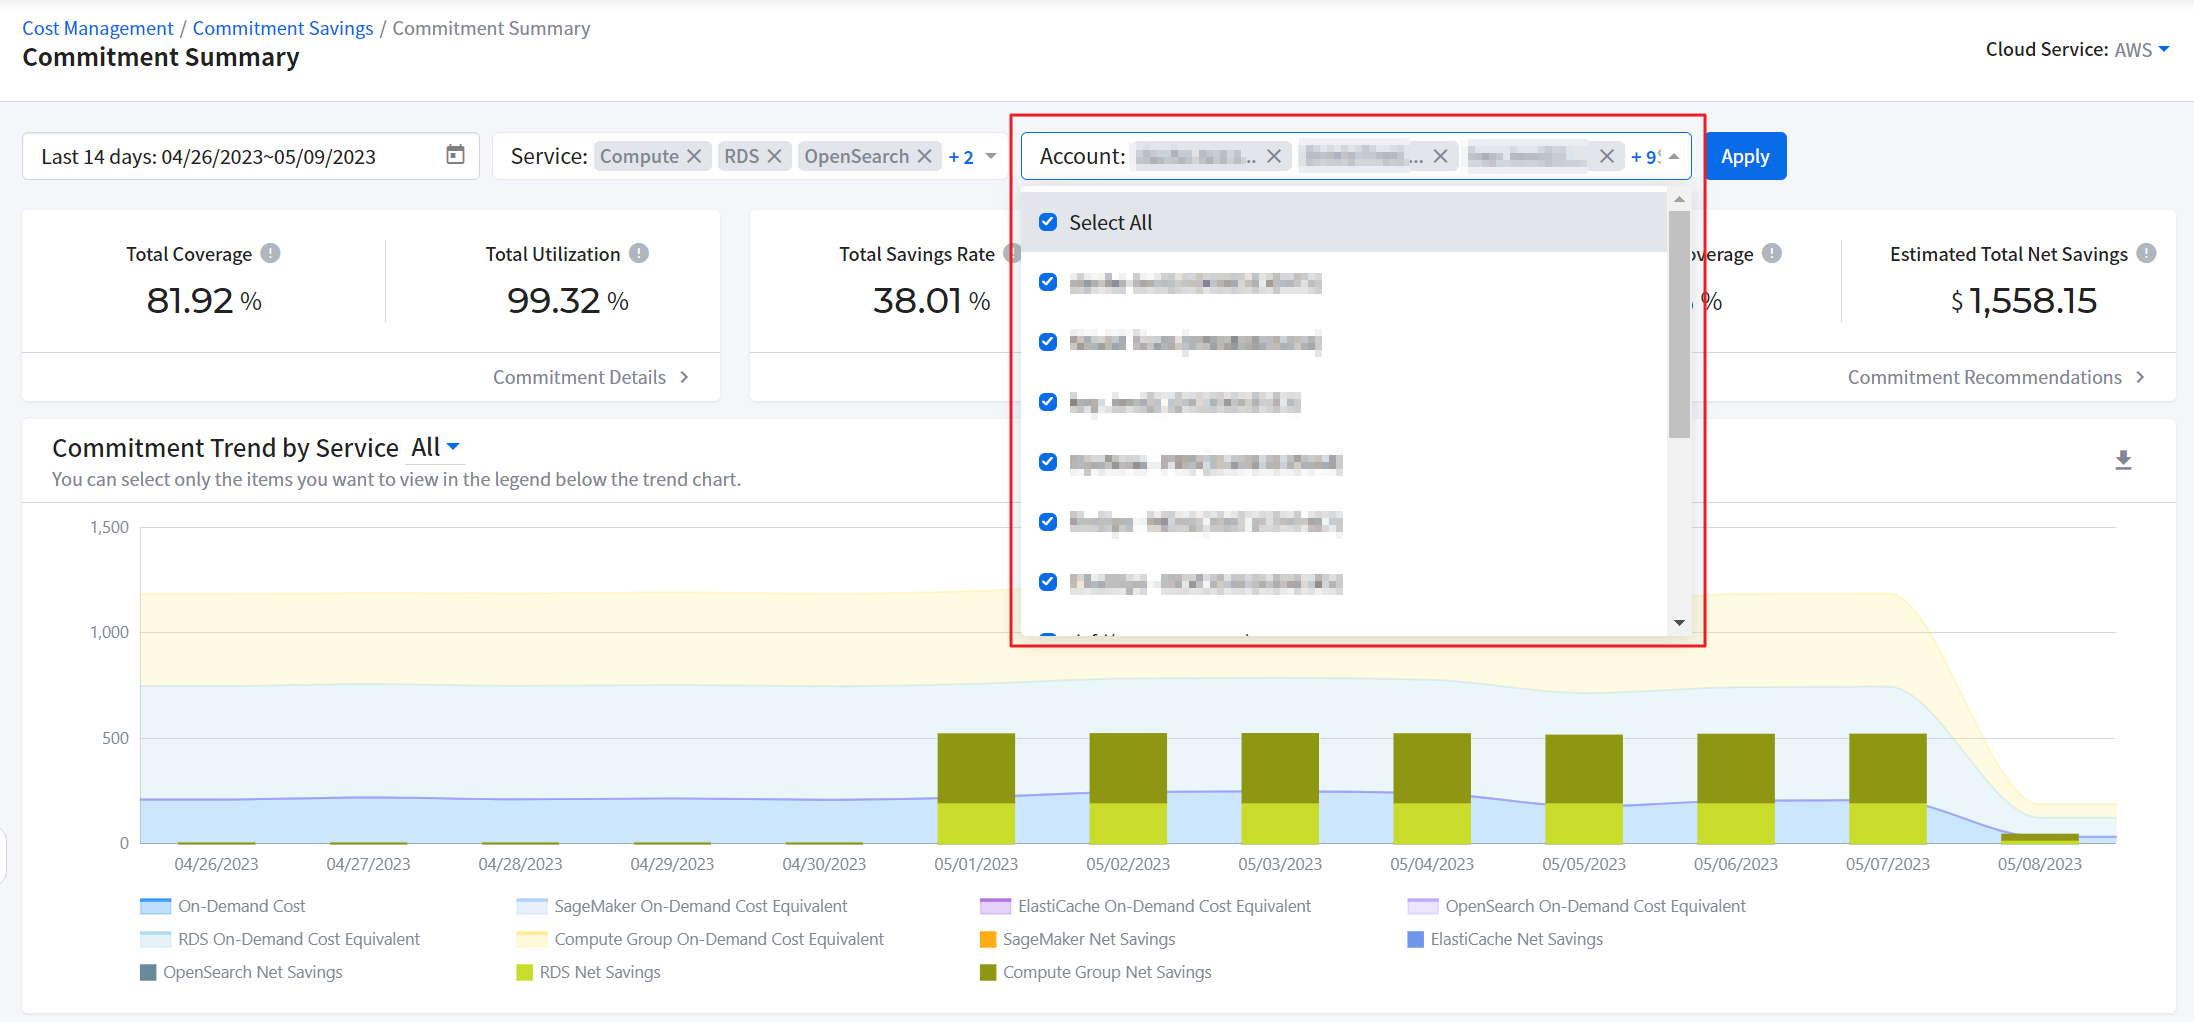
⑤ Click the [Apply] button to apply the data filter. This filter is temporarily saved, so even when you drill down or navigate away from the page, the filter conditions are kept for your convenience.
🔔 Notification: You can also download the filtered data in a CSV file. Click the [Download] icon in the upper right corner of the data table.
Understanding Data
To understand how well you are leveraging the commitments, first you should know your Commitment Coverage and Utilization rates by cloud service provider.
If you want to find out how much you are currently saving, for the benefit of the commitments, you should look closely at the Savings Rate and Net Savings amount. For an even greater savings effect, check out the Estimated Coverage and Estimated Net Savings and purchase additional commitments following the Commitment Recommendations.
Total Coverage: One of the indicators of how well you are using or benefiting from the commitment. This shows how much of your cloud usage was covered by the purchased commitments.
Total Coverage = (RI On-Demand Cost Equivalent + SP On-Demand Cost Equivalent) ÷ Total Cost × 100Total Utilization: Another indicator of how well you are using or benefiting from the commitment. This is the percentage of the used commitment out of the total purchased commitment. In a sense, the higher the utilization, the greater the cloud cost savings.
Total Utilization = (RI Used commitment amount + SP Used commitment amount) ÷ Total purchased commitment amount × 100Total Savings Rate: This shows the savings effect of the commitment in numbers. First, we convert the discounted cloud resource cost into On-Demand prices and then subtract the purchased commitment amount from the converted amount. Then, divide this amount by the converted amount, which is the On-Demand Cost Equivalent amount.
Total Savings Rate = Total Net Savings ÷ (RI On-Demand Cost Equivalent + SP On-Demand Cost Equivalent) × 100Total Net Savings: The difference between the On-Demand Cost Equivalent amount and the total purchased commitment amount over the selected period
Total Net Savings = (RI On-Demand Cost Equivalent + SP On-Demand Cost Equivalent) - (RI Used commitment amount + SP Used commitment amount)Estimated Total Coverage: This is the estimated amount of total coverage if you purchase all the commitments recommended based on the usage analysis over the last 30 days.
Estimated Total Net Savings: This is the estimated amount of total net savings if you purchase all the commitments recommended based on the usage analysis over the last 30 days.
To learn more about the detailed data for each item, please click the Details button, circled in green.
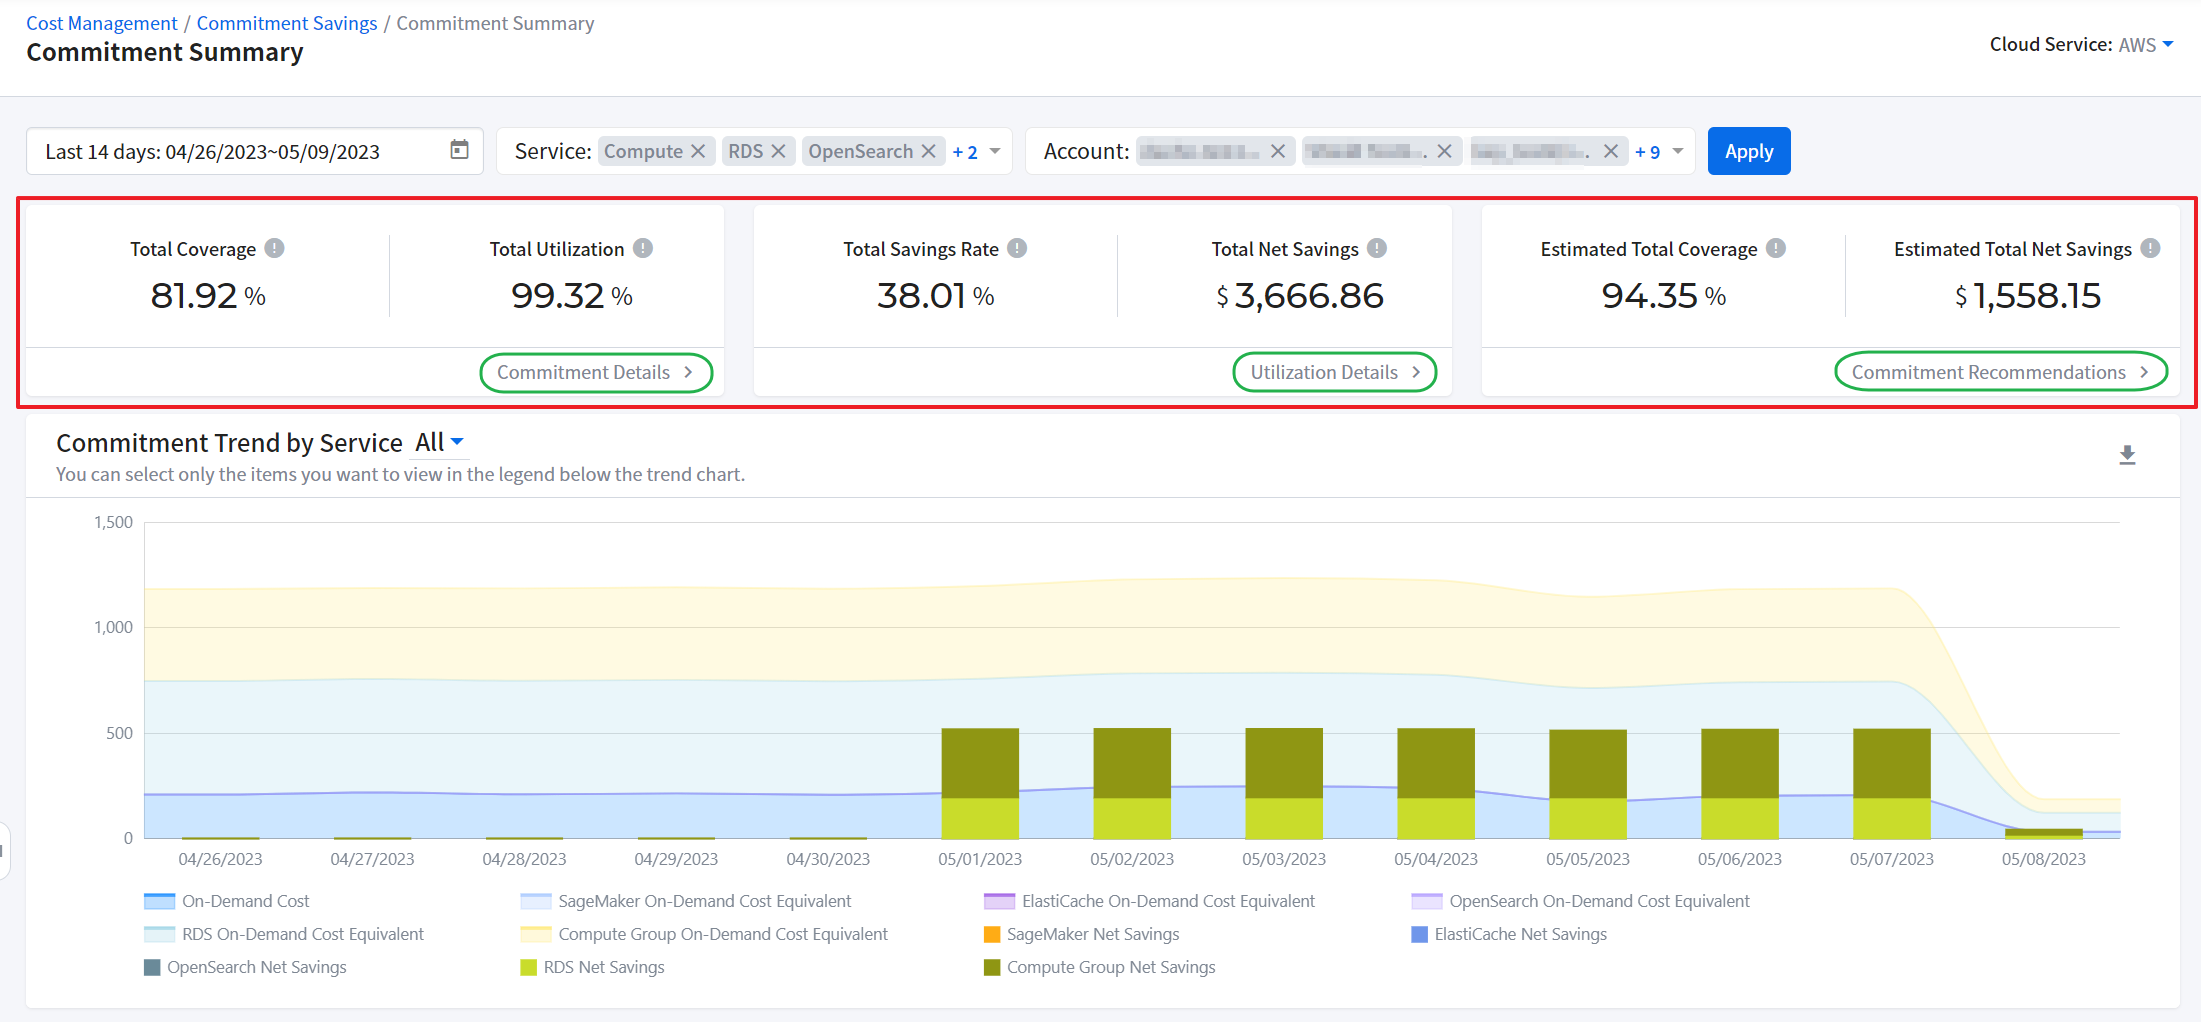
Cost Composition by Type
View the different types of commitments and how many of them are currently in use in the Cost Composition by Commitment Types chart at a glance. You can save more when the proportion of On-Demand costs is lower while that of used commitments is higher. We recommend you purchase more commitments if the proportion of On-Demand costs is high in the chart. You can hide or show the Cost Composition by Commitment Types horizontal bar chart using the toggle switch located on the top of the data table.

You can view the actual amount under the Cost by Type data table. Click the amount to move to the Details page.
- Click the Commitment On-Demand Cost Equivalent amount, in red box: Navigates to the Commitment Details menu
- Click [Reduce], in green box: Navigates to the Commitment Recommendations menu for more optimal cost-saving information.
![]()
View AWS Compute Engine Info
For AWS’s Amazon EC2, Amazon ECS, Amazon Lambda services, click the [Details] button next to Compute Engine in the Commitment Summary by Service.

Commitment Details
Commitment Savings > Commitment Details
You can view the utilization, coverage, inventory and even the trends of utilization and coverage of all purchased commitments in the Commitment Details menu.
Filter Data
To view the desired commitment savings information, filter data according to the following steps on the Commitment Details page.
① First, select Cloud Service in the upper right corner. Currently, AWS, Azure, and GCP are supported. For illustrative purposes, AWS is selected here.

② Select the Commitment-type tab menu on the upper left.

③ Click the calendar and set the date range in the upper left corner, and then click [Apply].

④ Select Accounts. For Azure, select Subscriptions and for GCP, select Projects to view data. If you want to view all data, check off [Select All].

⑤ Select Service. For Azure and GCP, select Product. For AWS Savings Plans, go to ⑥ without selecting anything else.
⑥ Click the [Apply] button to apply the data filter. This filter is temporarily saved, so even when you drill down or navigate away from the page, the filter conditions are kept for your convenience.
🔔 Notification: You can also download the filtered data in a CSV file. Click the [Download] icon in the upper right corner of the data table.
Utilization
Utilization shows how well you are using the purchased commitment. Utilization is calculated as follows:
- Utilization = (Used Commitments ÷ Commitments) × 100
For example, if the committed amount is $100 and the used commitment is $90, then the utilization is 90%.
Low utilization means that there is an excess amount of committed usage compared to the actual usage. You can get the maximum discount benefits when your utilization is high. Consider the following reasons if your utilization is low:
- Decrease in instance usage
- Change in instance type after the commitment purchase

📜 Note: Utilization and Coverage are indicators that conflict with each other. For the cost-optimizing objective, you need to find a balance between the two indicators. When the utilization is slightly higher than the coverage, it can be seen as a stable cost-saving scenario.
View Utilization Details
To see the Utilization Trend, click [View Details] in the Utilization card view.

Utilization Trend chart shows daily, weekly, or monthly utilization trends in a bar chart or line chart. Below the trend chart, the Utilization Details data table provides detailed information such as commitment types, total cost, and so on.
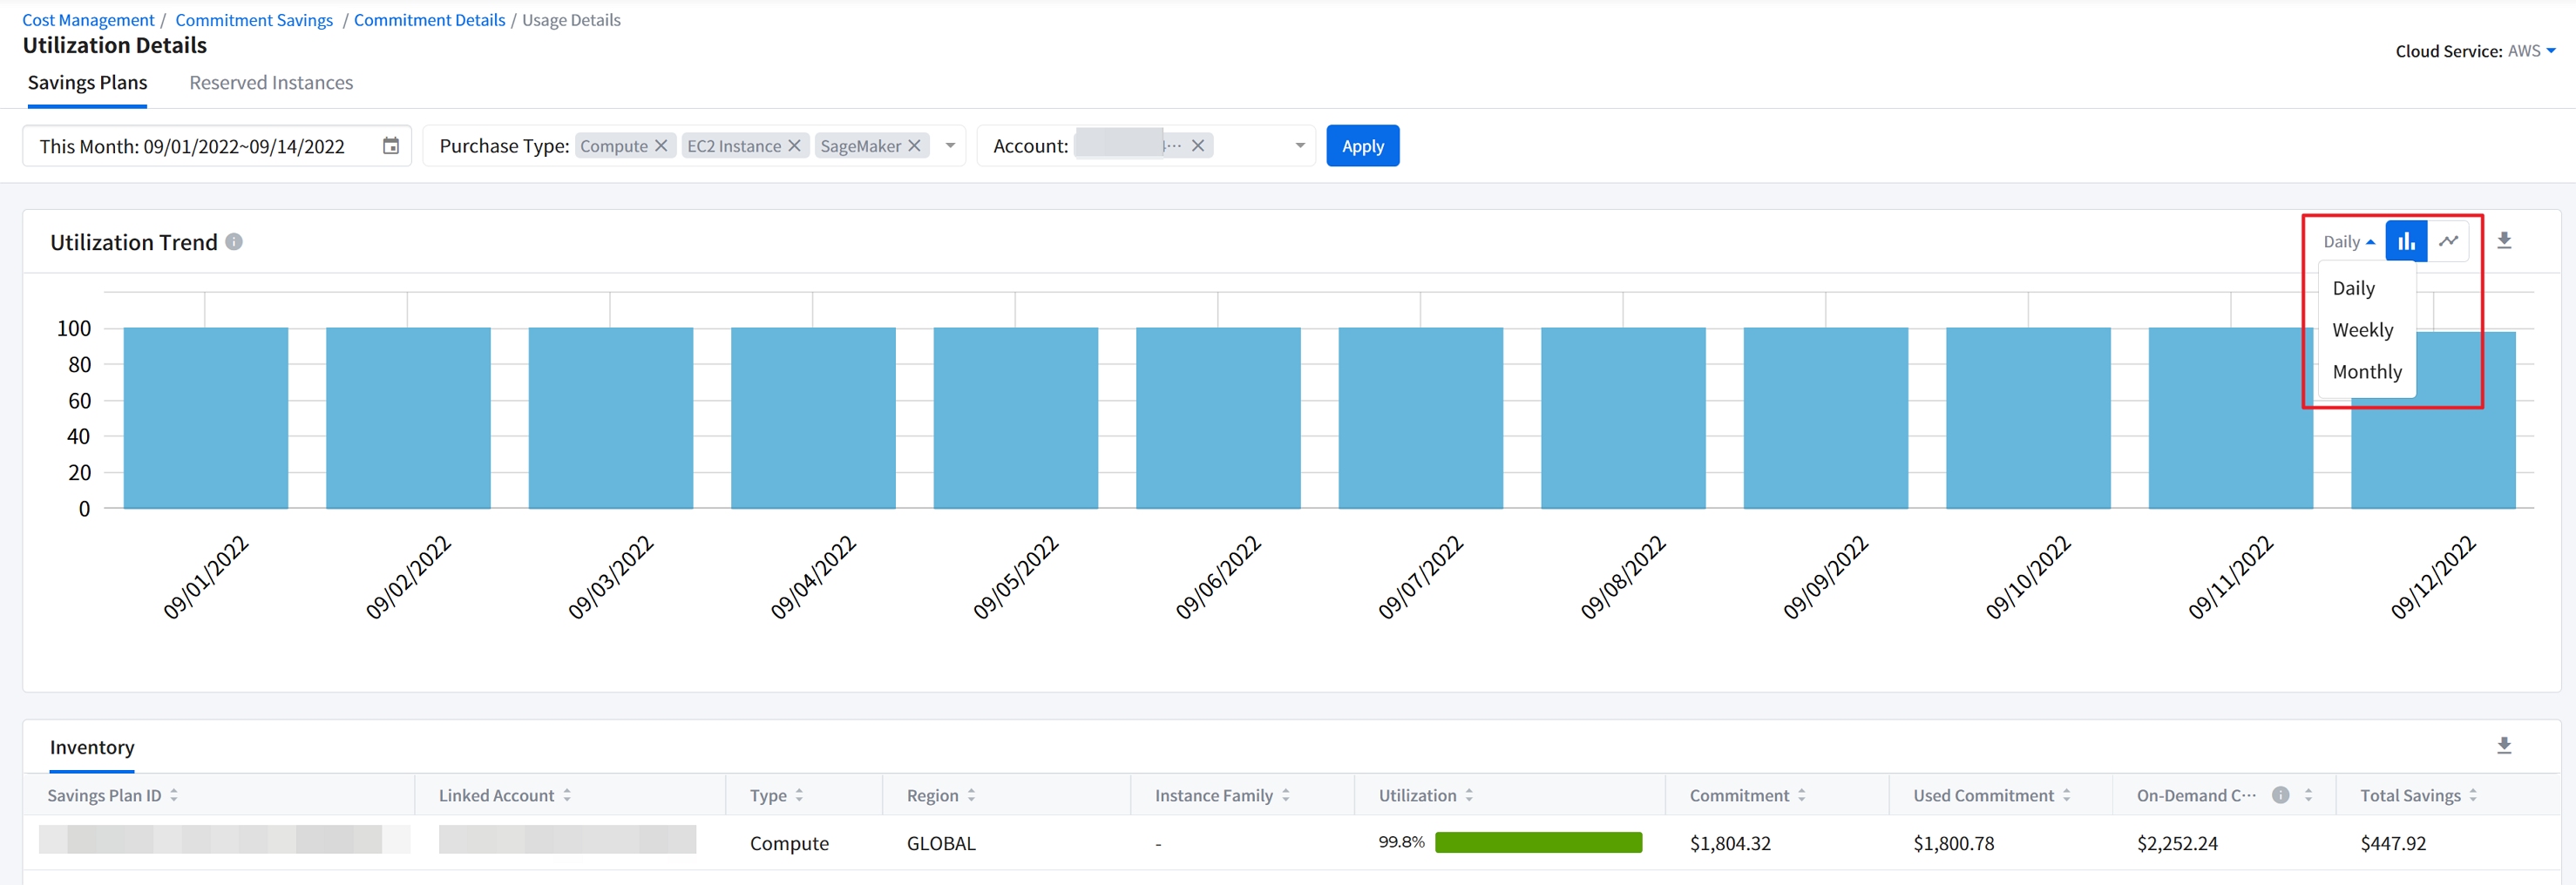
🔔 Notification: You can also download the filtered data in a CSV file. Click the [Download] icon in the upper right corner of the data table.
Coverage
Coverage shows how much of the commitment-applicable cloud resource cost is covered by the commitment. Coverage is calculated as follows:
- Coverage = (On-Demand Cost Equivalent ÷ Total Cost) × 100
For example, let’s say your commitment-applied cloud cost is $50 and its On-Demand cost equivalent is $70. At the same time, the On-Demand cost was $30. The total cost, which is the sum of On-Demand cost equivalent and On-Demand cost, is $100. Then, in this scenario, the coverage is 70%.
In another example, let’s say you have used a total of 100 hours of instances over a certain period of time. Among those, commitment savings can be applied for the 70 hours of usage, and On-Demand rates are applied to the rest of the usage. Then, the coverage is 70%.
Low coverage means that your potential savings are high. In this case, we recommend purchasing more commitment to maximizing your cost savings. Consider the following reasons if your coverage is low:
- Expiration of existing commitments
- Addition of new accounts
- Increase in usage

View Coverage Details
To see the Coverage Trend, click [View Details] in the Coverage card view.

Coverage Trend chart shows daily, weekly, or monthly coverage trends in a bar chart or line chart. View more information under the [Coverage Details] table at the bottom of the page.
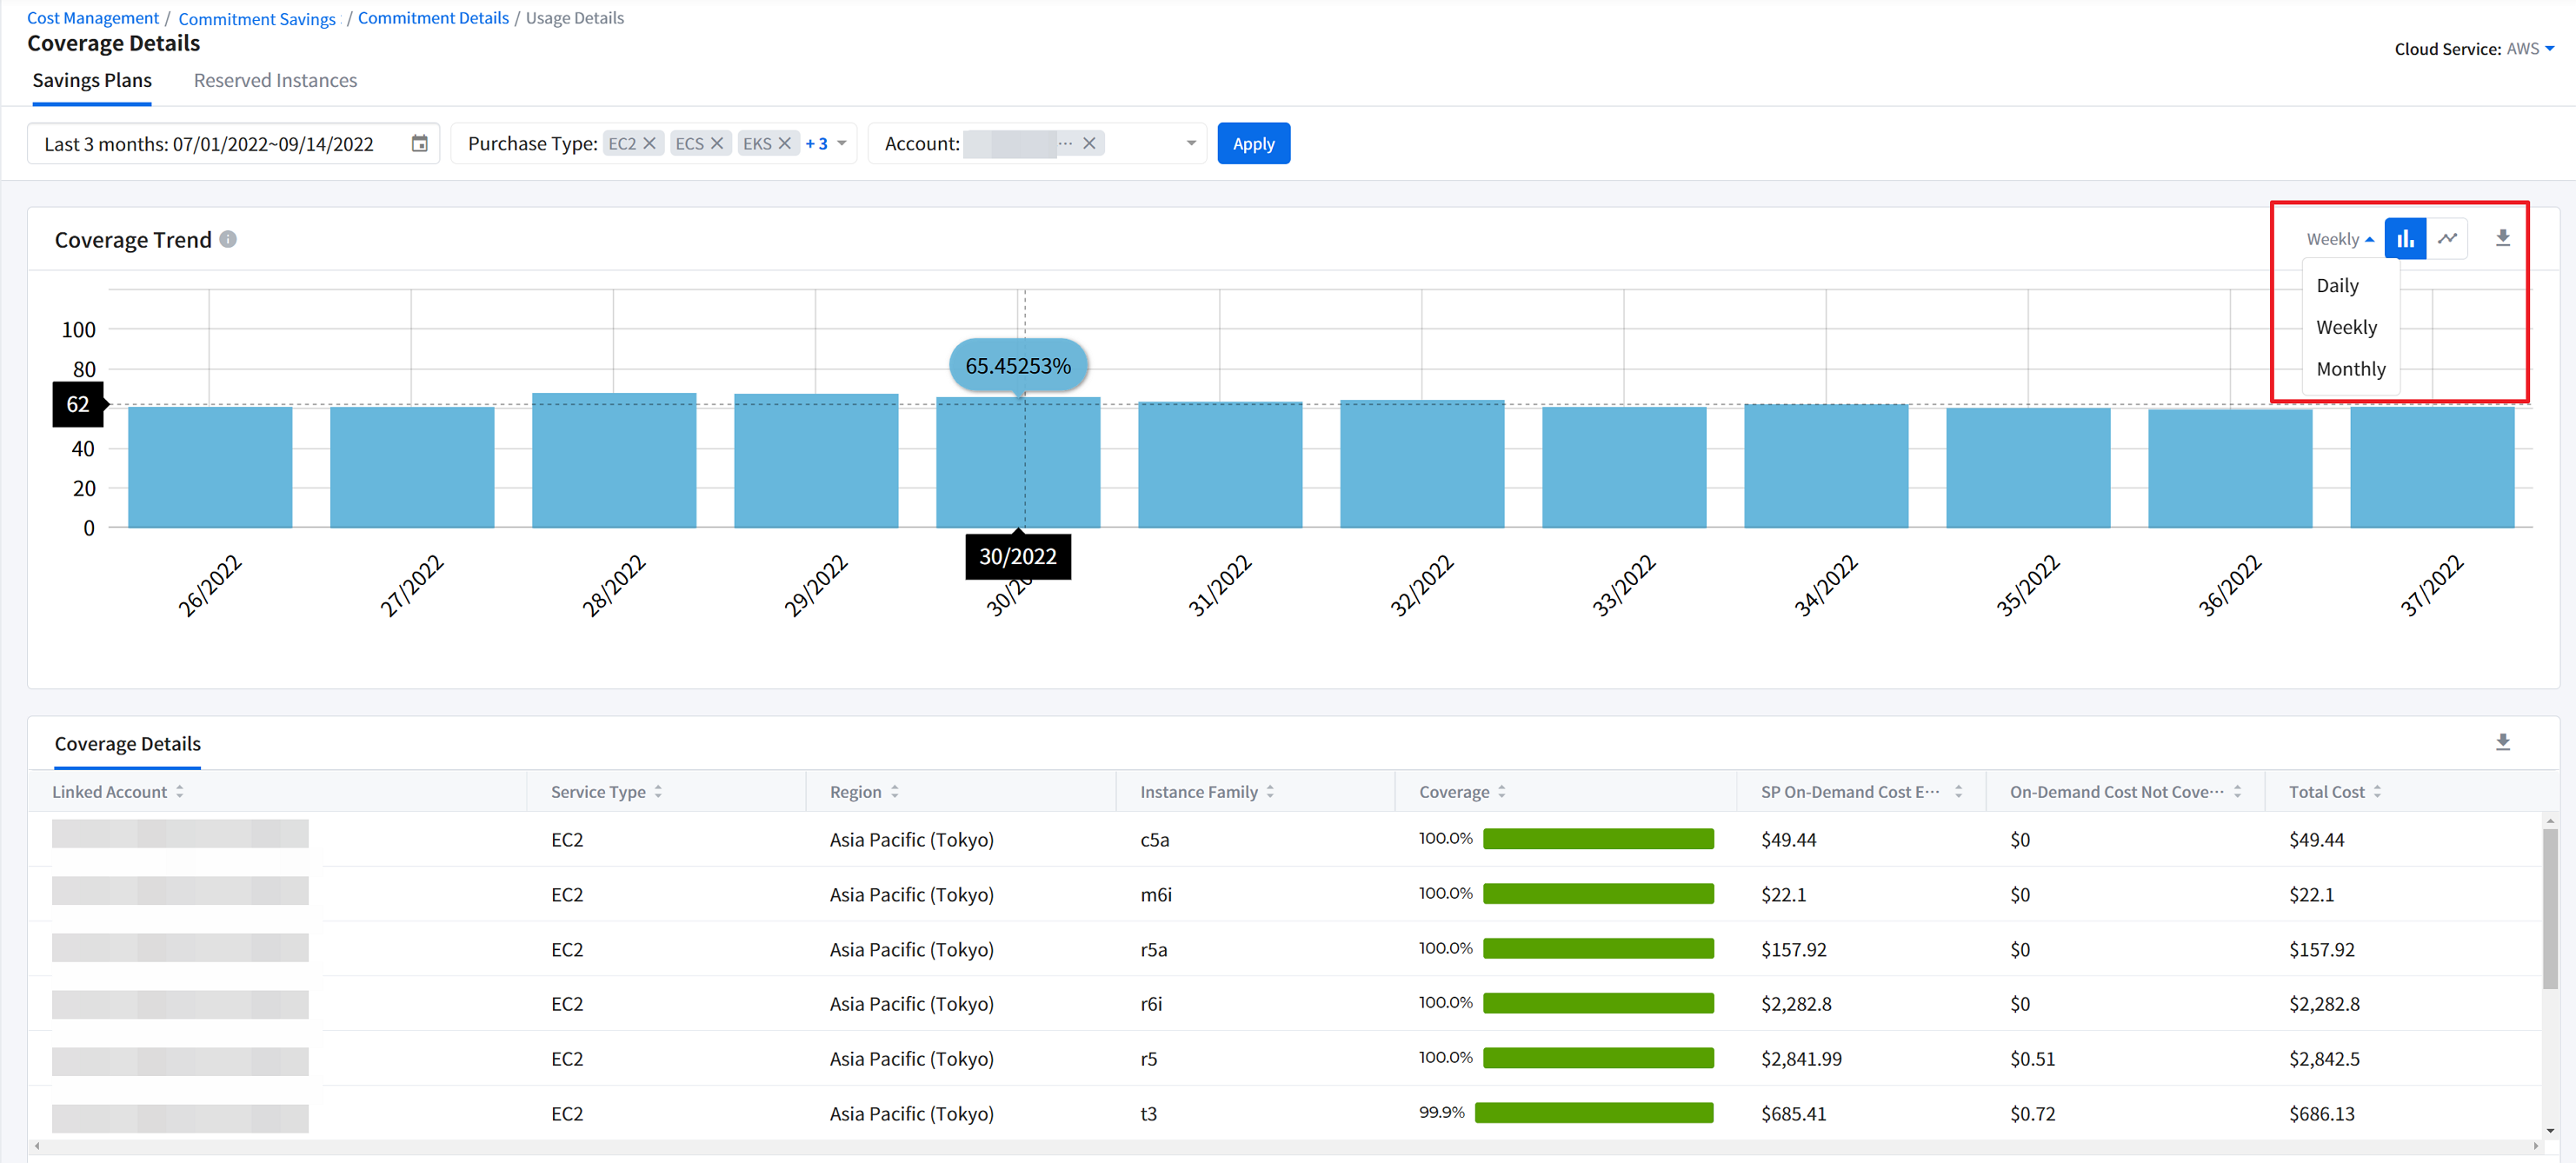
🔔 Notification: You can also download the filtered data in a CSV file. Click the [Download] icon in the upper right corner of the data table.
Inventory
Inventory provides information about your purchased commitments. Learn more about the active commitments that are currently in use. Plan for additional purchases if your commitment expiration date is approaching.
| Table Headers | Description |
|---|---|
| Region | Potential discount can only be realized when you purchase the commitment in the recommended region. |
| RI Count | For AWS and Azure RI, this is the purchase recommended quantity. |
| Hourly Commitment | For AWS Savings Plans, this is the recommended hourly commitment amount. |
| Days Remaining | This shows how many days you have left until the commitment term ends and discounts benefits expire. |
| Payment Option | Three options are available; All Upfront, Partial Upfront, and No Upfront. |
| Offering Class | AWS EC2 RI offers two types; Standard and Convertible. |
| Data Analysis Period | During this period, your usage data is analyzed, and based on this analysis, we make commitment recommendations for you. |
| Term, Duration | This is the recommended purchase term or duration that you should select when you purchase the commitment on the Cloud Service Console. |
| Scope | For Azure RI, reservation scope can be set to select where the commitment would apply. It can be either Single or Shared. |
| Flexibility | AWS EC2 RI offers size flexibility. When the commitment is flexible, it can be applied to different instance sizes within the same region, instance family, and system environment. |

Commitment Recommendations
Commitment Savings > Commitment Recommendations
Get cost-savings information in the Commitment Recommendations if you want to buy more commitments or if you are currently paying On-Demand rates for your cloud resources.
View Recommended Commitments
To view the commitment recommendations, filter data according to the following steps on the Commitment Details page.
① First, select Cloud Service in the upper right corner. Currently, AWS, Azure, and GCP are supported. For illustrative purposes, AWS is selected here.
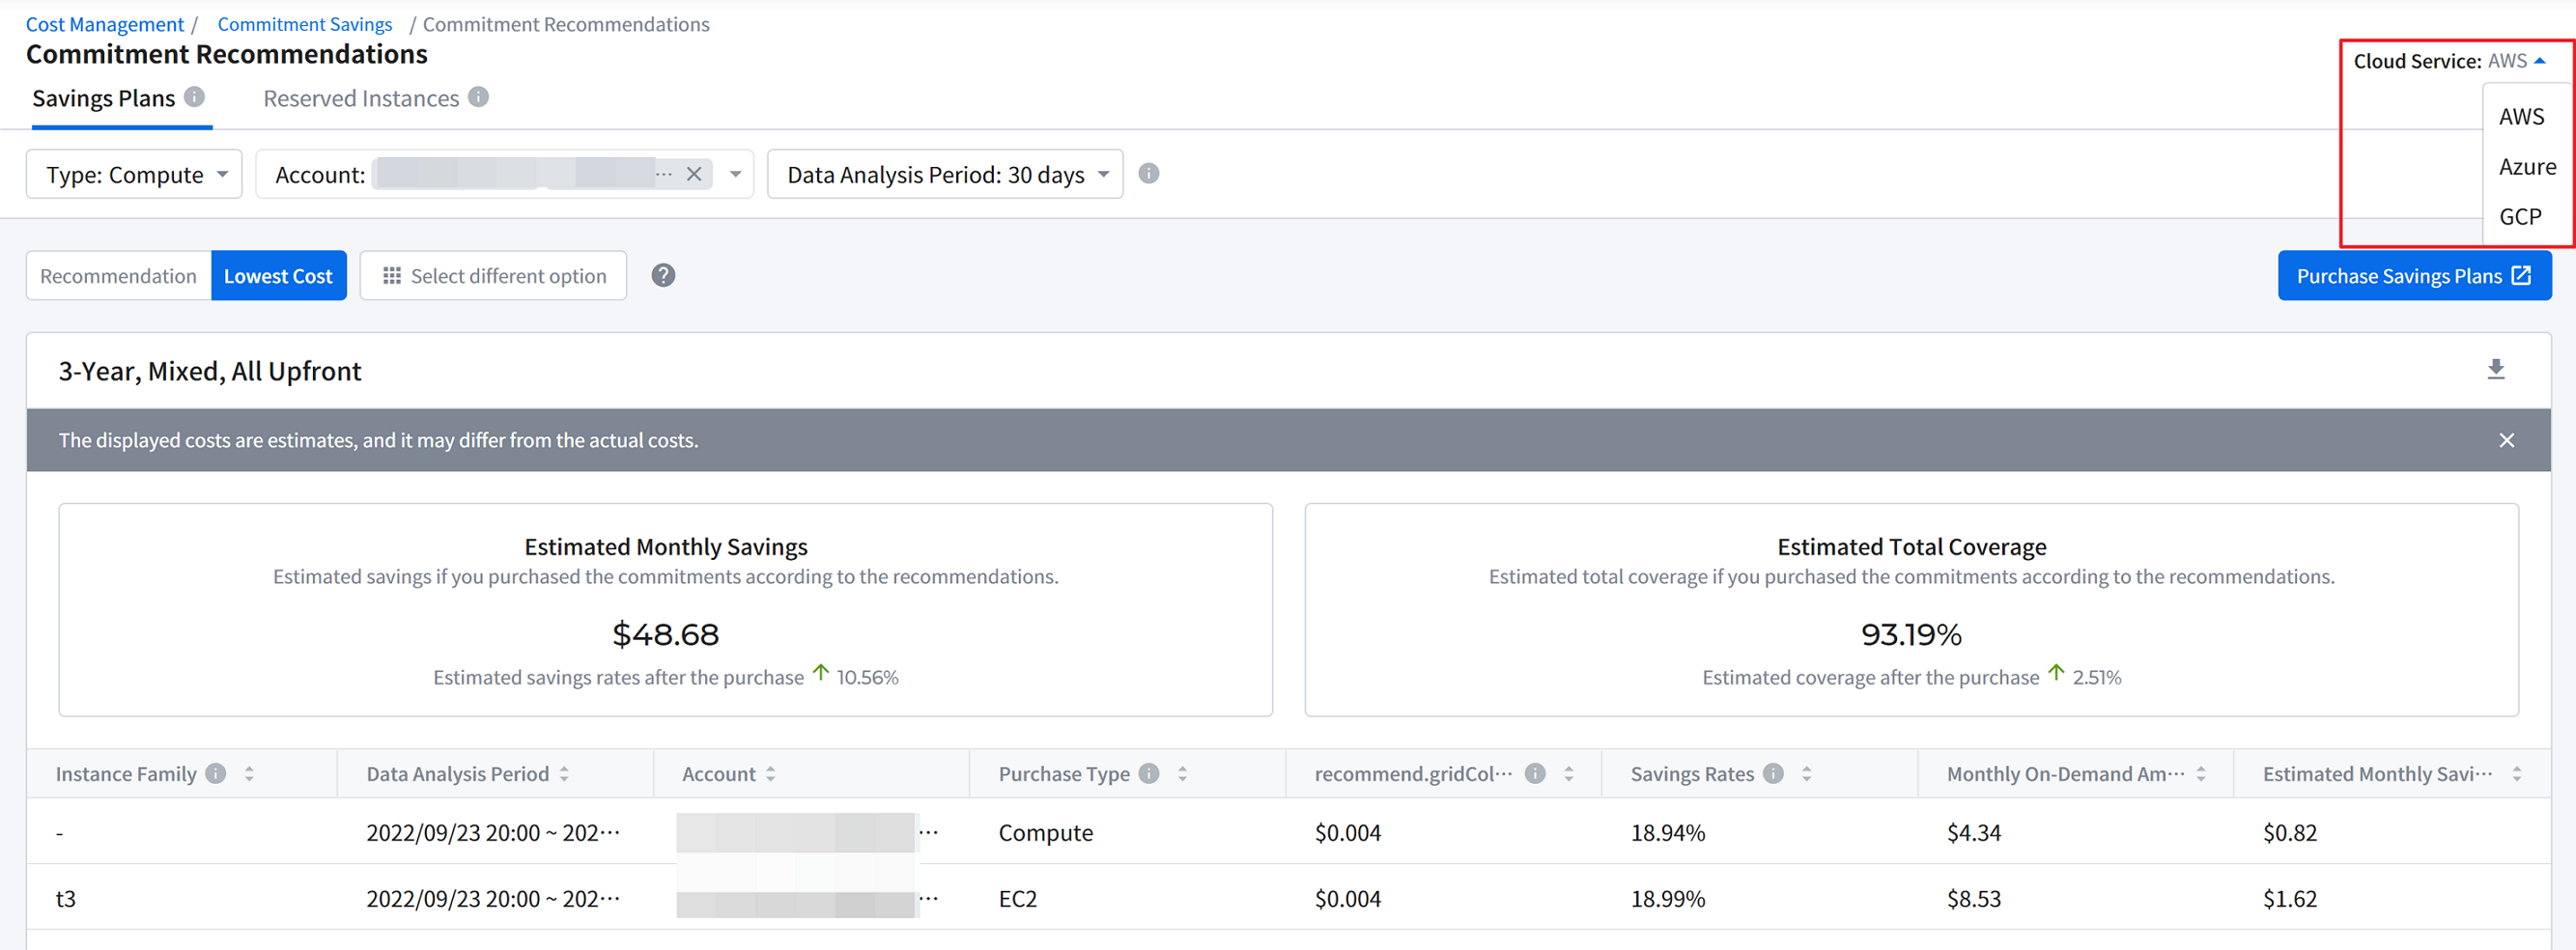
② Select the commitment-type from the tab menu.
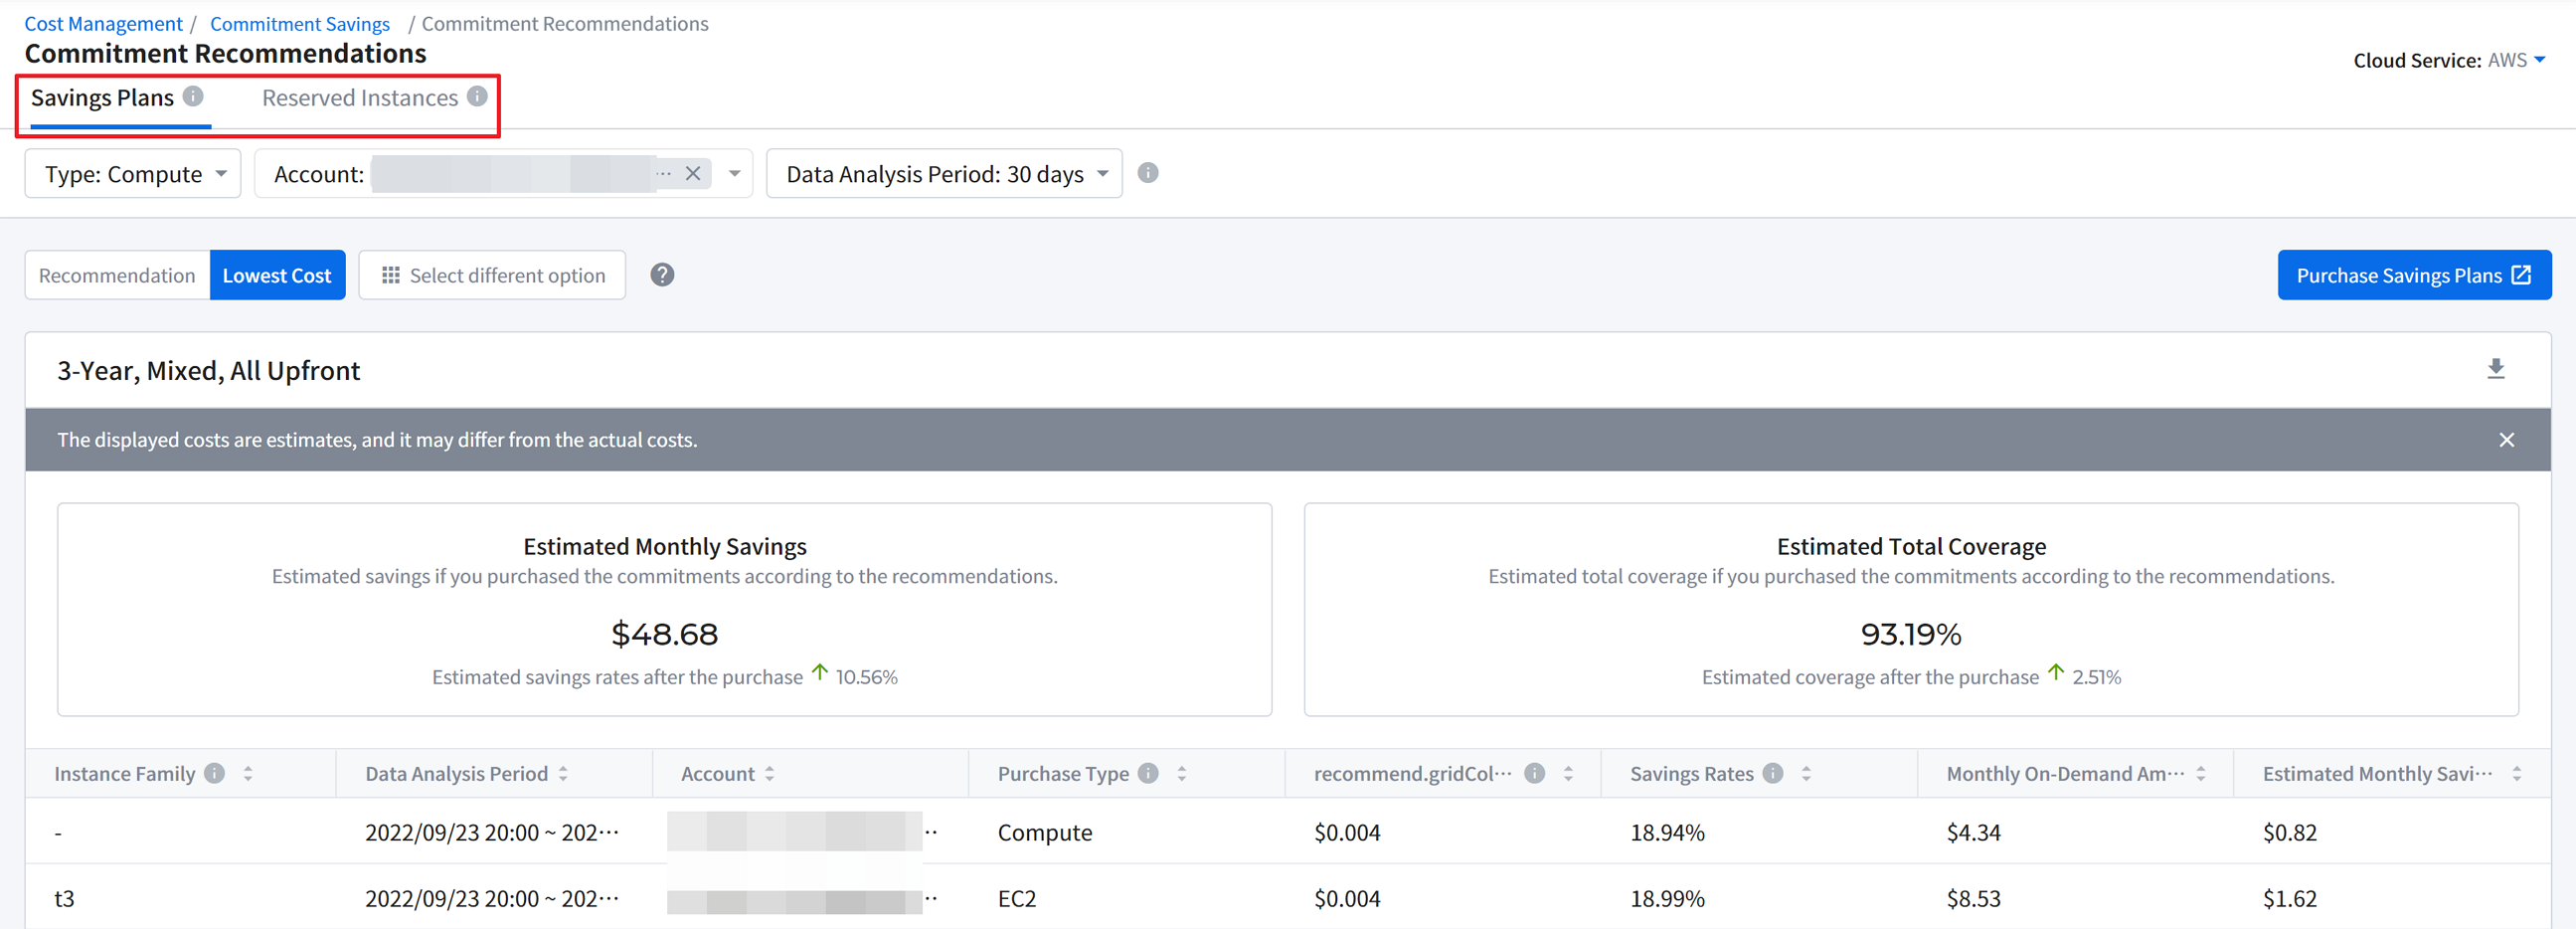
③ For AWS, select Service. For Azure and GCP, select Product. For AWS Savings Plans, select Type.
④ Select Accounts. For Azure, select Subscriptions and for GCP, select Projects to view data. If you want to view all data, check off [Select All].
⑤ Select [Data Analysis Period]. We analyze your cloud resource usage data over this period and make commitment recommendations for you based on the analysis. We recommend you select a relatively short period (14 days) if you want to see recommendations based on your recent usage patterns and select a longer period if your overall resource usage fluctuated often.
⑥ For AWS and GCP, Recommendation, Lowest Cost, and different options are available. For Azure, there is only one available option, so you only need to select the commitment term; 1-year or 3-year.
- [Recommendation]: The most suitable commitment purchase option for you. 1-Year, No Upfront option is often the best combination in many cases.
- [Lowest Cost]: This is the most powerful cost-saving commitment purchase option, with longer commitment terms and all upfront payments.
- [Select different options]: You can preview estimated monthly savings and costs for each option and select from various combinations of payment options, commitment terms, and offering classes.
![]()
![]()
💡 How long should I make a commitment?
The 3-year term offers a bigger discount than a 1-year option. However, Cloud Service Providers such as AWS, Azure, and GCP continuously introduce and improve pricing models as well as cloud resource types. Therefore, we recommend you purchase a commitment with the 1-year term because you may be able to benefit from those new options every year.
📌 Important: For AWS RDS RI, the ‘No Upfront’ payment option is only available when you purchase a commitment with a 1-year term.
🔔 Notification: You can also download the filtered data in a CSV file. Click the Download icon in the upper right corner of the data table.
⑦ To purchase commitments, click the [Purchase] button on the upper-right side to go to the Cloud Service Provider’s Console. Purchase commitments with the specific conditions recommended by the Commitment Recommendations page.
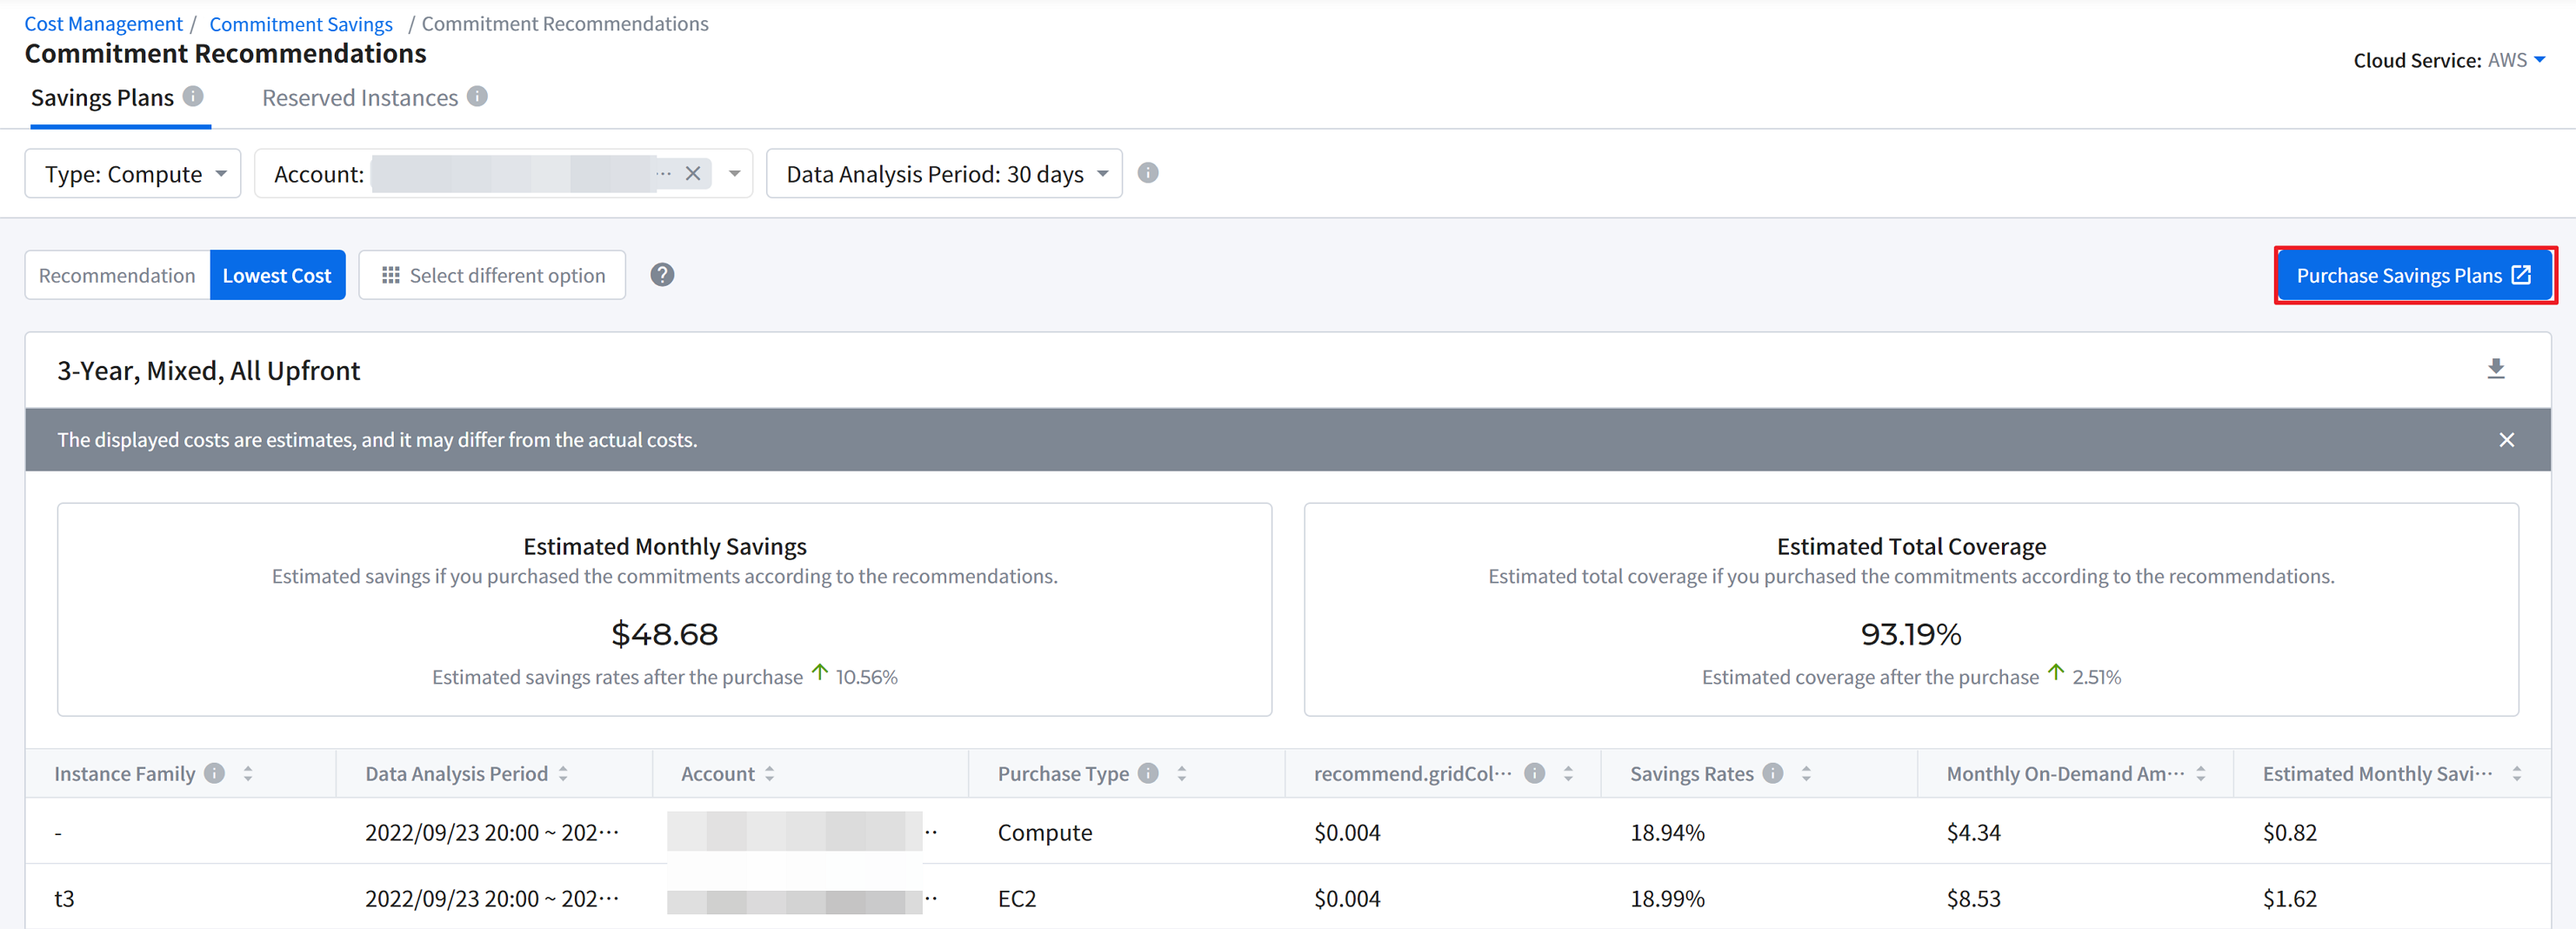
Estimated Monthly Savings
You can learn how much you could save if you purchased the commitments according to the recommendations.
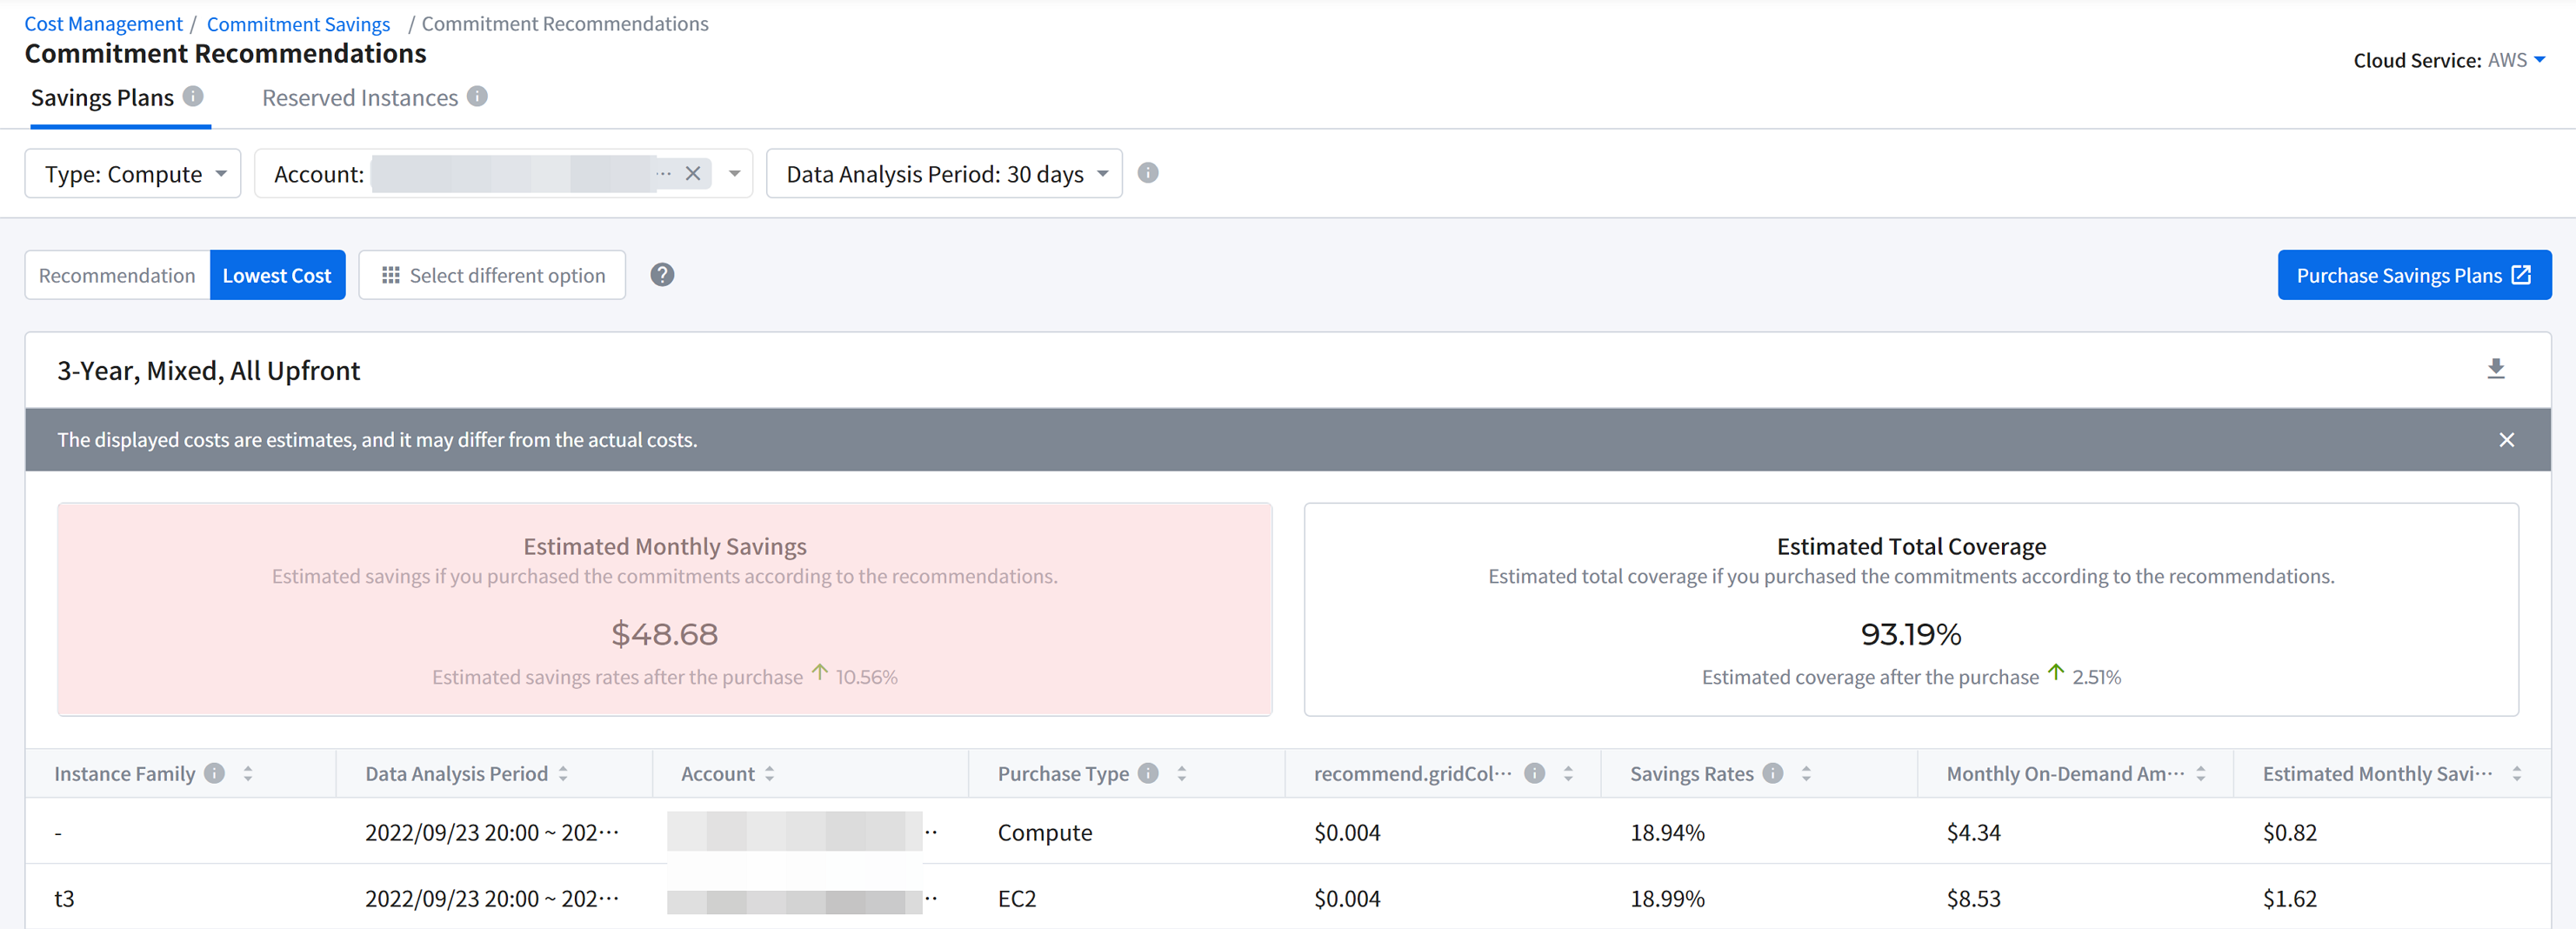
Estimated Total Coverage
This shows the estimated total coverage if you purchased the commitments according to the recommendations. For example, if you are thinking of purchasing more of the AWS commitments, this total coverage provides insight, considering both Savings Plans and Reserved Instances upon the purchase of recommended commitments.
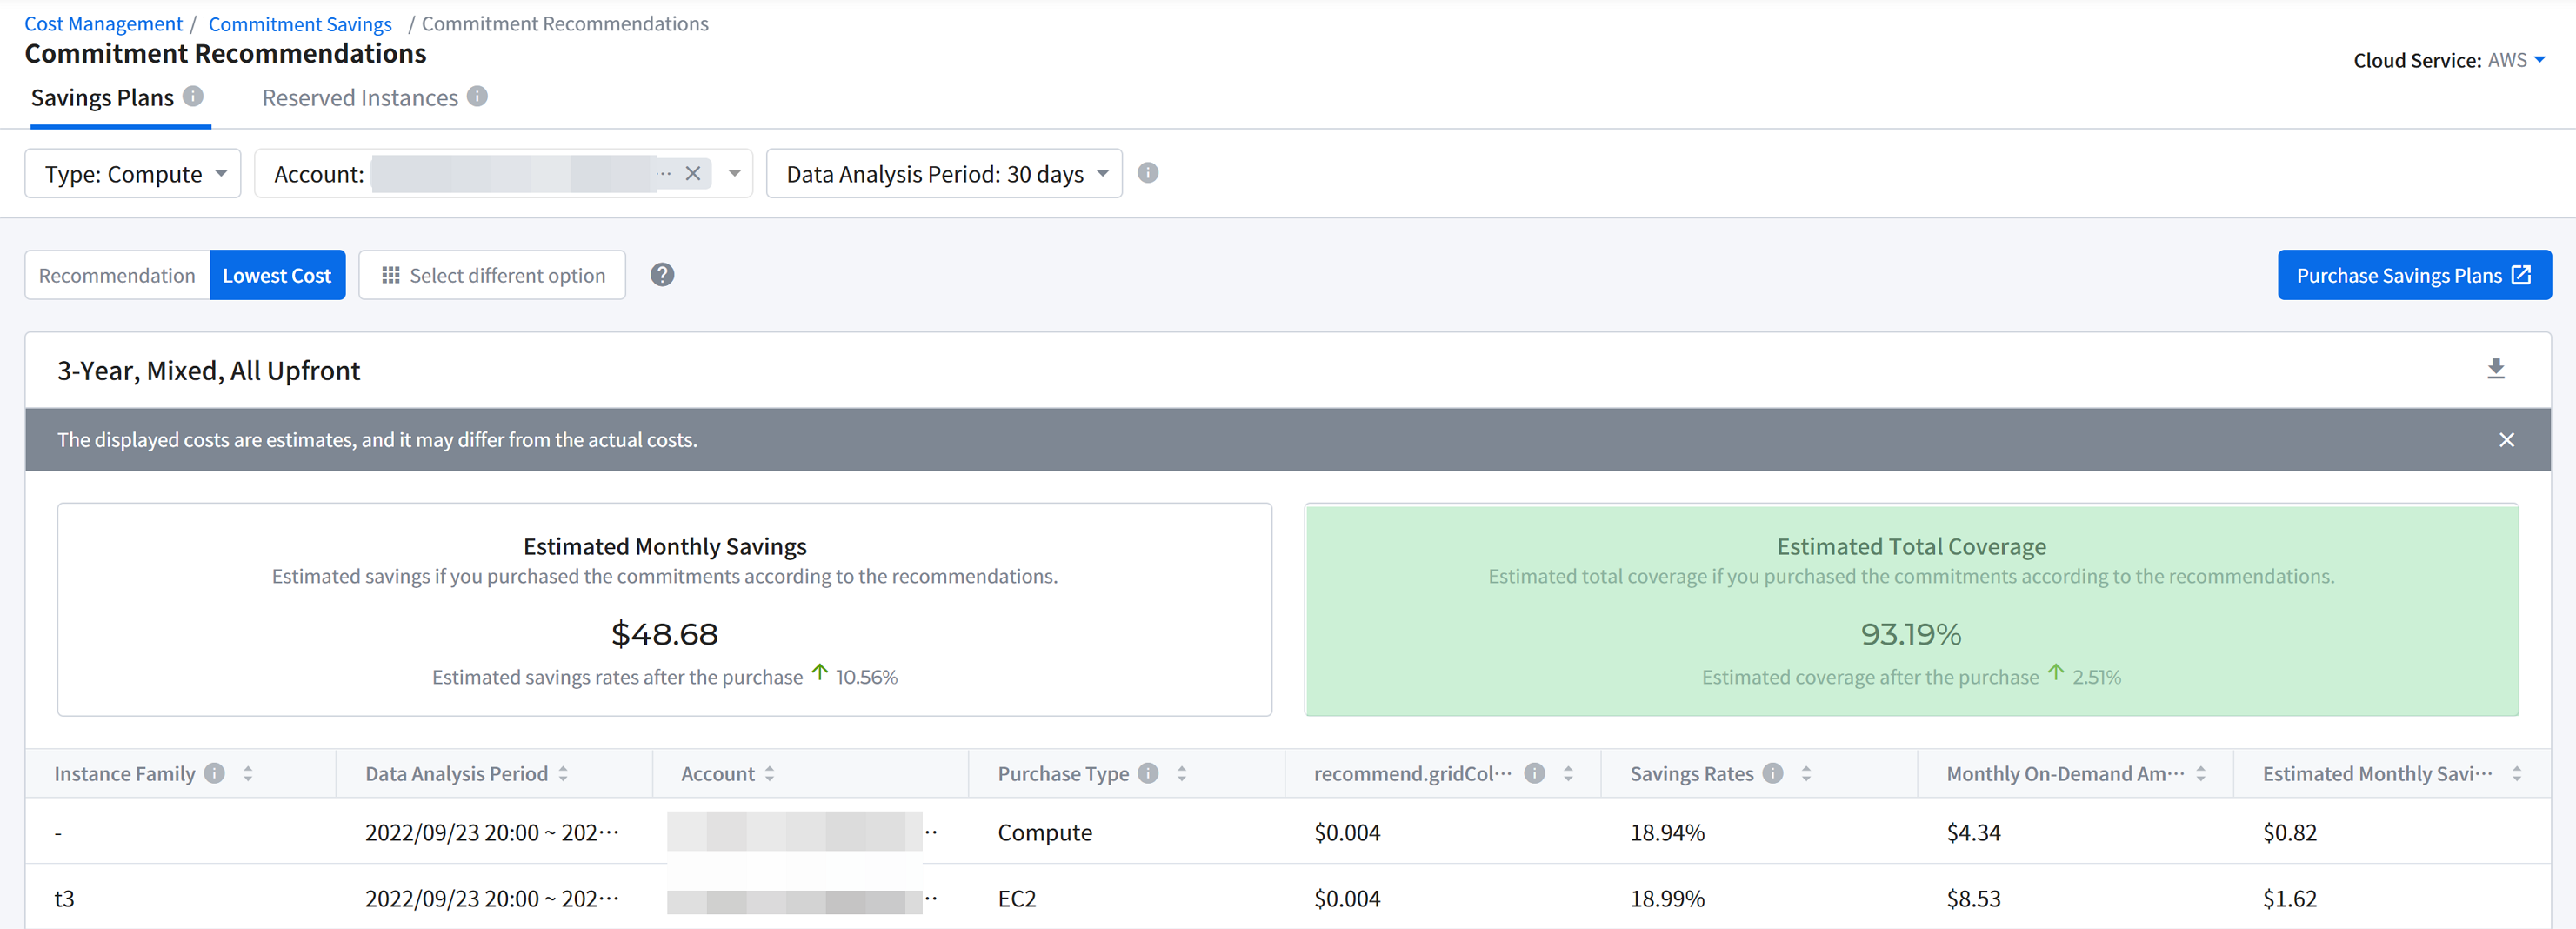
Discount & Credit
Cost Management > Discount & Credit > Discount History
Discount & Credit menu provides the details of the discounted charge applied and the remaining credit information.
View Discount History
Check your discount information by account.
- Click the column name to view the data in ascending/descending order.
- The discount amount is in USD ($).
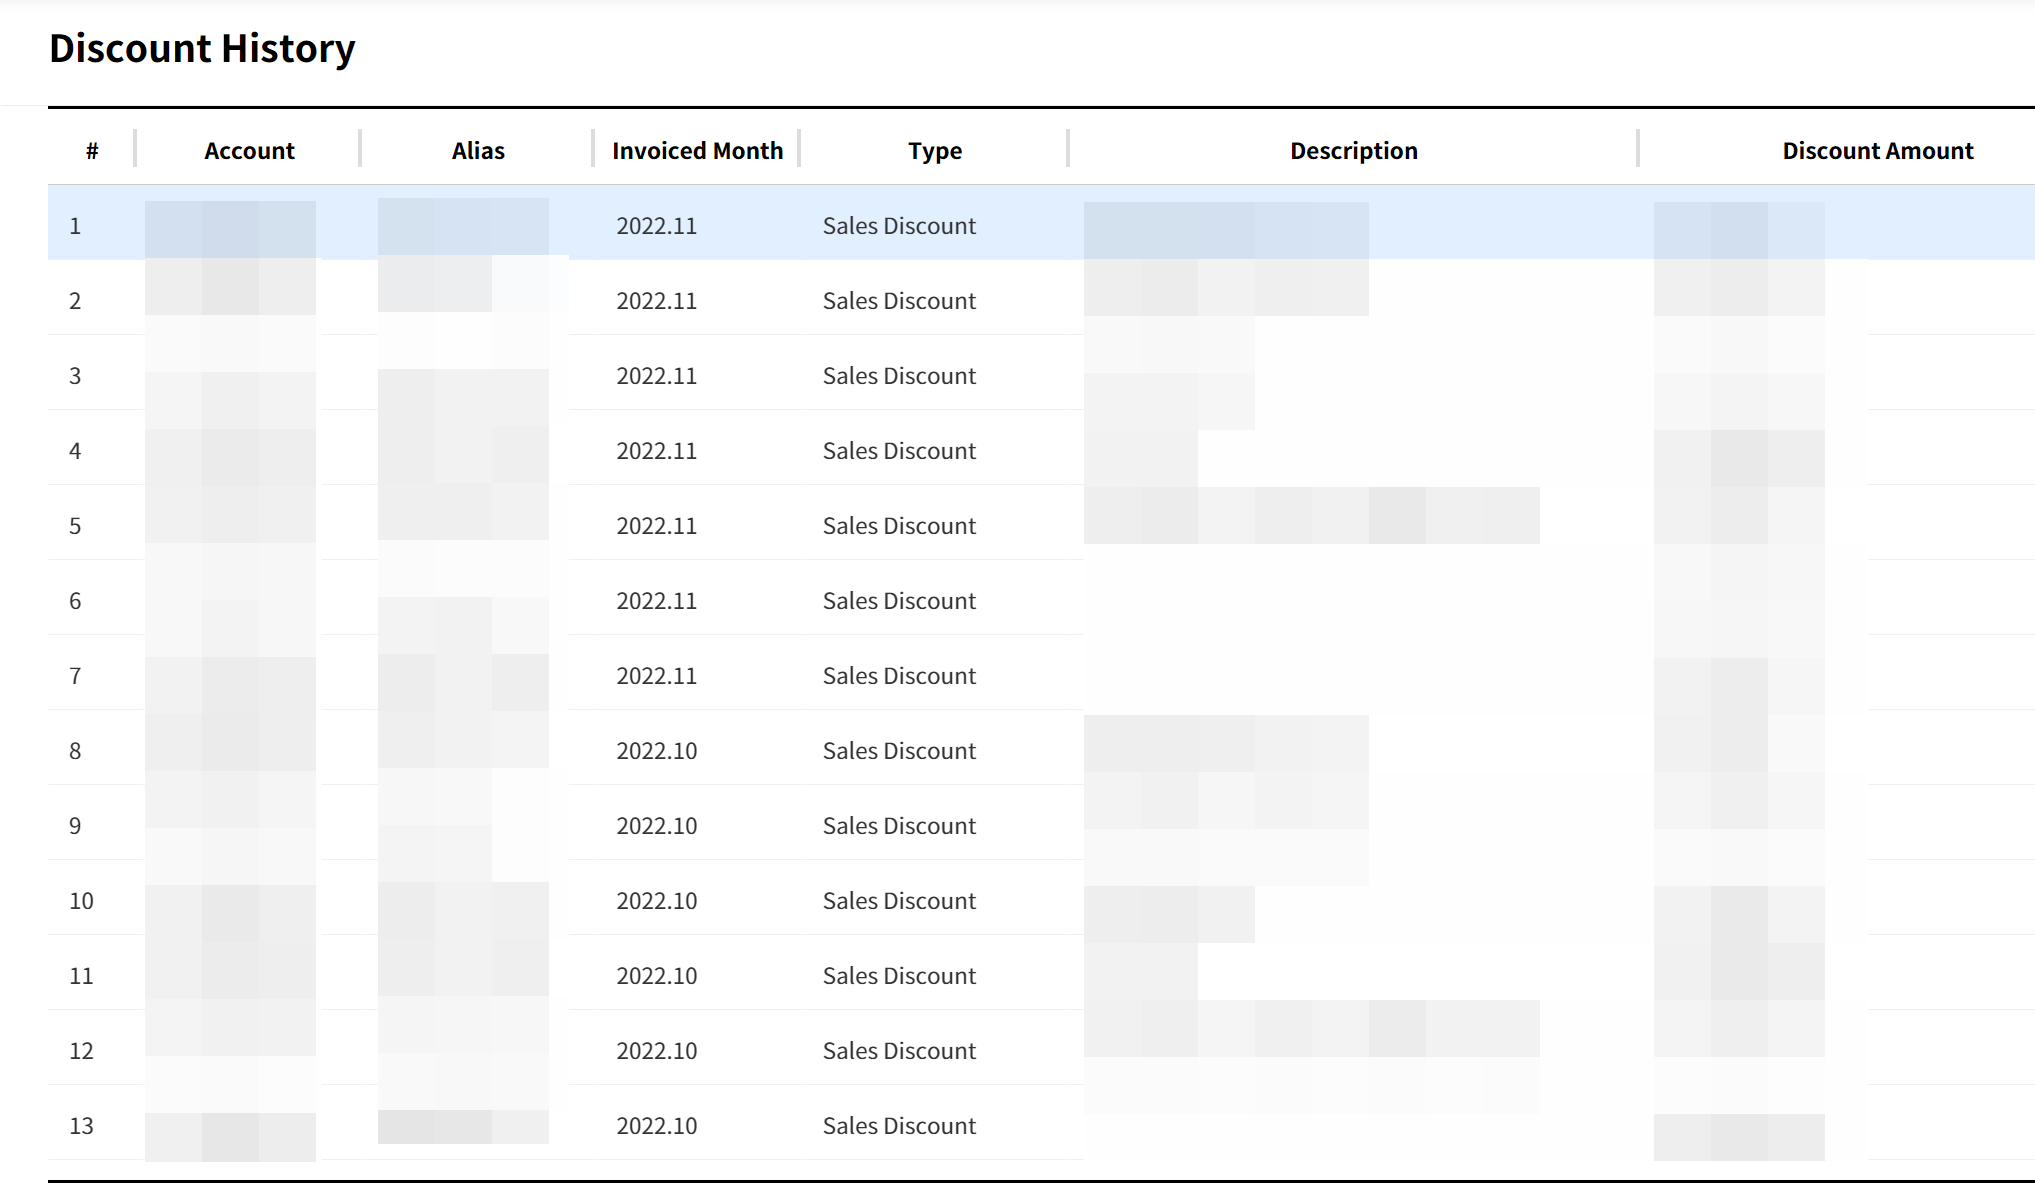
📜 Note: Please contact your Service Contract Representative or Account Manager for details on discounts. To manage the discount information, go to the [Admin Cost Management > Customer Information > Cost Adjustment Settings] page.
View Remaining Credits
Cost Management > Discount & Credit > Remaining Credit
You can check the status of credit issuance and the remaining credit status.
- Consolidated Credits are applied to the Company’s billing account.
- Individual Credits are applied to each user’s account.
- Individual credits are exhausted before consolidated credits.
⚠ Attention: If you do not configure consolidated credit or individual credit, the remaining credit may run out depending on your cloud usage.
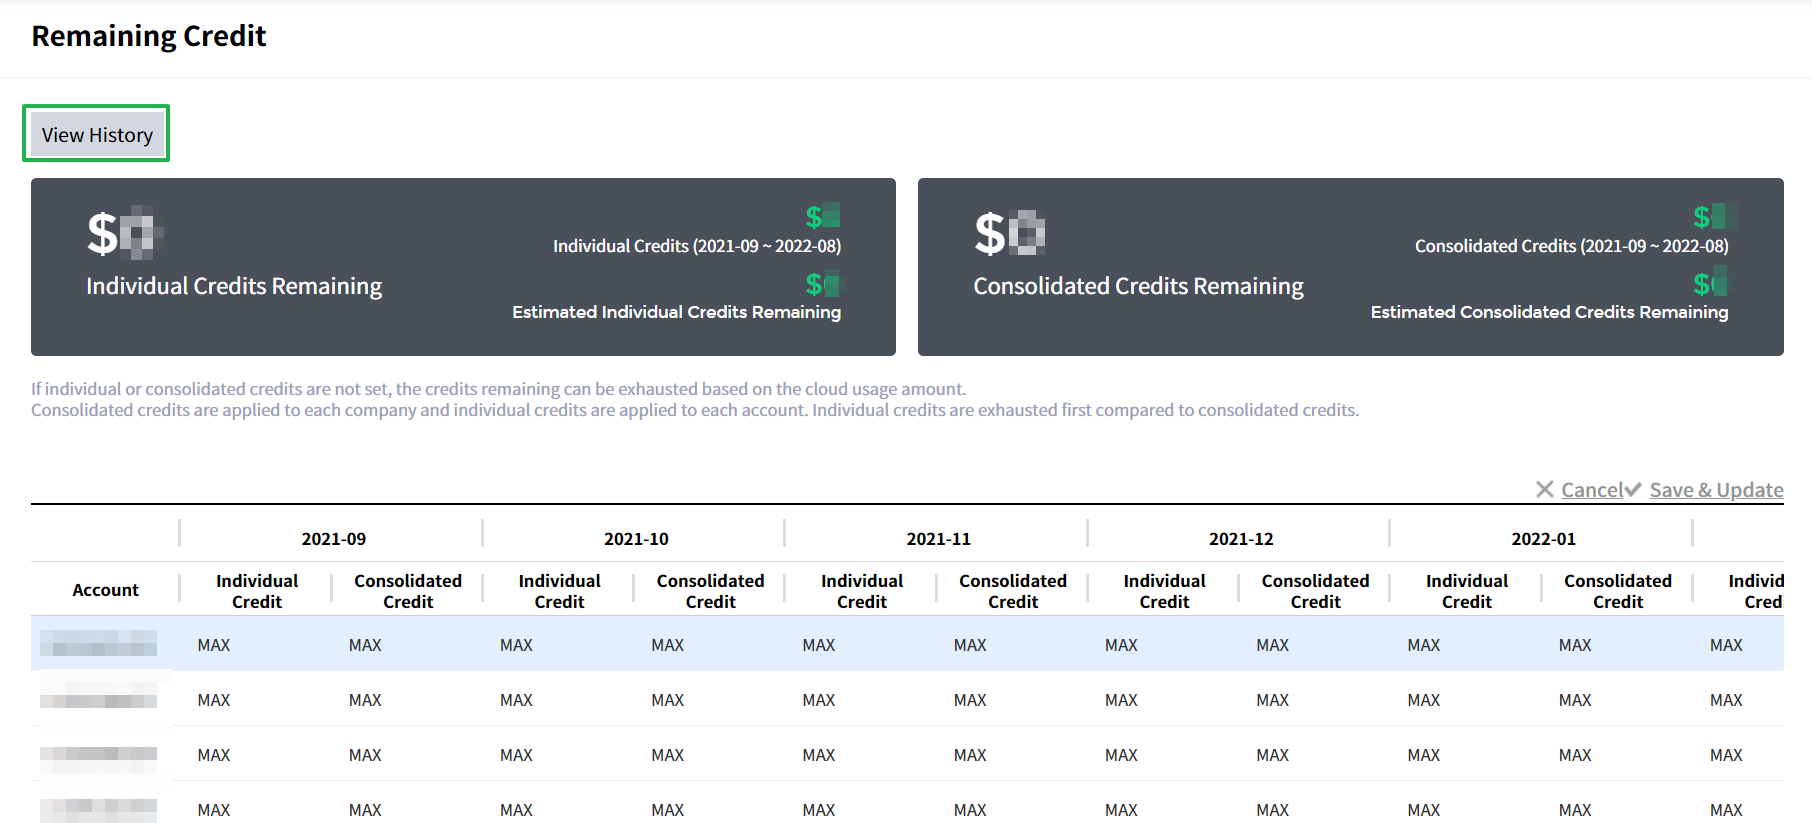
View Credit Change History
On the [Remaining Credit] page, click the [View History] button to see details of the credit change history.
If a credit is applied to a monthly charge, System will automatically exhaust the credit in that month. If a user has added or changed credit information, you can view the user information in the ‘Changed by’ column.
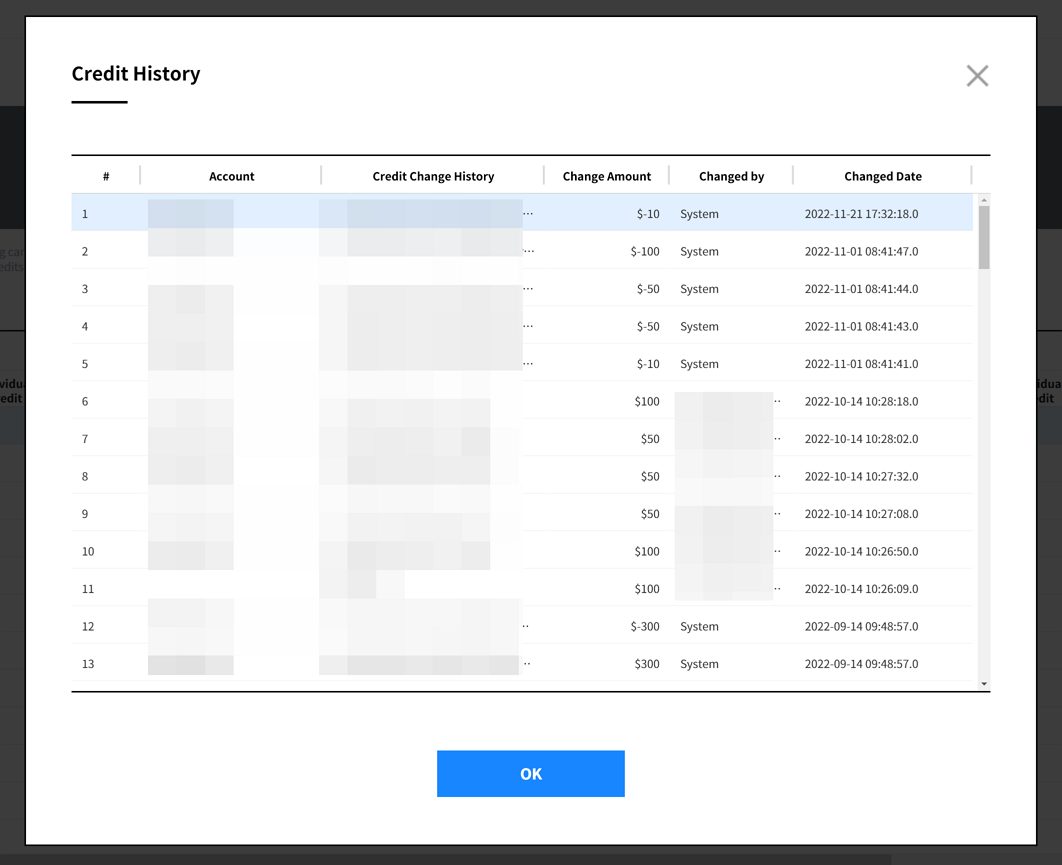
Report
Cost Management > Report
Provides a variety of essential Basic Report Templates you can choose and download. You can also customize a report in Custom Report menu and export it to your email.
Basic Report
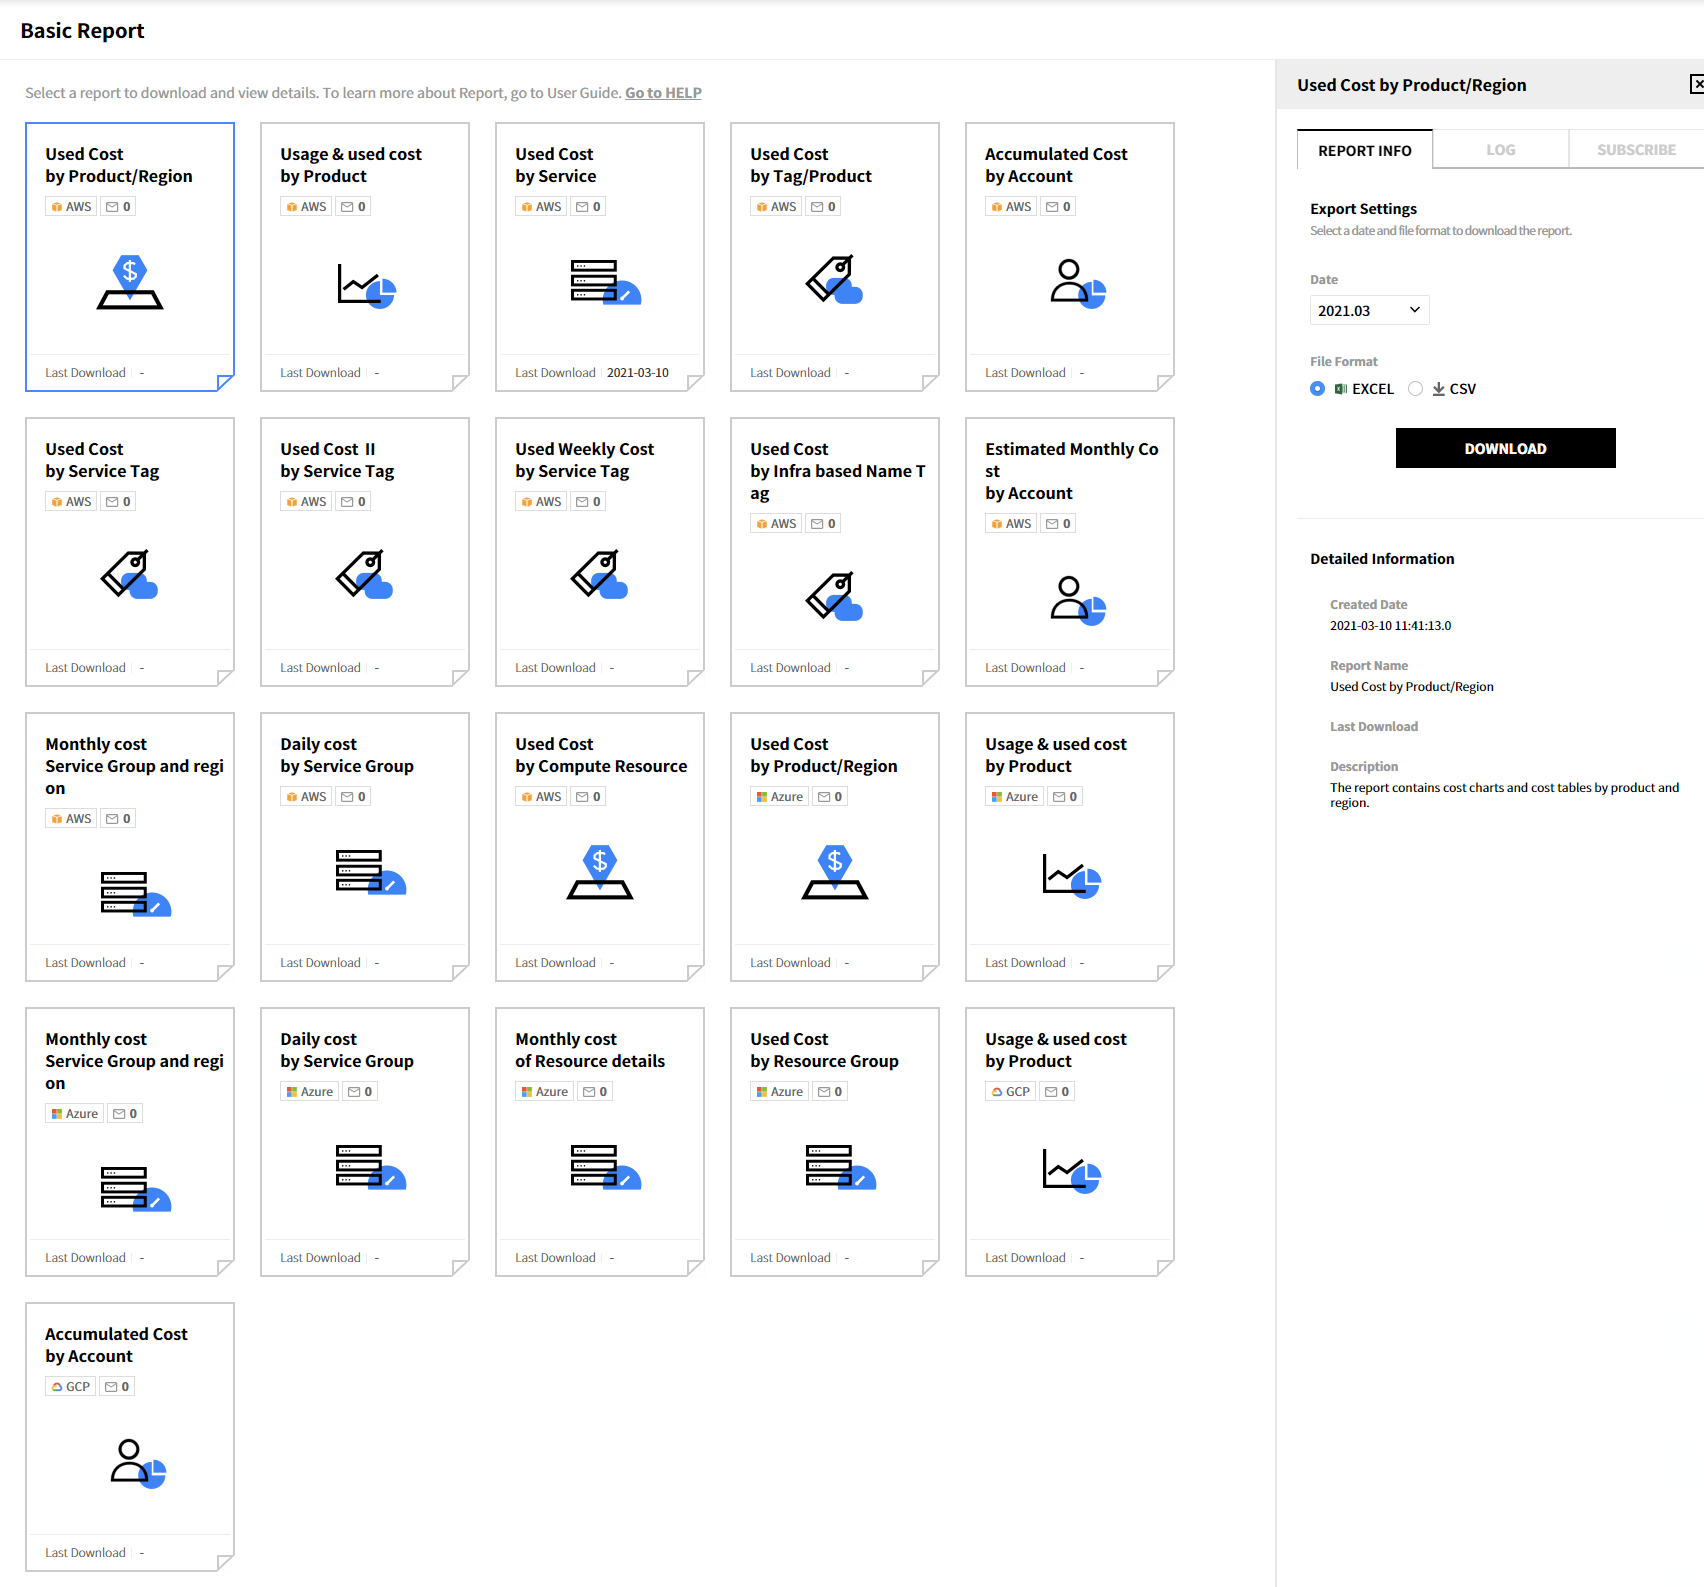
Provides various Basic Report Templates as shown above.
If you click each Report Template, the menu explained below appears on the right side.
Report Info: If you select the period and file format of a report, you can download the report accordingly.
You can download it in .xls and .csv format.
Log: Shows download history of Reports created with the selected Report Template.
You can re-download the created Report.
Subscription: You can subscribe via a registered email for the selected Report Template.
You can choose between daily, weekly, or monthly subscriptions for each report, and you can specify a time.
The report subscription list has a subscription that you set up yourself and a subscription that others have designated you as a subscriber to with the Subscribe Setting menu permission You can create, delete, and modify subscription lists that you have set up yourself, but you can only view the subscriptions that you are designated as a subscriber to subscriptions created by others from the Report Subscription Menu.
![]()
① Create New Subscription
You can create a new subscription by entering and selecting Subscription name, File format, Language, Standard time, Subscription cycle, and Time. The default Subscription name, which consists of the report name, cycle, and language settings, is shown when you create it. You cannot set the same cycle for the same Report Template.
![]()
② Edit Subscription
You can edit Subscription name, File format, Language, Standard time, Subscription cycle, and Time. You cannot set the same cycle for the same Report Template.
![]()
Custom Report
Depending on your country or region, this feature may not be available.
Cost Management > Report > Custom Report
You may select any of the basic report templates by clicking the [Save As] button on your upper right side or you may configure a new report with a customizable report element by clicking the [+ Create New Report] on your lower-left corner of the screen. Only a subset of data is shown here. For a full dataset, export the created Custom Report to your registered email to download it.
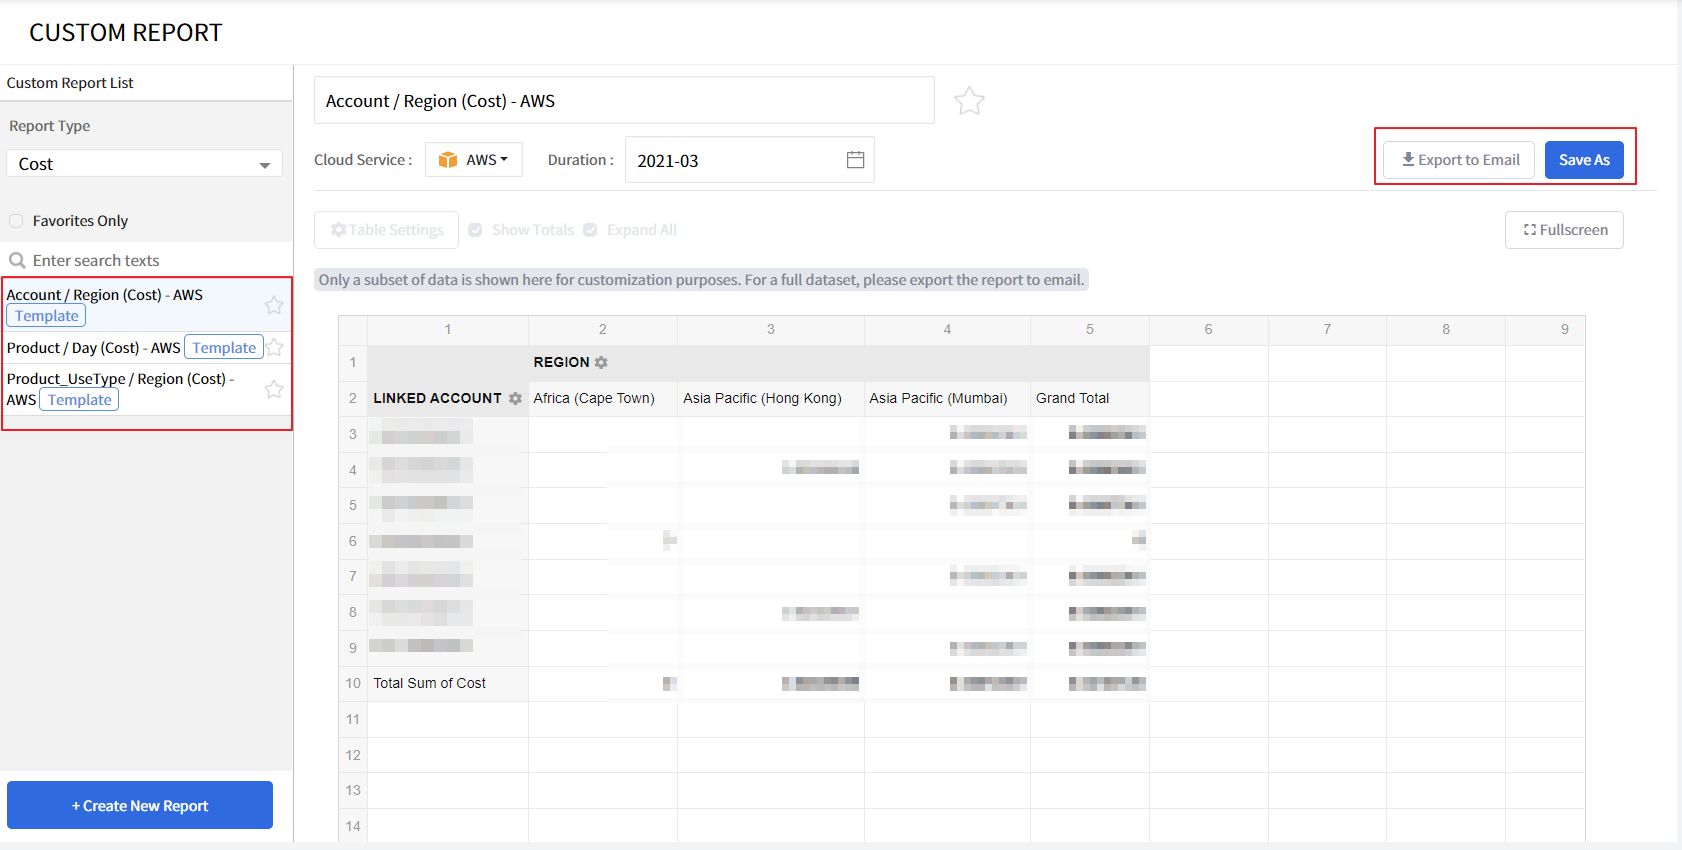
Depending on the size of the report data, it may take a few minutes to prepare and export the Custom Report to your email.
Create Custom Report
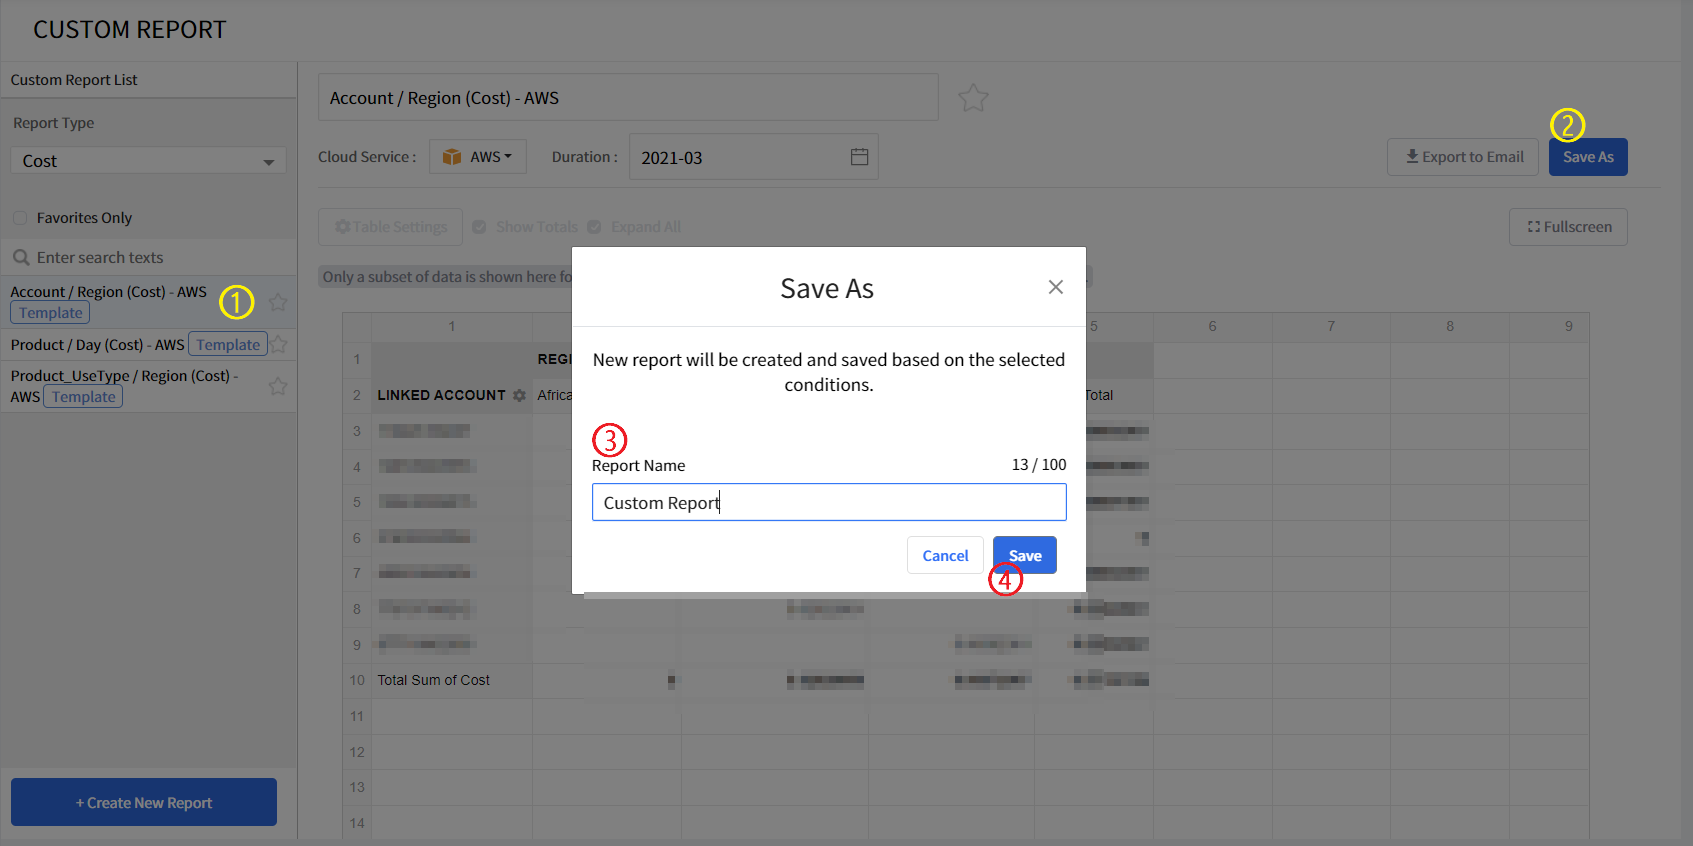
① Select one of the basic report templates.
② Start creating a new [Custom Report] by clicking the [Save As] button.
③ Enter a new name for the report.
④ Click the [Save] button.
Alternatively, you can also create a custom report by clicking [+ Create New Report] button on the lower-left corner.
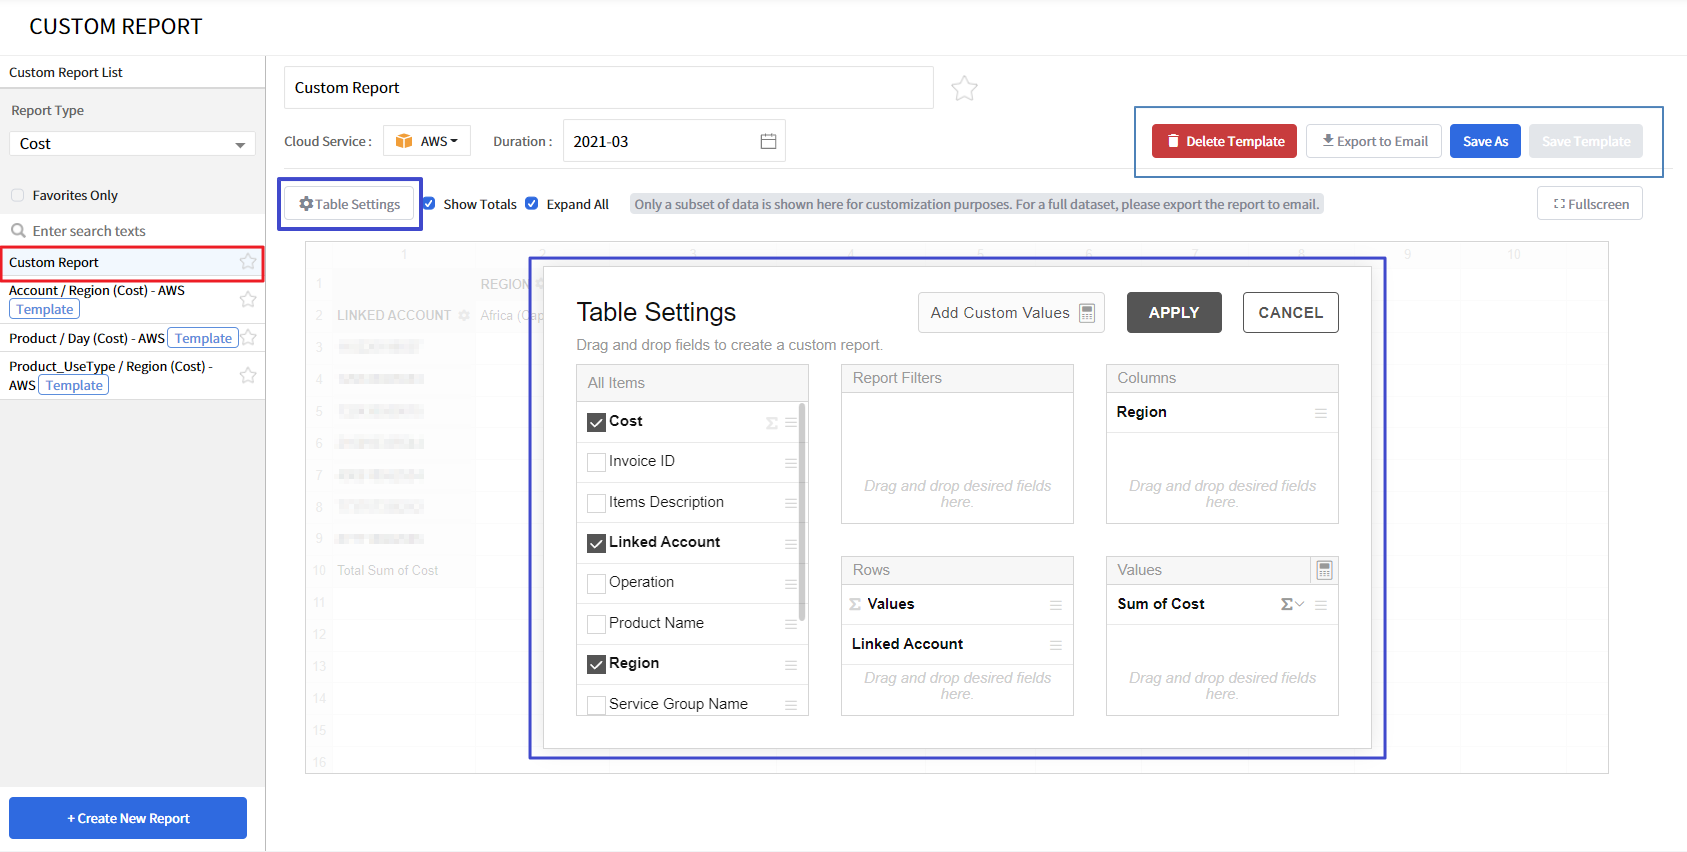
• On the left side of the screen, a new custom report named ‘Custom Report’ is added to the Custom Report List. You can designate any custom report as a Favorite Report by clicking the star icon next to the name. Simply click the selected star icon once again to remove it from the Favorite reports. The search box is available for you to search reports when there are too many custom reports on the list.
• When a new custom report is added to the list, [Delete Template] and [Save Template] buttons appear on the upper right side. Currently, only AWS Cloud Service is supported with our Custom Report menu. We will expand this service to other Cloud Services shortly.
• You can select up to three months for report duration. The months in duration can be continuous or discrete.
For example: 2020-03, 2020-09, 2021-03
• To view detailed report data, check the Show Totals and Expand All checkbox. If you want to see a simple report, uncheck those checkboxes. If you want to add custom values or custom formula, click the [Table Settings] button and select desired items, formula, and values, and click [Apply] to save them.
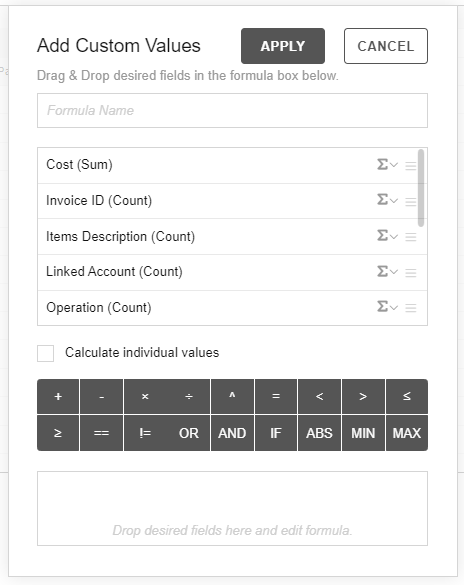
• You can create or edit custom formulas as you want. Drag and drop items, functions, values to the lower box and click [Apply].
Report Subscription
We provide a report automatic mailing feature to all customers who use Cost Management services and who have the permission to edit the Report subscription menu. Report subscriptions allow you to create a Report Subscription or manage it through edit or delete, view the history of each subscription, and download files that have been sent. In addition, it provides a feature to manage recipient by creating or deleting external email or desired email. Recipient can be specified when creating/editing subscription. The History Tab allows you to view past send history including the send history of deleted subscriptions.
Cost Management > Report Subscription
Subscription List
Cost Management > Report Subscription > Subscription List
Subscriptions are managed by report type and are created by specifying options such as send cycle (daily, weekly, monthly), language, and time. In the subscription list, you can view subscription name, cycle, recipient information, and recent send date information, and you can also create a new subscription or manage the subscription through edit or delete.
Used Costs by Product/Region, Used Costs by Product, Used Costs by Service, Used Costs by Infra based Name Tag, Used Costs by Product/Region in Azure, Used Costs by Product in Azure
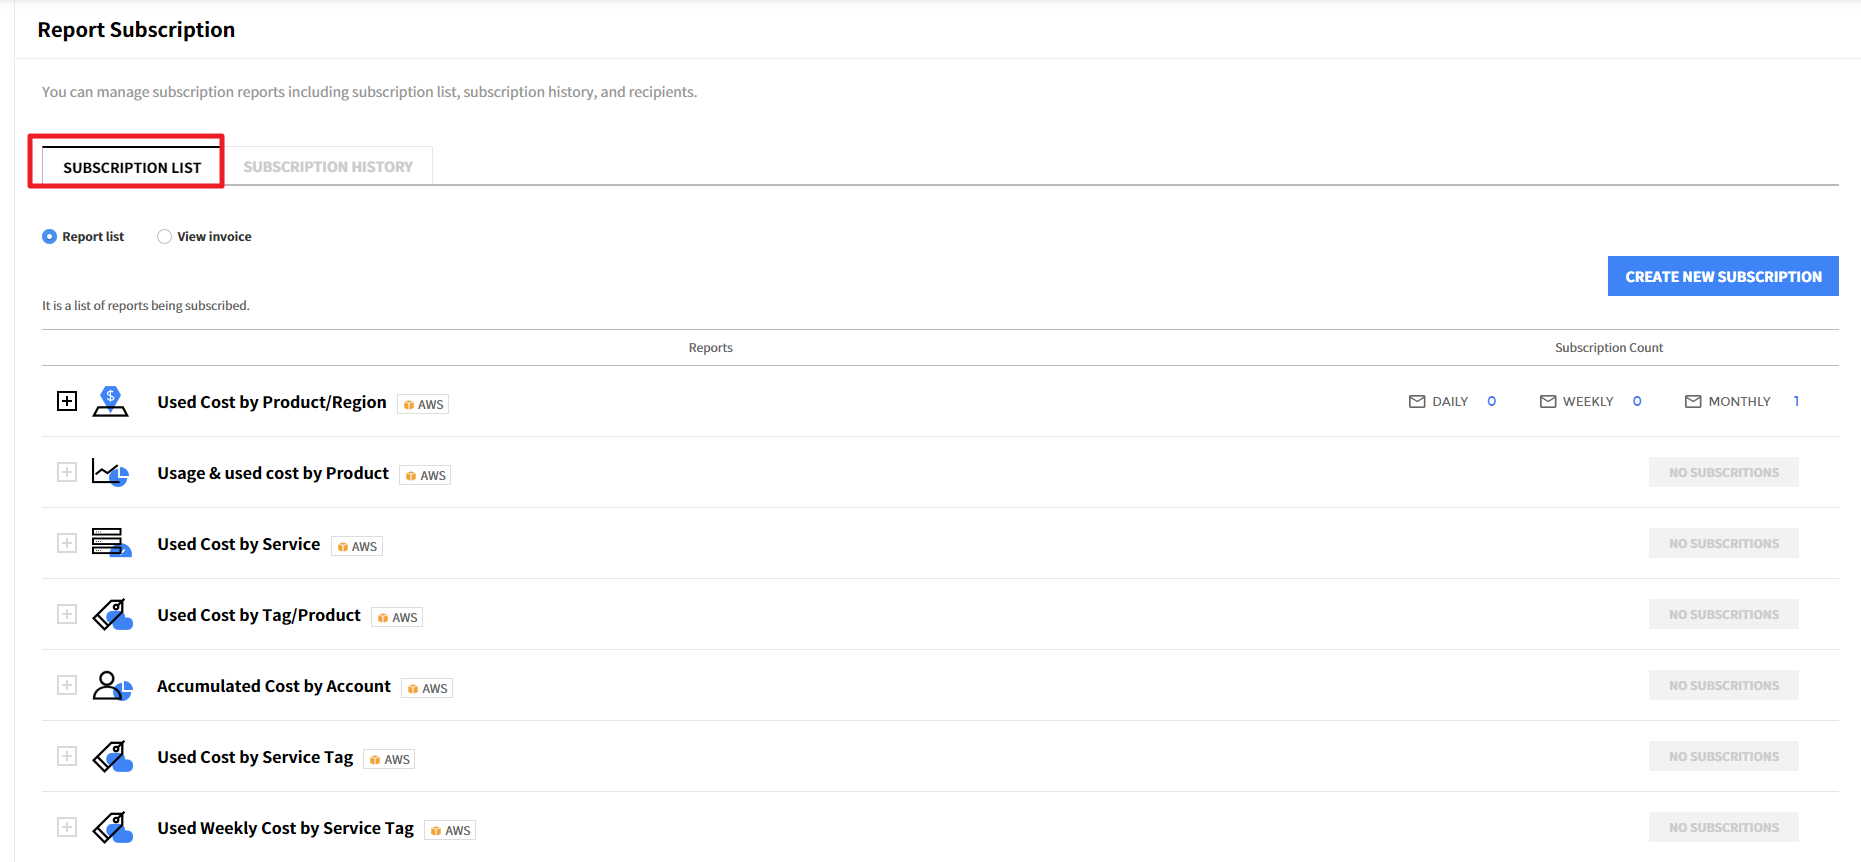
Create Subscription
You can create a subscription through a four-step guide pop-up. In Step 1, Step 2, and Step 3, you can specify the required information and recipient for the subscription. In Step 4, you can confirm the information that you specified and change the subscription name.
Create New Subscription Step 1
• Depending on the selected report type, you can check the subscription name and cycle of the subscription currently created.
• Cost Management Report is provided in Excel format only, but exported Billing Report from Billing menu is provided in Excel and PDF Format and you can select the desired file format.
• You can specify the language of the Email Template to be sent by selecting the language. Chinese, Korean, and English are provided.
• Up to five subscriptions can be created depending on the report type.
Create New Subscription Step 2
• Select the subscription cycle and send time.
• The report send cycle can be selected among daily, weekly, or monthly.
• The Cost calculated by can be selected between Last month or This month
• If you want to receive daily subscription reports, select the time on the Daily tab.
• If you want to receive weekly reports, select the hour and day on the Weekly tab.
• If you want to receive monthly reports, select the date and time on the Monthly tab.
Create New Subscription Step 3
• In step 3, you can specify a recipient. There are two types of Recipient list.
• You can set up to 10 recipients.
Create New Subscription Step 4
• In the final step, the default Subscription name is created and you can edit it.
• Check the configured information and if there is information to edit, use the previous button to edit it.
Edit Subscription
If you need to edit the created subscription, click Edit button in the image below from Subscription list to use the Edit popup. The Edit popup shows the information for the currently selected subscription. You can select the desired subscription information and click [Edit] button to complete or cancel the edit to undo the changes.
Delete Subscription
If you no longer want to subscribe, click the [X] button in the image below to proceed with the subscription deletion.
• Before you delete a subscription, check whether you want to delete it again. Click the [Delete] button to complete the deletion.
• You can check the send history of deleted subscriptions from the History Tab if they have been sent.
Subscription History
Cost Management > Report Subscription > Subscription History
You can check the send history after setting the subscription, and download the file that was sent for the recent send (within 1 month) history. You can apply the report type, send date, and subscription name filter.

• Report Name: The report name selected when setting the subscription is shown
• Subscription Name: The subscription name setting follows the format defined by default, but if there is a name that is designated separately, the designated name is shown.
• Send Date: The sent date and time are shown in YYYY-MM-DD HH:mm format.
• Download: Files from the last 1 month can be downloaded through the download icon on the screen. If the delivery fails or the file is older than one month, the download button will be grayed out and will be shown as ‘cannot be downloaded’.
• Send Status: It is divided into Standby/Sent/Send failed according to the mail sending status.
• Recipients: The number of recipients specified as recipients when sending the subscription mail appears. You can check the Recipients Popup by clicking it.
Migration Calculator
Migration Calculator helps you analyze server specs for your on-premises environment, calculate what’s available for each cloud service, and compare quotes for estimated cloud costs. You can easily calculate the cost of multiple cloud services and aggregate data in one place. The cloud services currently supported by the migration calculator are AWS, Azure, and GCP.
Calculate costs per cloud service
Go to Cost > Migration Calculator.
Click the [+ Create Portfolio] button at the top left of the Migration Calculator screen.

- Enter a name for the portfolio, select the portfolio file format, and click the [Create] button in the bottom right corner.
📜Note
The template file and sample file are .xlsx format files for importing the user’s server information, and can be uploaded after creating a portfolio.
In the case of the template file, users can fill in the server information by referring to the how-to sheet. In the case of a sample file, sample data is filled in so that you can use it for testing purposes.
- Click the created portfolio to edit and enter server data directly on the screen, or click the [Import data] button on the top left to upload a file and import data.

📜Note
If you are entering server data on the screen, you can enter data by clicking the ▾ icon or pencil icon that appears when you hover your mouse cursor over the actual data on the screen. You can also add rows by clicking the [Add Row] button in the upper left corner, or select rows with the checkboxes on the left side of the list to bulk edit or delete them.
- Go to the Server > Cost tab to see the cloud cost based on the server data you entered.
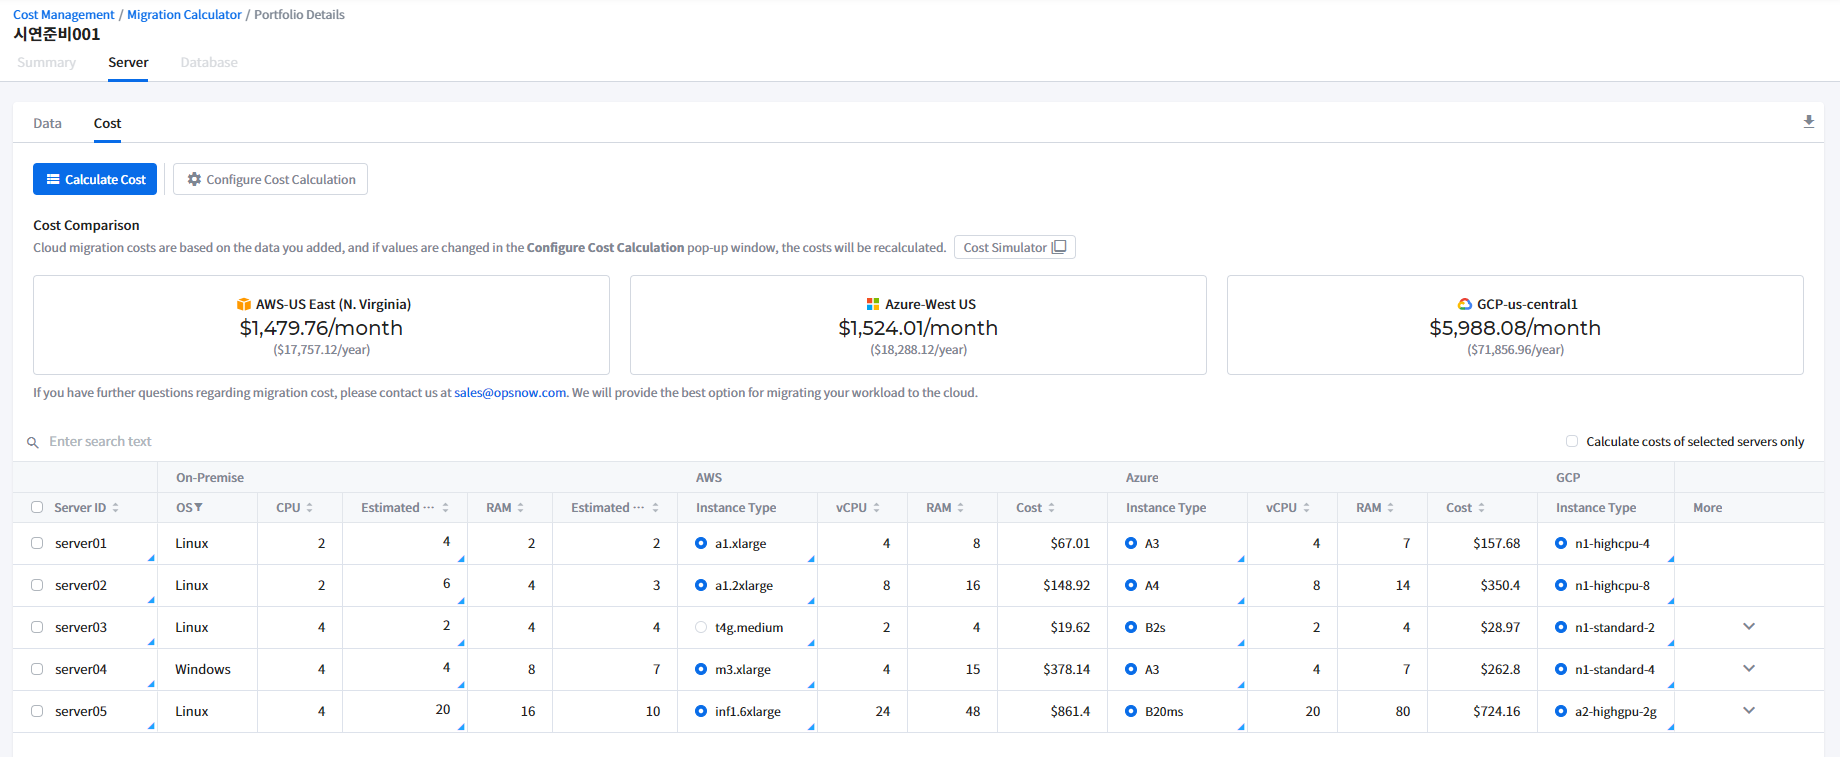
Use the cost feature
On the Server > Cost tab, you can view and compare server costs by cloud service based on the data you entered.
Set up cost calculations
Click the [Configure Cost Calculation] button on the top left of the screen to modify the values for calculating the cost, such as region, server type, server usage, and currency unit. Click Restore to Default on the bottom left to enter The default values stored in the system.
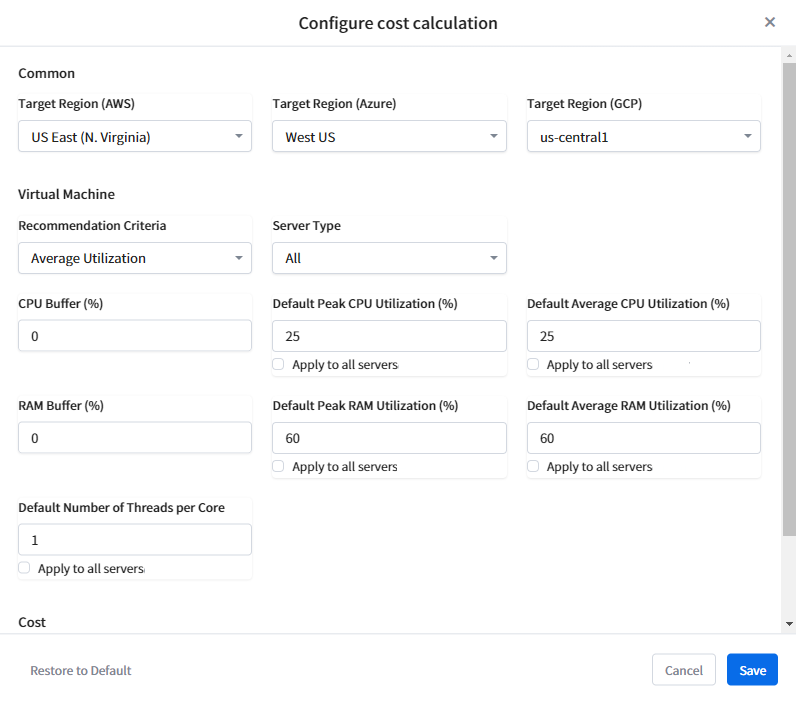
Check the formula with cost simulator
Click the [Cost Simulator] button at the top center of the screen to see the formula for calculating costs. Enter your values into the simulator and you’ll see your on-premises, average utilization, and peak utilization along with the formula.
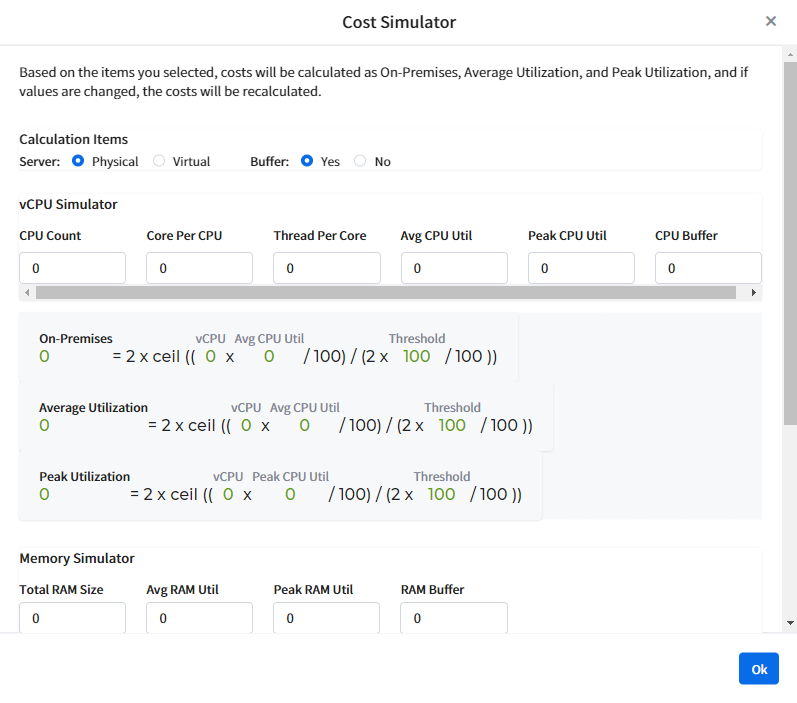
Calculate costs of only selected servers
You can view only the cost of selected servers in the list of server data displayed on the screen. If you enable Calculate cost of selected servers only on the top right of the list, select the desired server cost from the list, and click the [Calculate Cost] button on the top left of the screen, the cost will be recalculated to reflect only the selected server costs.
